How to Make a Stencil From a Picture for DIY Crafts and Wall Art
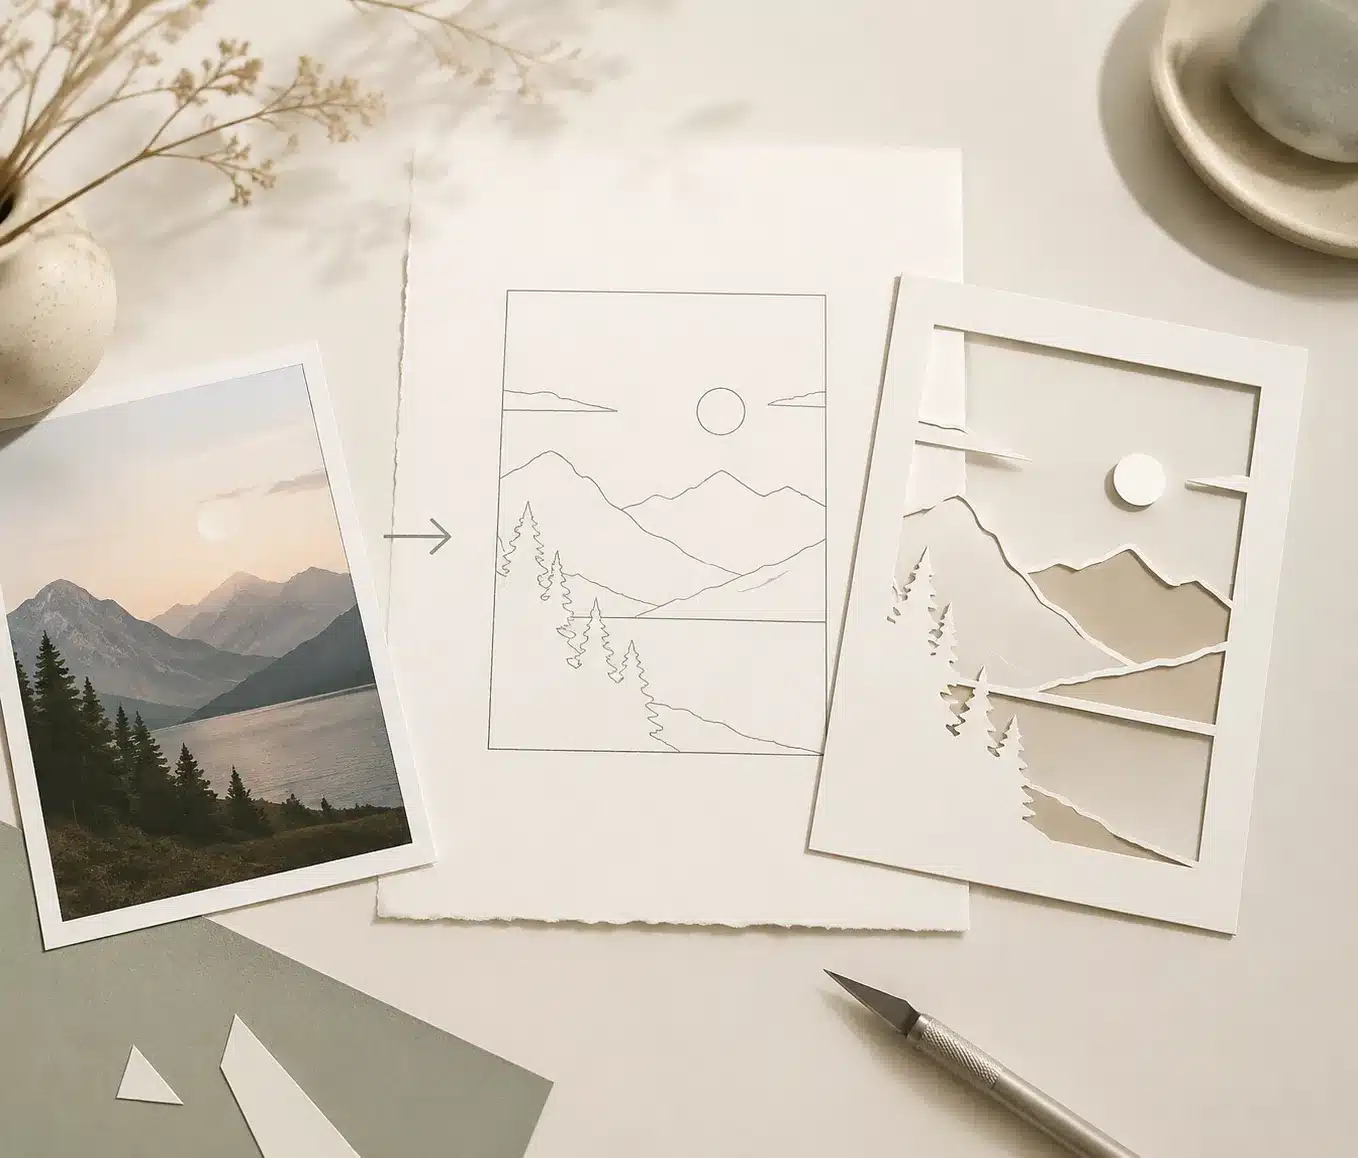
Turning an ordinary picture into a clean, reusable stencil feels a little like translating a language. A photograph is packed with shadows, textures, tiny details, and gradients, while a stencil relies on bold shapes, open spaces, and crisp edges. That difference is exactly why some stencil projects look sharp and professional while others turn into blurry paint disasters. The good news? You do not need industrial equipment or advanced art training to make an impressive stencil from a picture. You just need the right process.
DIY stencil making has exploded in popularity recently because more people are customizing walls, furniture, fabrics, signs, pottery, and street-art-style projects at home. Modern cutting machines like Cricut and laser cutters have made the process faster, but hand-cut stencils are still incredibly popular because they are affordable and accessible. Current crafting guides and community discussions consistently point toward reusable Mylar film as one of the best materials because it balances durability, flexibility, and clean paint edges.
The challenge is not just cutting a design. The real skill comes from choosing the right image, simplifying details without losing personality, transferring the design accurately, and cutting cleanly enough that the stencil survives repeated use. Every stage matters. A great stencil starts long before the knife touches the material.
Contents
Understanding What Makes a Good Stencil Design
A stencil is not just a cut-out image. It is a carefully simplified version of an image that still communicates the original subject clearly. Think about famous stencil artwork from street artists or graphic designers. Even when the image is reduced to only black and white shapes, your brain still instantly recognizes the face, object, or symbol. That happens because strong stencil designs focus on contrast and structure instead of tiny visual details.
One of the biggest mistakes beginners make is trying to preserve every feature from the original picture. Real photos contain gradients, soft shadows, skin texture, reflections, and subtle color transitions. None of those translate naturally into a stencil. Paint either goes through the cut-out or it does not. There is no in-between. That means you need to train yourself to see shapes instead of photographic detail. Once you start thinking in terms of positive and negative space, stencil design becomes dramatically easier.
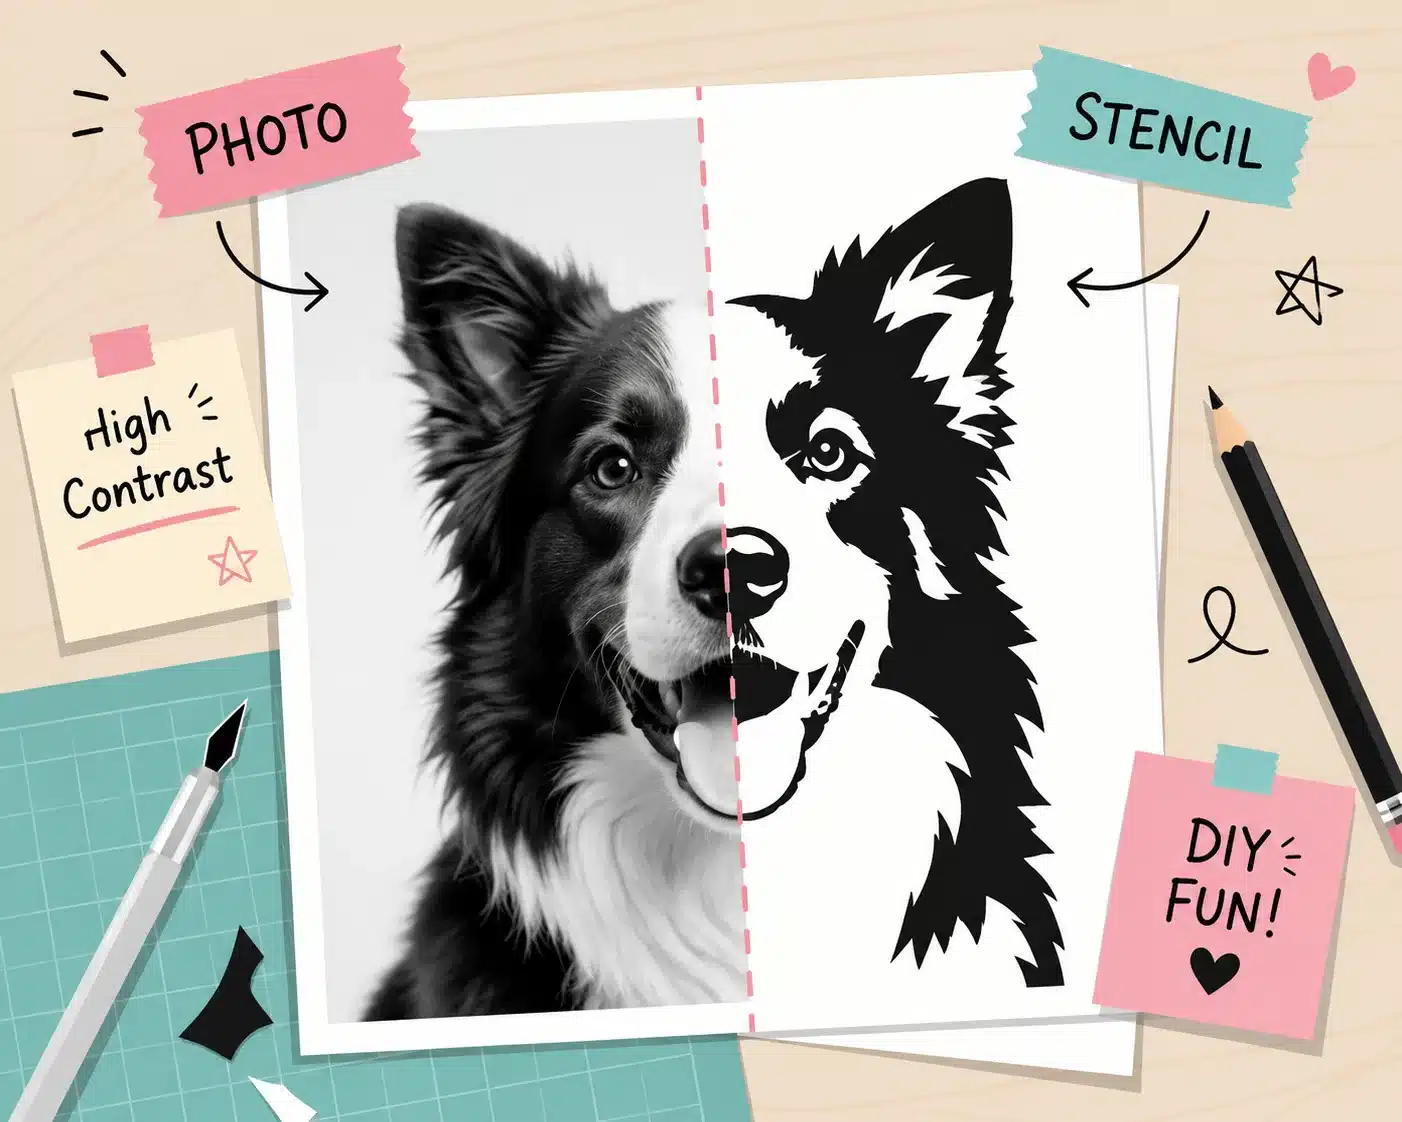
High contrast images always work best. A subject standing against a simple background is far easier to convert into a stencil than a crowded image full of overlapping elements. Portraits with directional lighting often produce amazing stencil results because shadows naturally define the facial structure. Objects with strong outlines, bold silhouettes, and separated features also perform extremely well.
Professional stencil creators often simplify images into only two or three tonal values before cutting. This creates visual clarity and prevents muddy results during painting. According to recent stencil crafting guides, reducing detail and emphasizing shape definition is one of the most important factors in producing reusable, clean-looking stencils.
Picking an Image That Translates Well Into a Stencil
Choosing the right picture can save hours of frustration later. Not every image deserves to become a stencil. Some photos look amazing digitally but completely fail once converted into cut shapes. The trick is learning how to predict which images will survive simplification.
Portraits with dramatic lighting are usually excellent choices because the shadows already divide the face into strong shapes. Logos, icons, bold typography, and animal silhouettes also work beautifully because their structure is naturally graphic. Beginners should avoid overly busy backgrounds, overlapping objects, or images with extremely fine detail like hair strands or intricate textures. Those details may look impressive on a screen, but they become weak points when cut into stencil material.
Here is a quick comparison table showing which image styles usually work best:
| Image Type | Stencil Difficulty | Result Quality |
|---|---|---|
| Bold logos | Easy | Excellent |
| High-contrast portraits | Medium | Excellent |
| Animal silhouettes | Easy | Very Good |
| Landscapes | Hard | Moderate |
| Crowded group photos | Very Hard | Poor |
| Detailed architecture | Hard | Moderate |
The cleaner the subject separation, the easier the cutting process becomes. If you squint at the image and can still recognize the subject, that is usually a good sign. Stencils rely heavily on recognizability from simplified shapes. A blurry or overly detailed image loses identity once details disappear.
There is also an emotional element to image selection. The best stencil projects often come from meaningful photos: a pet portrait, a favorite quote, a family silhouette, or custom artwork. Those personal connections make the extra design effort feel worthwhile. A stencil is not only a craft tool; it becomes a reusable artistic signature you can apply across multiple projects.
Turning Complex Details Into Clear Shapes and Lines
This is where stencil making transforms from simple tracing into genuine design work. Complex images need simplification, but simplification does not mean destroying personality. Your goal is to preserve the essence of the image while removing anything that weakens the structure.
Start by converting the image into black and white. Most editing apps or free online tools can increase contrast automatically. Once the image becomes monochrome, begin identifying unnecessary details. Tiny wrinkles, hair strands, texture patterns, and subtle shading usually need to disappear. What matters most are defining shapes and strong boundaries.
One essential stencil concept is the idea of “bridges.” Bridges are small connected sections that prevent floating pieces from falling out of the stencil. Think about the center of letters like “O,” “A,” or “D.” Without bridges, those inner sections detach completely. Stencil creators strategically place thin connectors to hold isolated pieces in place while maintaining readability.
Why Letter Centers Need Support
When beginners forget bridges, the stencil often collapses during cutting or painting. Those floating pieces have nowhere to attach. Good bridge placement feels almost invisible because the eye naturally fills in the missing information. Skilled stencil artists use narrow bridges that maintain both structural integrity and visual balance.
Recent stencil tutorials recommend keeping bridges at least 1 millimeter wide for durability, especially when using reusable materials like Mylar. Thin unsupported areas are the most common cause of tearing during repeated use.
Another useful trick is intentionally exaggerating certain shapes. Small shadows may need to become larger dark sections. Thin lines may need thickening. Tiny disconnected islands should often merge into broader shapes. These adjustments might feel strange initially, but they dramatically improve the finished stencil.
Choosing Materials That Hold Up During Cutting and Painting
Material choice can completely change the stencil experience. Cheap materials often buckle, tear, absorb paint, or warp after only one use. Better materials cut more cleanly, survive repeated painting sessions, and produce sharper edges.
For one-time projects, cardstock works fine. It is inexpensive, easy to cut, and widely available. The downside is durability. Paint moisture softens paper quickly, which causes fuzzy edges and curling. If you want a reusable stencil, plastic-based materials are much better.
Mylar has become the industry favorite for reusable stencils because it combines flexibility with strength. Multiple recent stencil-making resources highlight Mylar as the top option for reusable stencil projects because it resists tearing, cleans easily, and maintains edge quality after repeated use.
Here is a comparison of popular stencil materials:
| Material | Durability | Flexibility | Reusable | Best Use |
|---|---|---|---|---|
| Cardstock | Low | Medium | No | One-time crafts |
| Acetate | Medium | High | Limited | Small projects |
| Mylar | High | High | Yes | Professional reusable stencils |
| Stencil Vinyl | Medium | Very High | Sometimes | Curved surfaces |
Thickness matters too. Thin stencil material sits closer to the painting surface, which helps prevent paint bleeding under the edges. Some crafting experts recommend 4–7.5 mil Mylar because it balances flexibility and durability well. Extremely thick material lasts longer but can allow more paint seepage beneath the edges.
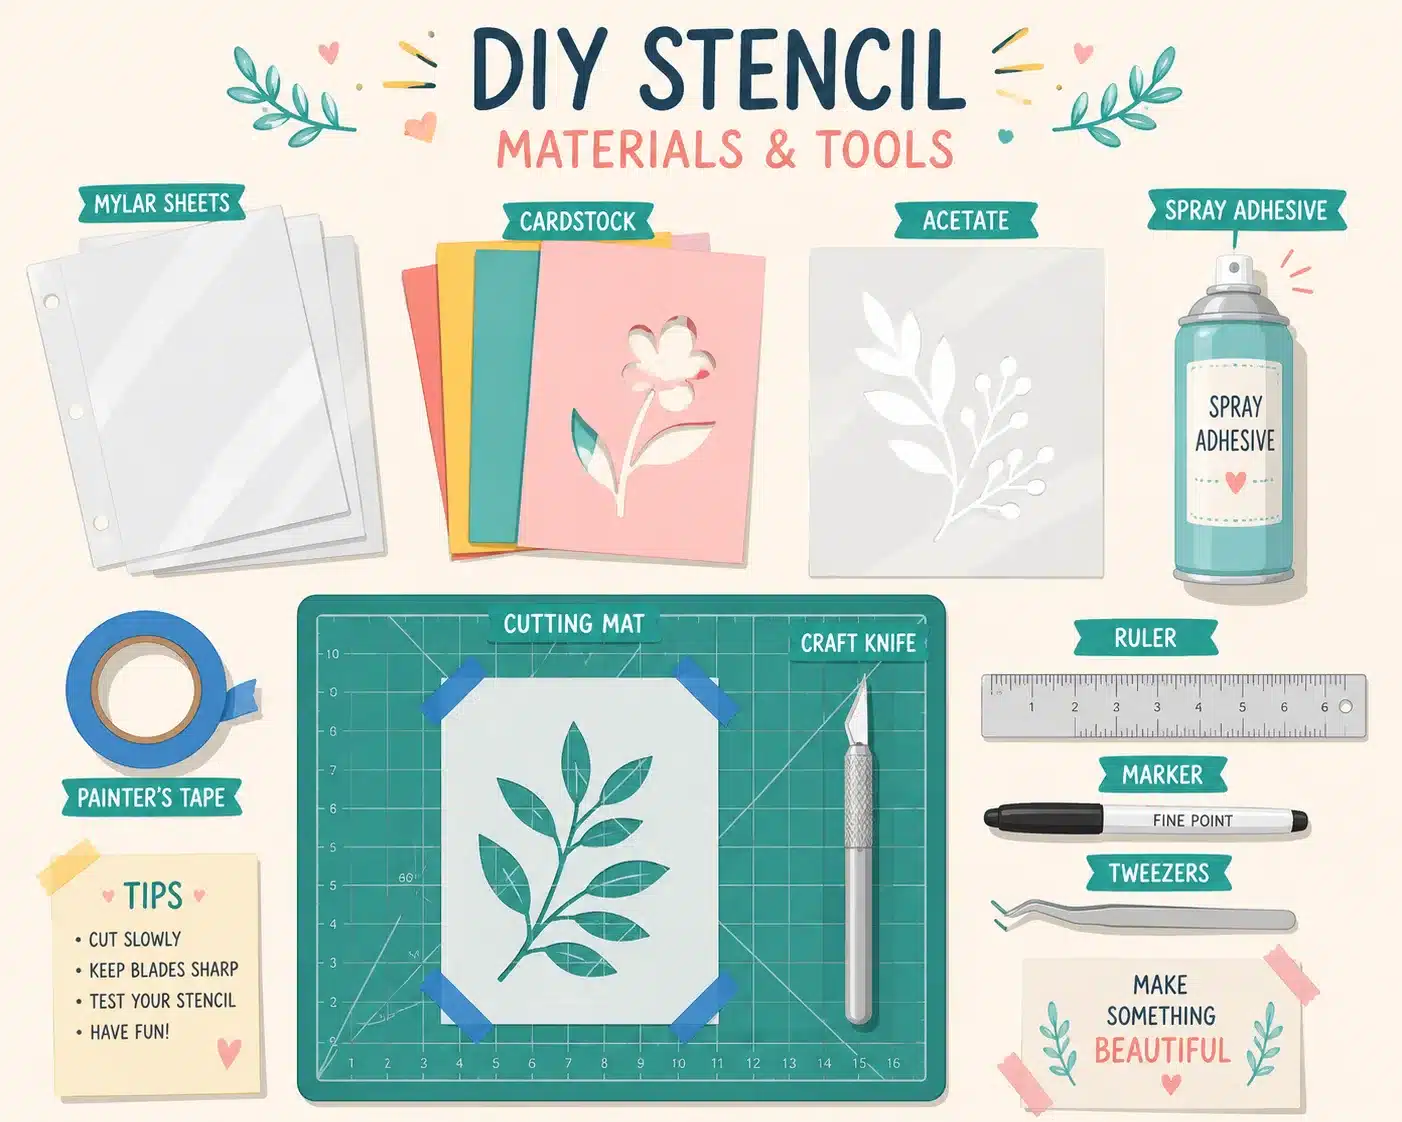
Tools You Need Before Starting
You do not need a workshop packed with expensive equipment to make a quality stencil, but you do need the right essentials. A dull blade or unstable work surface can ruin even the best design. Precision matters because every cut affects how the paint behaves later.
The most important tool is a sharp craft knife. Many stencil makers prefer X-Acto-style knives with replaceable blades because they offer excellent control. Fresh blades glide through material cleanly while dull blades drag, snag, and tear edges. Some experts recommend replacing blades more frequently than beginners expect because even slight dullness affects cut quality.
A self-healing cutting mat is another major upgrade. It protects your table while allowing smoother blade movement. Hard surfaces can cause blade skipping, which leads to jagged cuts and accidental tears. Good lighting also matters more than people realize. Shadows make precision cutting harder, especially around intricate corners.
Helpful stencil tools include:
- Sharp craft knife
- Self-healing cutting mat
- Painter’s tape
- Spray adhesive
- Tweezers for small cut-outs
- Metal ruler
- Fine-tip marker
Digital cutting machines like Cricut have become extremely popular because they automate much of the process. Community tutorials and recent crafting guides consistently mention Cricut-compatible stencil films and Mylar sheets for fast reusable stencil creation. Still, hand-cutting remains valuable because it gives full artistic control and costs far less upfront.
The Best Way to Transfer the Design Accurately
Even a perfect design becomes useless if it transfers crookedly or distorted onto the stencil material. Precision during transfer determines how accurately the final stencil reflects the original image.
Printing directly onto paper and taping it over the stencil material is one of the easiest methods. Some artists place the printed image beneath transparent Mylar and trace directly onto the surface using a fine-tip marker. Transparent materials make alignment dramatically easier because you can constantly verify placement.
Spray adhesive can help temporarily secure the printed design to the stencil material during cutting. The key is using a light adhesive layer. Too much glue creates wrinkles and sticky residue that interfere with blade movement. Painter’s tape also works well because it holds edges without damaging the material during removal.
If you are enlarging an image, projection methods work beautifully. A digital projector can display the image directly onto the stencil material or wall surface for tracing. This approach is especially useful for murals and oversized art projects because it maintains proportions accurately.
One underrated transfer tip is leaving generous margins around the design. Crowding the image too close to the stencil edge weakens the material and makes handling awkward during painting. Recent stencil tutorials commonly recommend leaving at least one to two centimeters of border around the design.
More Content: Easy Methods for How to Transfer Embroidery Pattern to Fabric
Cutting Techniques That Prevent Tearing and Rough Edges
Cutting is where patience becomes your greatest tool. Rushing creates jagged edges, stretched corners, and weak connections. A stencil does not need fast cutting; it needs controlled cutting.
Instead of forcing the blade aggressively, use multiple light passes. Think of the knife as a pencil rather than a saw. Smooth pressure creates cleaner cuts and dramatically reduces tearing risk. Beginners often try to cut completely through thick material in one motion, which usually causes slips and rough edges.
Curves require rotating the material rather than twisting your wrist awkwardly. Keeping your hand in a comfortable cutting angle improves consistency and prevents accidental overcuts. Tight corners benefit from short controlled cuts instead of one long motion.
Sharp internal corners are common tearing points because stress concentrates there during handling. Slightly rounding corners can improve durability without visibly changing the design. This tiny adjustment often makes reusable stencils last significantly longer.
Recent stencil-making guides also emphasize the importance of testing blade depth carefully when using digital cutting machines. Excessive depth can cut into mats and damage fine details, while shallow cuts leave frustrating partially connected sections.
The cleanest stencils usually come from a calm, methodical process. Good cutting feels almost meditative. Every smooth curve and crisp edge contributes directly to sharper paint results later.
Testing the Stencil Before Starting the Final Project
Skipping the testing stage is like baking a cake without tasting the batter. You might get lucky, but problems are far easier to fix before the final project begins.
Always test your stencil on scrap material first. Cheap cardboard, spare fabric, or leftover wood pieces work perfectly. Testing reveals paint bleed issues, weak bridge areas, awkward handling spots, and design flaws that are hard to notice while cutting.
Paint bleed is one of the most common stencil frustrations. It happens when paint sneaks beneath the stencil edges, creating fuzzy lines. Usually, this comes from applying too much paint too quickly. Thin paint layers applied gradually produce much cleaner results.
Weak sections often reveal themselves during testing. Bridges may bend excessively, narrow areas might tear, or isolated details may become difficult to paint cleanly. Minor reinforcement using clear tape on the back can extend stencil life dramatically. Recent stencil resources specifically recommend reinforcing small tears before they spread further.
Testing also helps you choose the best paint application method. Different stencils respond differently to spray paint, rollers, brushes, or sponges. Some designs benefit from dry brushing techniques while others need soft spray layers. Finding the right combination before the final project reduces stress enormously.
Professional-looking results rarely come from luck. They come from identifying problems early and correcting them before the real surface is involved.
Cleaning and Reusing Homemade Stencils Successfully
Read More: spray paint dry faster
A well-maintained stencil can last for years. Poor cleaning habits, though, can destroy a stencil after only a few uses. Paint buildup gradually thickens edges, distorts details, and causes uneven application.
The best cleaning approach depends on the paint type. Water-based acrylics usually clean easily with warm water and mild soap if addressed quickly. Letting paint dry fully makes removal far more difficult. Solvent-resistant materials like Mylar handle stronger cleaners much better than paper-based stencils. Some stencil manufacturers specifically highlight Mylar’s resistance to brittleness and cleaning chemicals as a major durability advantage.
Avoid aggressive scrubbing because thin bridge areas can stretch or tear under pressure. Soft cloths, gentle rinsing, and careful wiping preserve edge integrity better than abrasive cleaning tools. If paint buildup becomes stubborn, soaking the stencil briefly often loosens residue safely.
Storage matters too. Tossing stencils loosely into drawers leads to bent corners, warped edges, and accidental tears. Flat storage between cardboard sheets works well for larger stencils. Hanging storage can work for thick reusable materials, but thin stencils may deform over time if unsupported.
Labeling stencils also saves time later. Once you start creating multiple designs, organization becomes surprisingly important. A simple folder system with notes about paint type, project size, and preferred application method can streamline future projects significantly.
The beauty of reusable stencils is repetition. One carefully crafted stencil can create dozens or even hundreds of consistent designs across furniture, walls, fabrics, signs, and artwork. That repeatability transforms a simple DIY project into a long-term creative tool.
Conclusion
Learning how to make a stencil from a picture is really about learning how to simplify without losing identity. Every successful stencil balances clarity, durability, and visual impact. The process starts with choosing the right image, continues through thoughtful simplification and careful cutting, and finishes with testing and maintenance that keep the stencil usable for years.
The materials you choose matter enormously. Reusable Mylar film continues to dominate modern stencil crafting because it offers flexibility, clean cuts, and excellent durability for repeated painting projects. Combined with careful bridge placement, sharp cutting tools, and patient paint application, even beginners can achieve remarkably professional results.
A great stencil is more than a template. It becomes a repeatable creative signature. Once you master the process, almost any image can evolve into wall art, fabric design, signage, furniture decoration, or custom artistic expression. The first stencil may feel intimidating, but every project sharpens your eye for shapes, balance, and visual storytelling.
FAQs
1. What is the best material for reusable homemade stencils?
Mylar is widely considered the best reusable stencil material because it is flexible, durable, waterproof, and easy to clean. Many modern stencil-making guides recommend 4–7.5 mil Mylar for balancing flexibility and strength.
2. Can I make a stencil without a Cricut machine?
Absolutely. Many stencil artists still cut designs by hand using a craft knife and cutting mat. Hand-cutting offers more control and works well for custom artistic projects.
3. Why does my stencil paint keep bleeding?
Paint bleeding usually happens because too much paint is applied at once or the stencil is not sitting tightly against the surface. Using thinner paint layers and securing the stencil properly helps create sharper edges.
4. How do I stop small stencil sections from tearing?
Use bridges to support floating areas, avoid ultra-thin connections, and cut with sharp blades using light pressure. Reinforcing weak spots with tape on the back can also improve durability.
5. How many times can a reusable stencil be used?
A well-maintained Mylar stencil can often survive dozens or even hundreds of uses depending on paint type, cleaning habits, and handling quality.

Kareem Sallam is an Egyptian special writer based in Australia, with a strong interest in practical ideas and creative content that focuses on everyday solutions. He writes clear, engaging articles designed to be easy to follow and useful for a wide range of readers.
His work centers on DIY projects, handmade ideas, simple crafts, and home based creativity. Kareem aims to deliver content that is practical, inspiring, and accessible, helping readers turn simple materials into smart and enjoyable projects.