How to Make Night Vision Goggles With Household Items
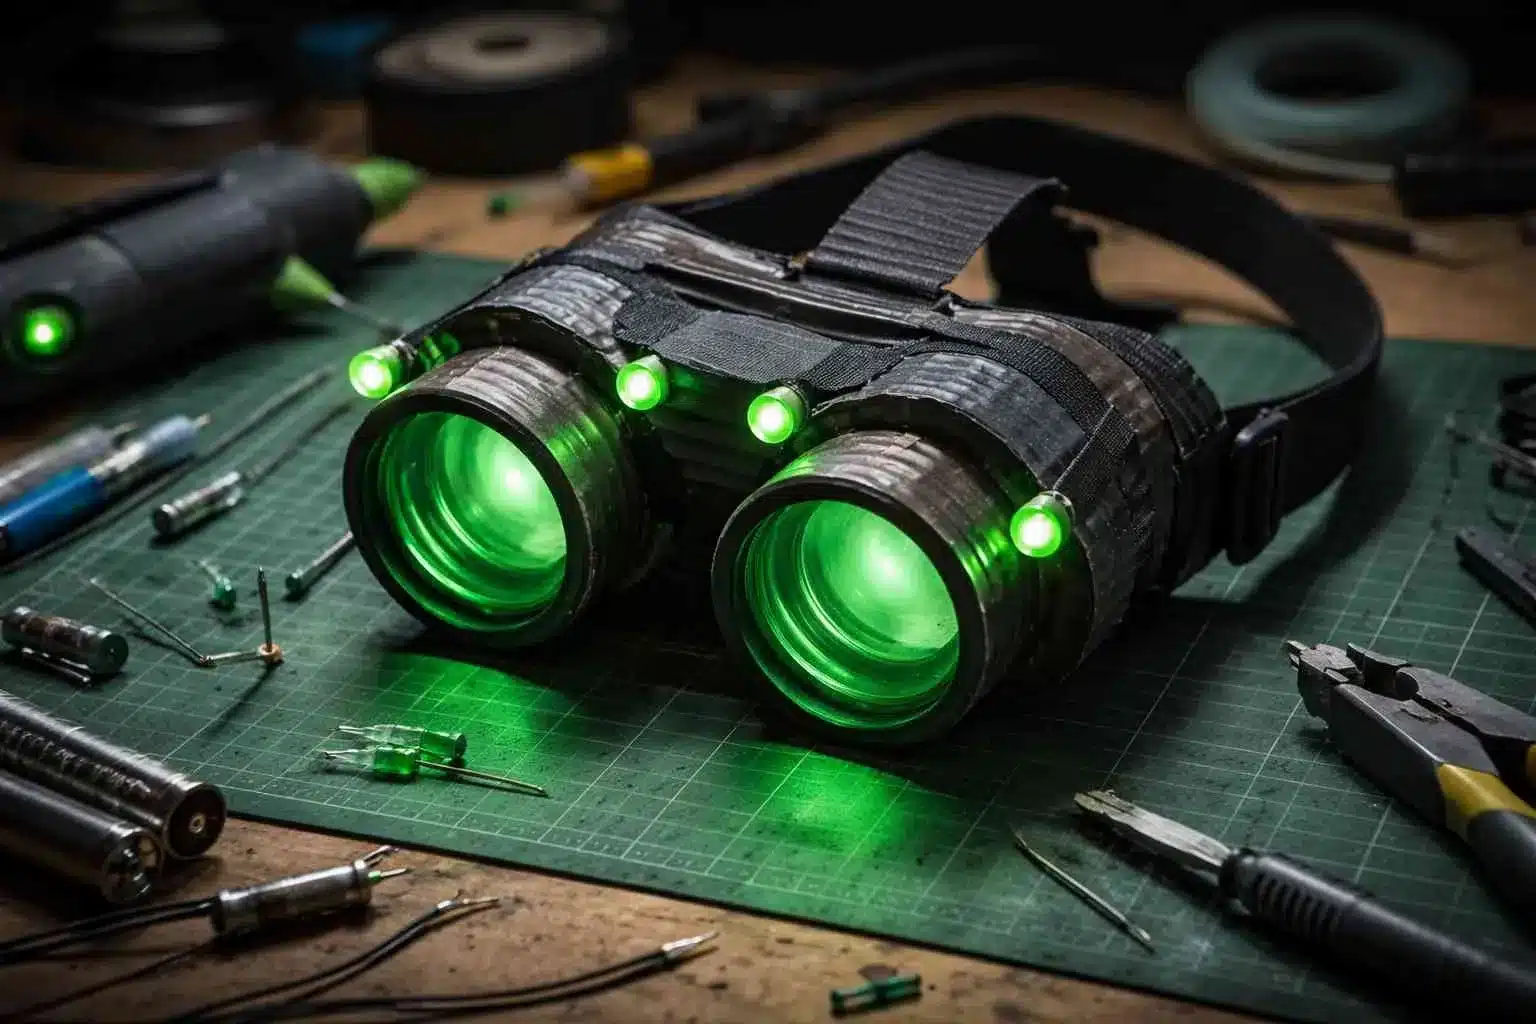
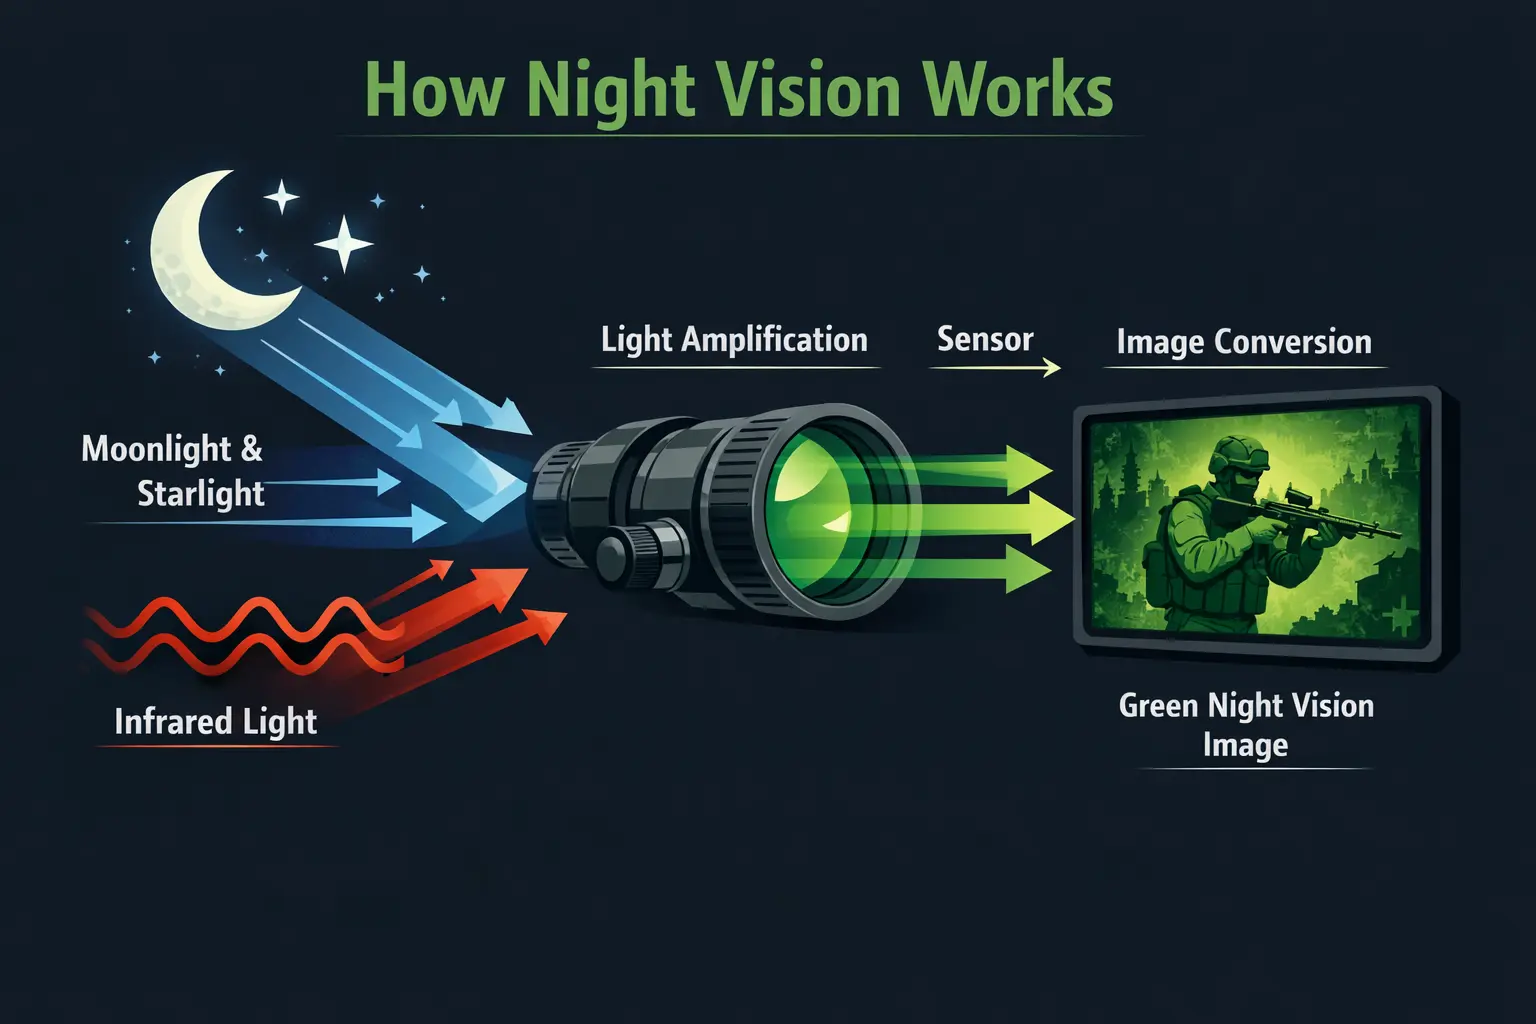
Night vision technology works by collecting light that is too faint or falls outside the range your eyes can detect, then converting it into an image you can see. Depending on the system, that may involve amplifying available light or using infrared (IR) illumination with a camera sensor. Most beginner-friendly DIY projects use digital cameras and IR light because they are more accessible than traditional image-intensifier equipment.
Your eyes can detect only visible wavelengths, while near-infrared light sits just beyond that range. A camera with suitable IR sensitivity can capture this otherwise invisible light and display the result on a screen. That makes DIY night vision less about literally changing what your eyes can see and more about using electronics to create a visible representation of low-light scenes.
The appeal is that you can explore the basic principles without investing in expensive professional equipment. A simple project may demonstrate how IR illumination, camera sensitivity, and displays work together. The result will not match military or professional night vision, but it can still be an interesting way to learn how low-light imaging works.
Contents
What Is Infrared Light?
Infrared light is electromagnetic radiation just beyond the visible spectrum, so human eyes cannot normally detect it. Near-infrared light is especially useful in night vision projects because many digital camera sensors can respond to it when their built-in IR filtering allows enough of the wavelength through. Objects and surfaces can also reflect infrared illumination, giving a compatible camera information that is invisible to you.
This is the principle behind many infrared security cameras. Instead of relying entirely on available moonlight or ambient light, an IR LED illuminates the scene with wavelengths that people generally cannot see. A camera sensitive to that infrared light captures the reflected signal and converts it into an image on a display.
Active vs Passive Night Vision
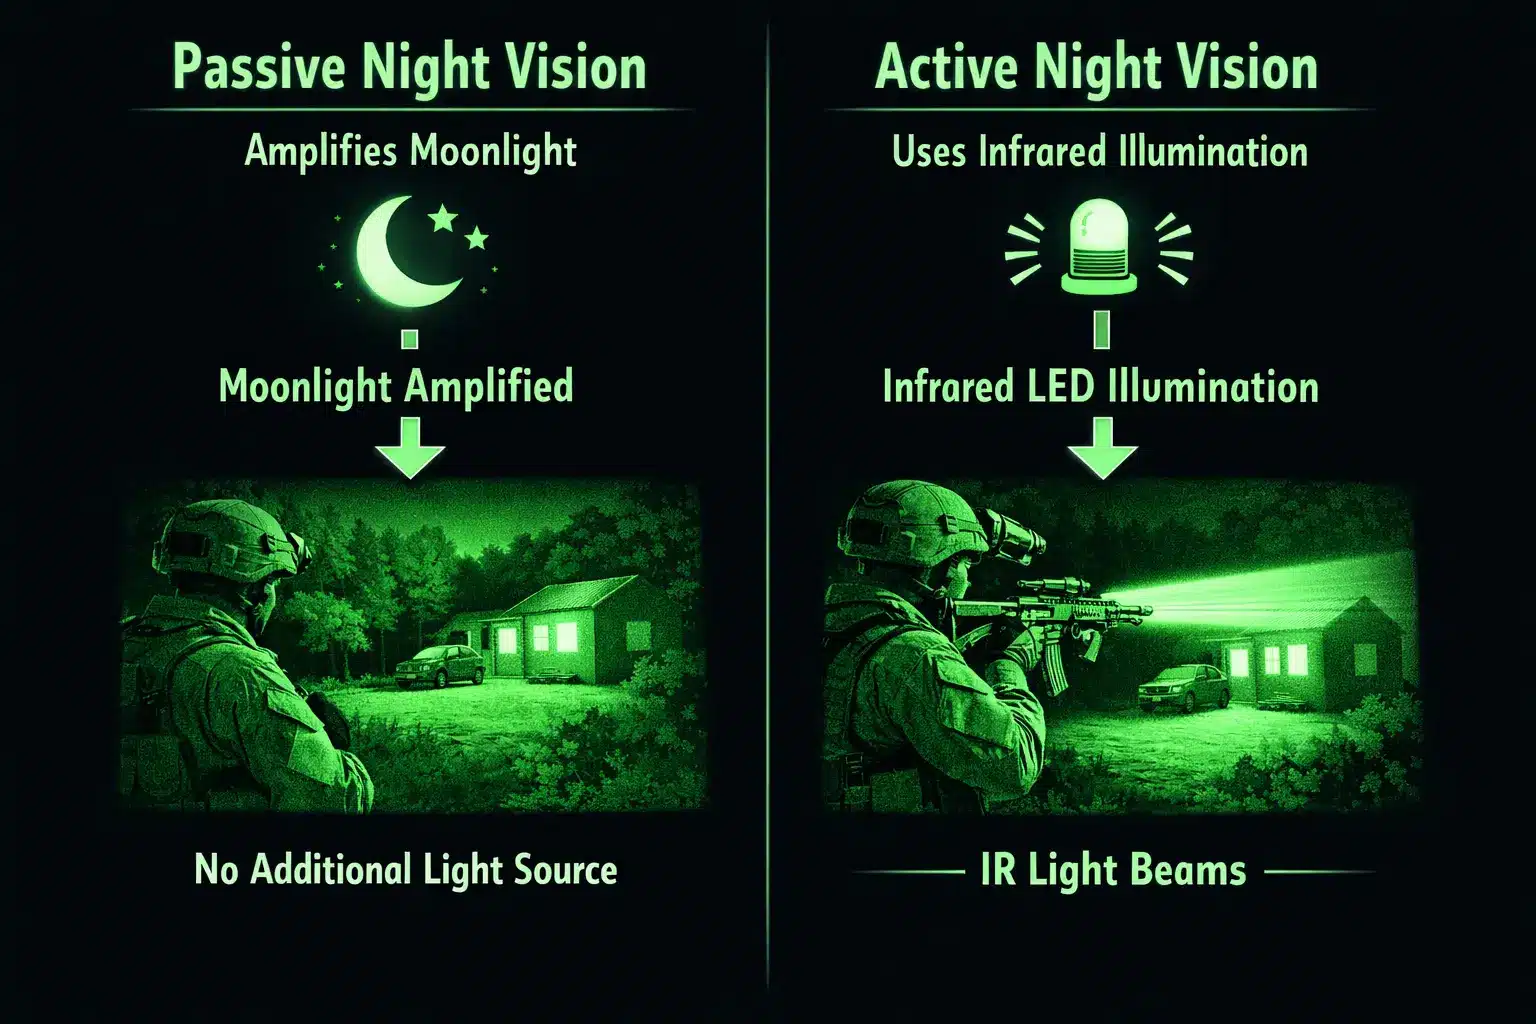
- Passive night vision: Uses existing ambient light and amplifies or enhances it to produce a visible image.
- Active night vision: Adds infrared illumination to the scene and uses a suitable sensor to capture the reflected IR light.
For a beginner DIY project, active infrared night vision is usually the more practical approach because the added IR illumination can provide a usable light source when the environment is extremely dark. The camera and display then do the work of turning that invisible illumination into an image you can interpret.
Active vs Passive Night Vision
There are two main types of night vision:
- Passive: Amplifies existing light (used in military gear)
- Active: Uses infrared light to illuminate objects
DIY goggles almost always use active night vision, because it’s much easier to build at home. You’re basically shining invisible light and then capturing it with a sensor.
Can You Really Make Night Vision Goggles at Home?
Short answer? Yes. But let’s be real; it’s not going to turn you into a night-ops commando.
Homemade night vision goggles are more like a science experiment meets fun gadget. They can help you see in low-light conditions, but they won’t match professional devices used by law enforcement or the military. Those rely on advanced image intensification tubes and precision optics that are expensive and complex.
Still, DIY versions can be surprisingly effective. Some setups allow visibility up to about 10–15 meters in dark conditions, depending on your components .
What DIY Goggles Can and Can’t Do
Let’s set expectations clearly:
| Feature | DIY Goggles | Professional Goggles |
|---|---|---|
| Cost | Very low | Very high |
| Visibility Range | Short (10–15m) | Long (100m+) |
| Image Quality | Basic | High-definition |
| Ease of Build | Moderate | Not DIY |
| Durability | Low | Military-grade |
DIY goggles are perfect for:
- Fun experiments
- Learning electronics
- Night exploration in safe environments
But they’re not suitable for:
- Security work
- Hunting
- Emergency rescue
Safety Considerations You Must Know
Before you start building anything, take this seriously: your eyes are at risk if you do this incorrectly.
- Infrared LEDs can damage your eyes if too powerful
- Electrical wiring mistakes can cause short circuits
- Poor design can strain your vision
Experts warn that improper setups involving IR and electronics can lead to permanent eye damage if misused .
Materials You’ll Need (Household & Easy-to-Find Items)
Let’s break this down into two approaches: simple and advanced.
Basic DIY Method Materials
This is the “kitchen table” version:
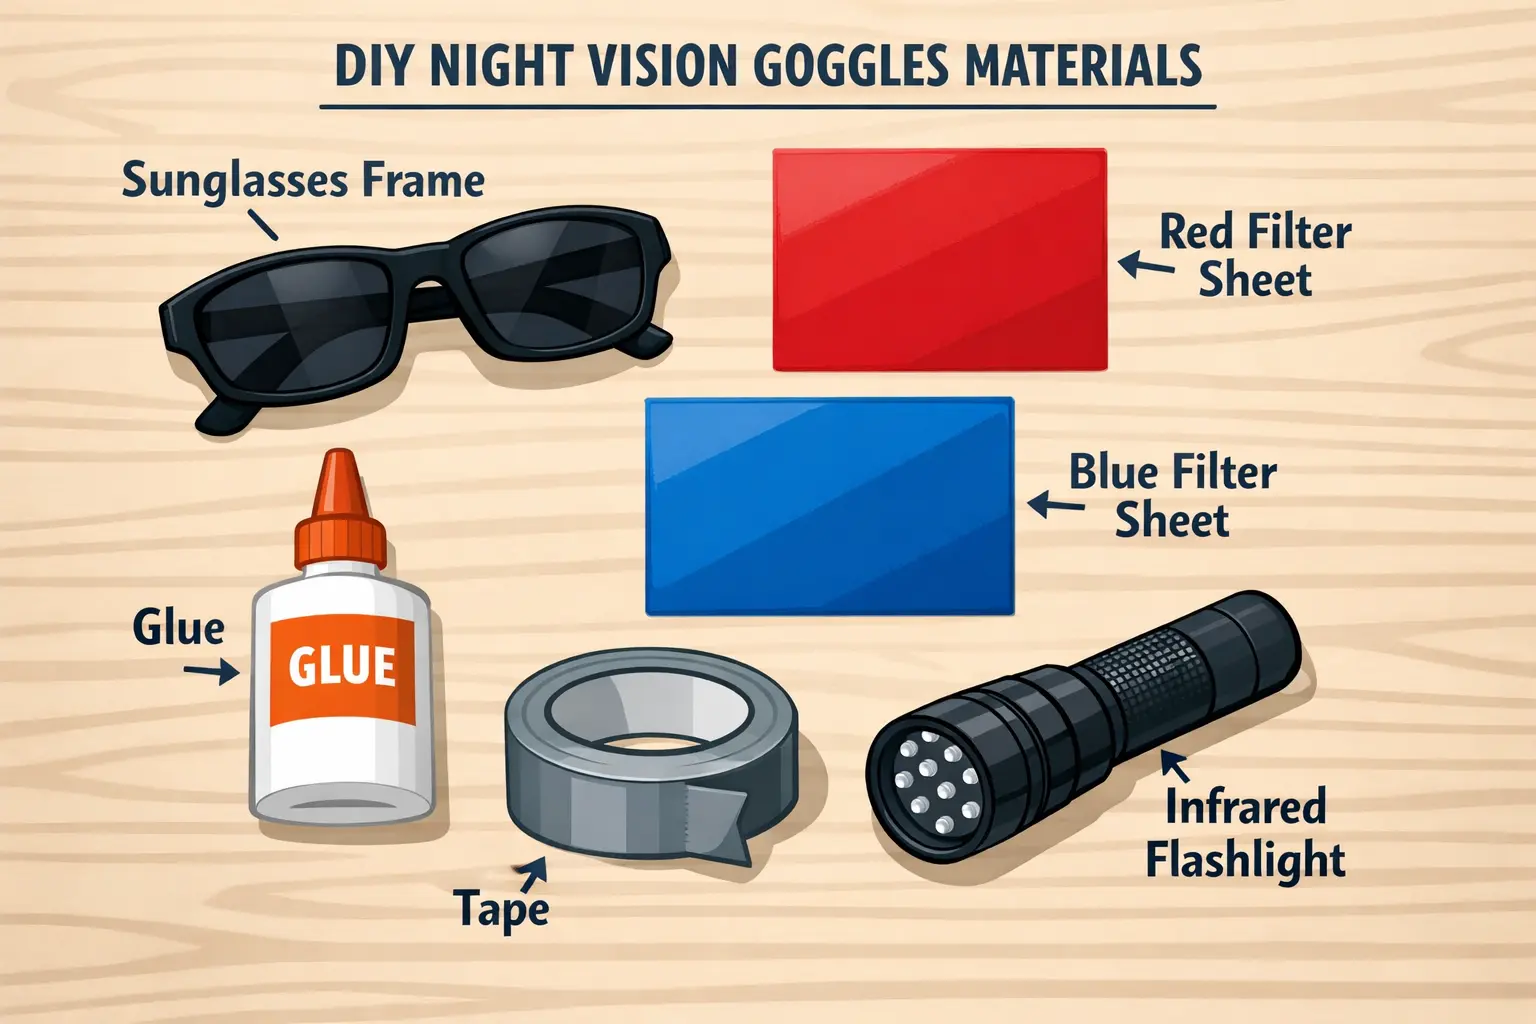
- Old sunglasses or goggles frame
- Red and blue transparent plastic (or theatrical gels)
- Glue or tape
- Infrared flashlight (or remote control LED hack)
This method uses light filtering and IR illumination to create a primitive night vision effect .
Advanced DIY Digital Method Materials
Want something more powerful? Try this:
- Old smartphone or digital camera
- VR headset or small screen
- Infrared LEDs
- Battery pack
- Wires and connectors
This setup mimics real night vision systems by combining camera + IR + display .
Method 1 – Simple Night Vision Goggles (Beginner-Friendly)
This is where things get hands-on. No coding, no soldering; just creativity.
Step 1: Preparing the Frame
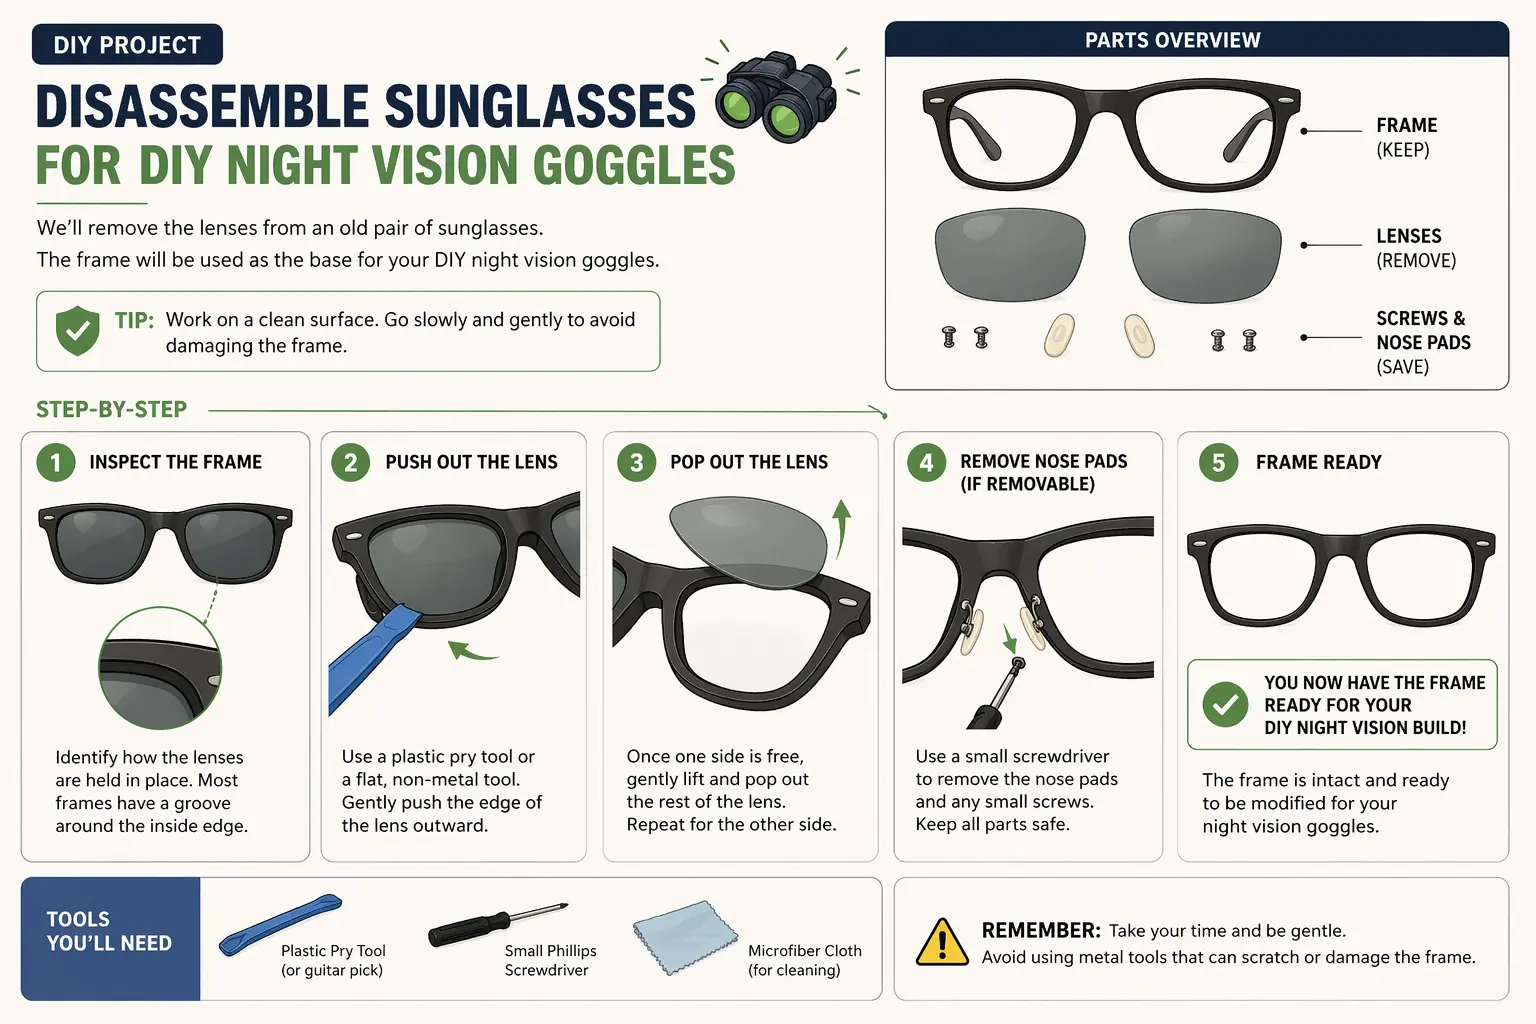
Start with an old pair of sunglasses or protective goggles. Remove the lenses carefully. You’ll use the frame as your base.
Step 2: Adding Colored Filters
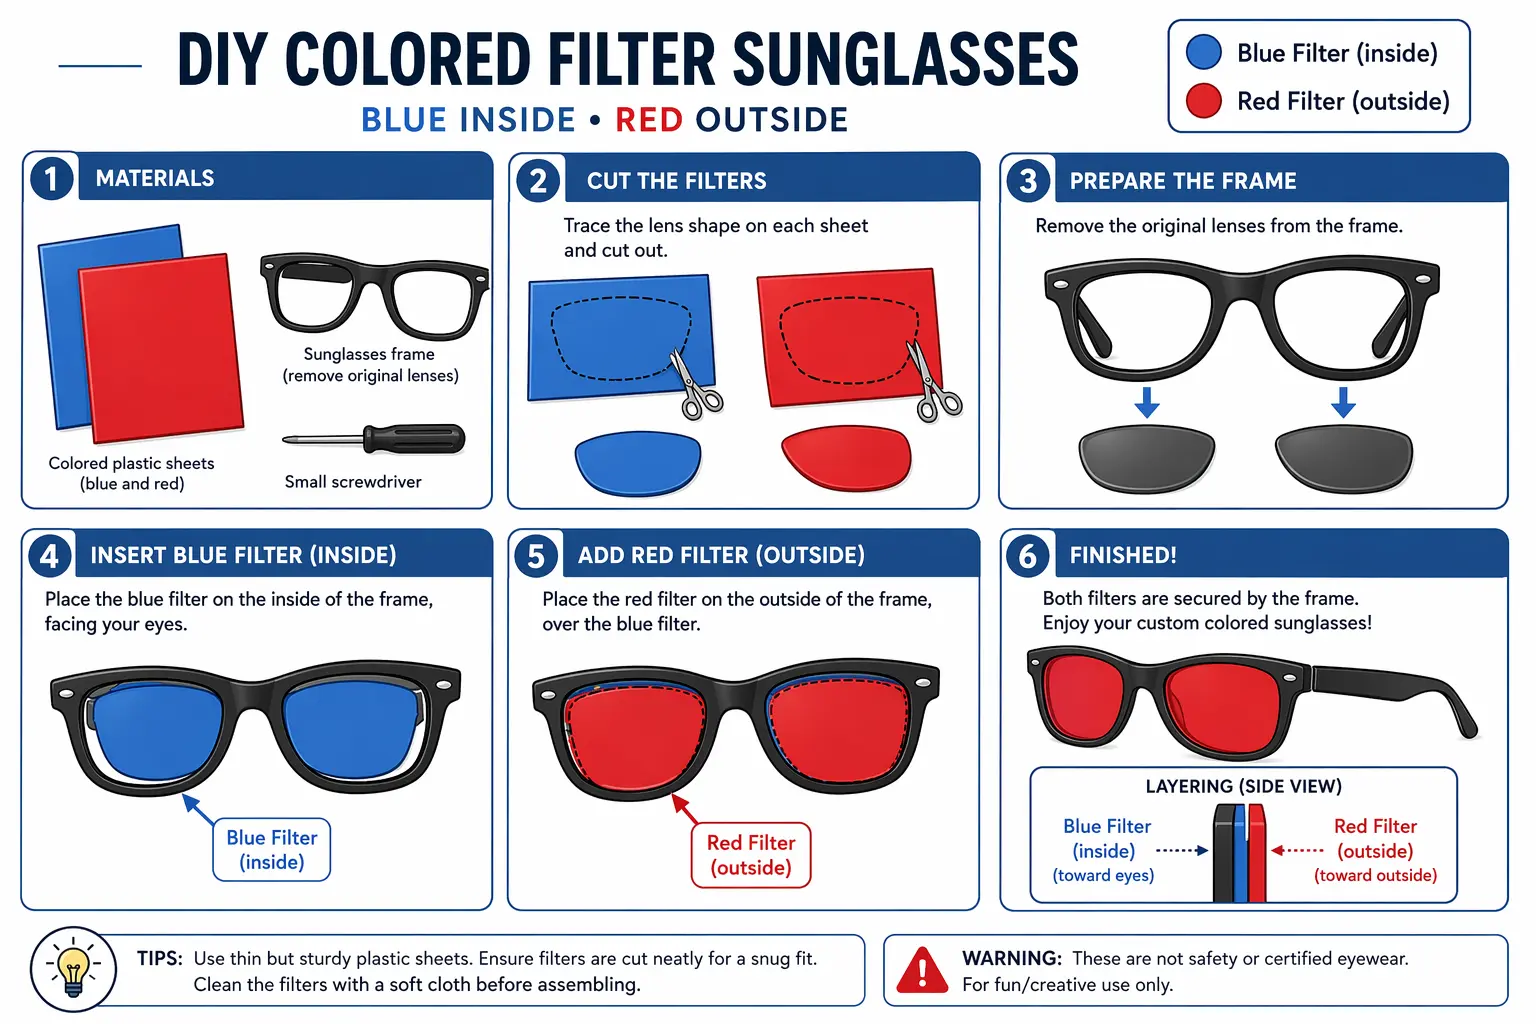
Cut red and blue plastic sheets to match the lens shape. Attach:
- Blue layer inside
- Red layer outside
This combination filters visible light and enhances contrast when used with infrared illumination.
Step 3: Adding Infrared Light Source
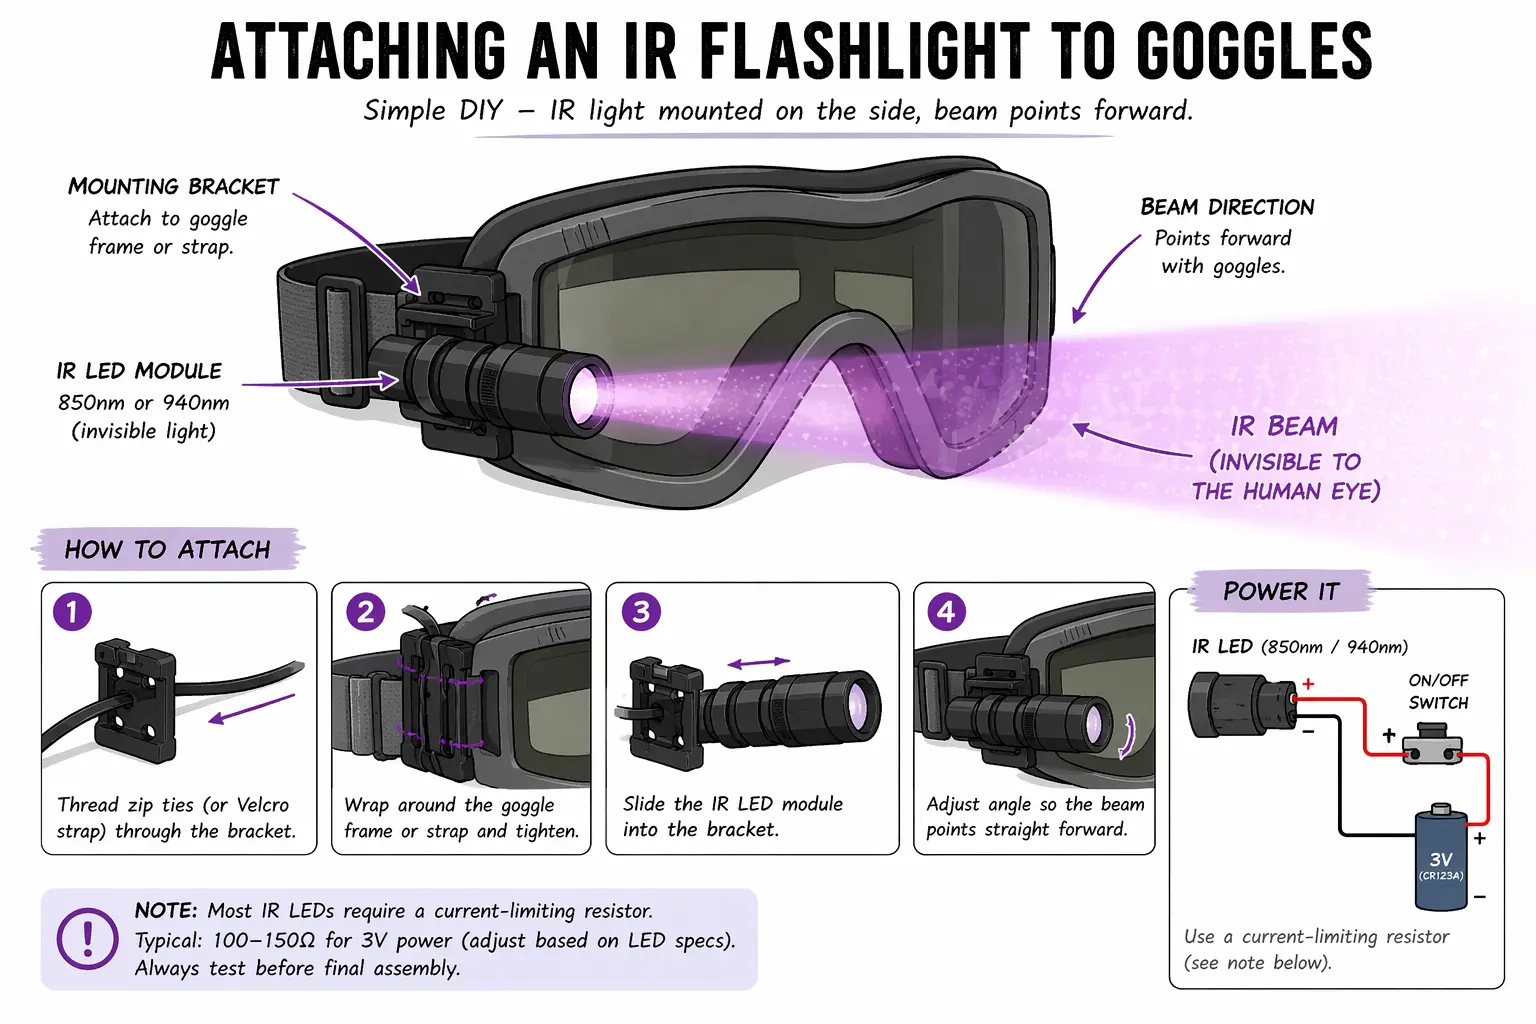
Use an IR flashlight or modify a remote control LED. Mount it on the side of the goggles so it shines forward.
Now, turn off the lights and test. You’ll notice objects becoming faintly visible; like stepping into a different world.
Method 2 – Digital DIY Night Vision Goggles
This is where things get interesting; and way more effective.
Step 1: Using a Camera That Sees Infrared
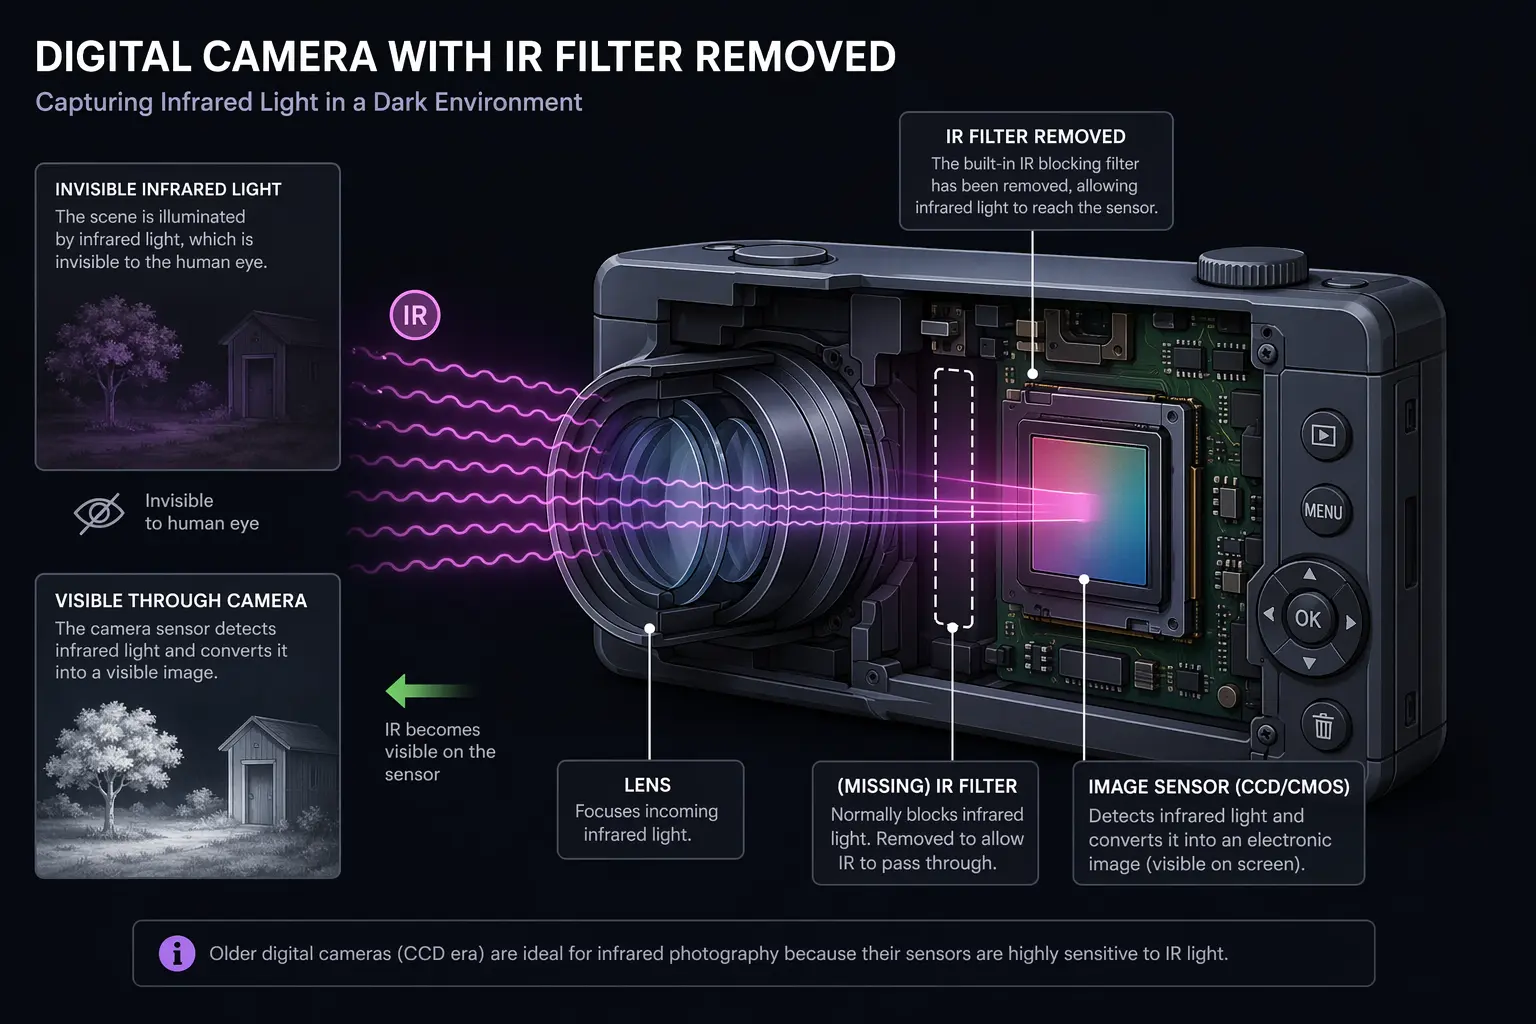
Some cameras (especially older ones) can detect infrared light if you remove the IR filter. This allows them to “see” what your eyes can’t.
Step 2: Connecting a Display
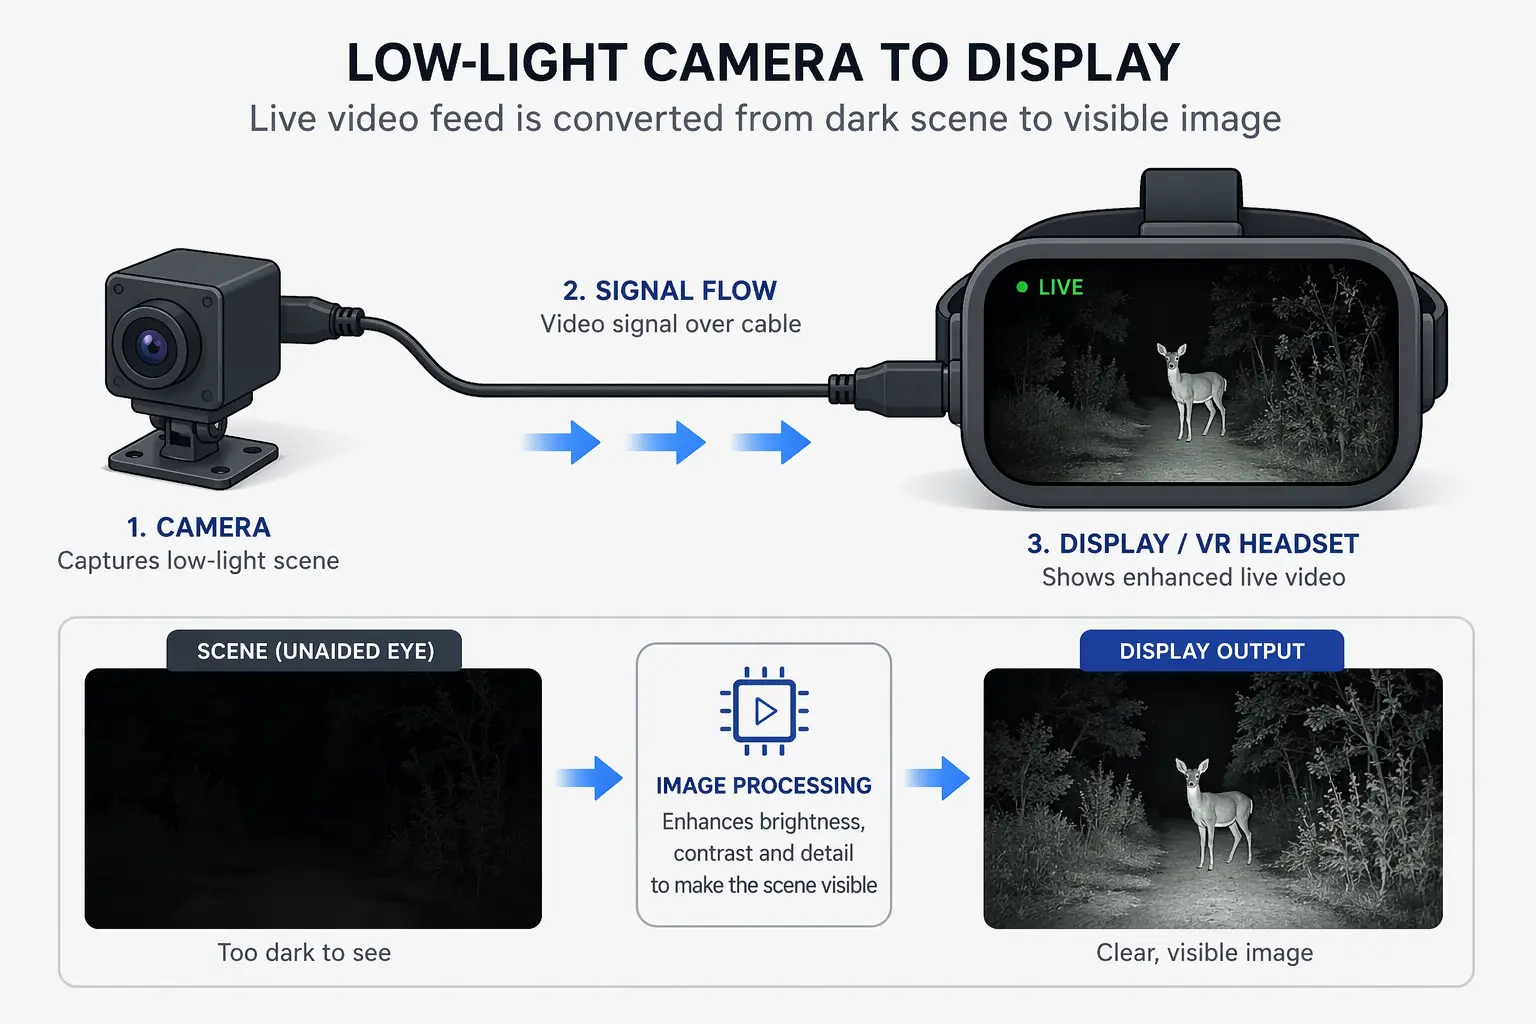
Attach your camera to a small screen or use a VR headset. This creates a real-time feed of what the camera sees.
Step 3: Power Supply Setup
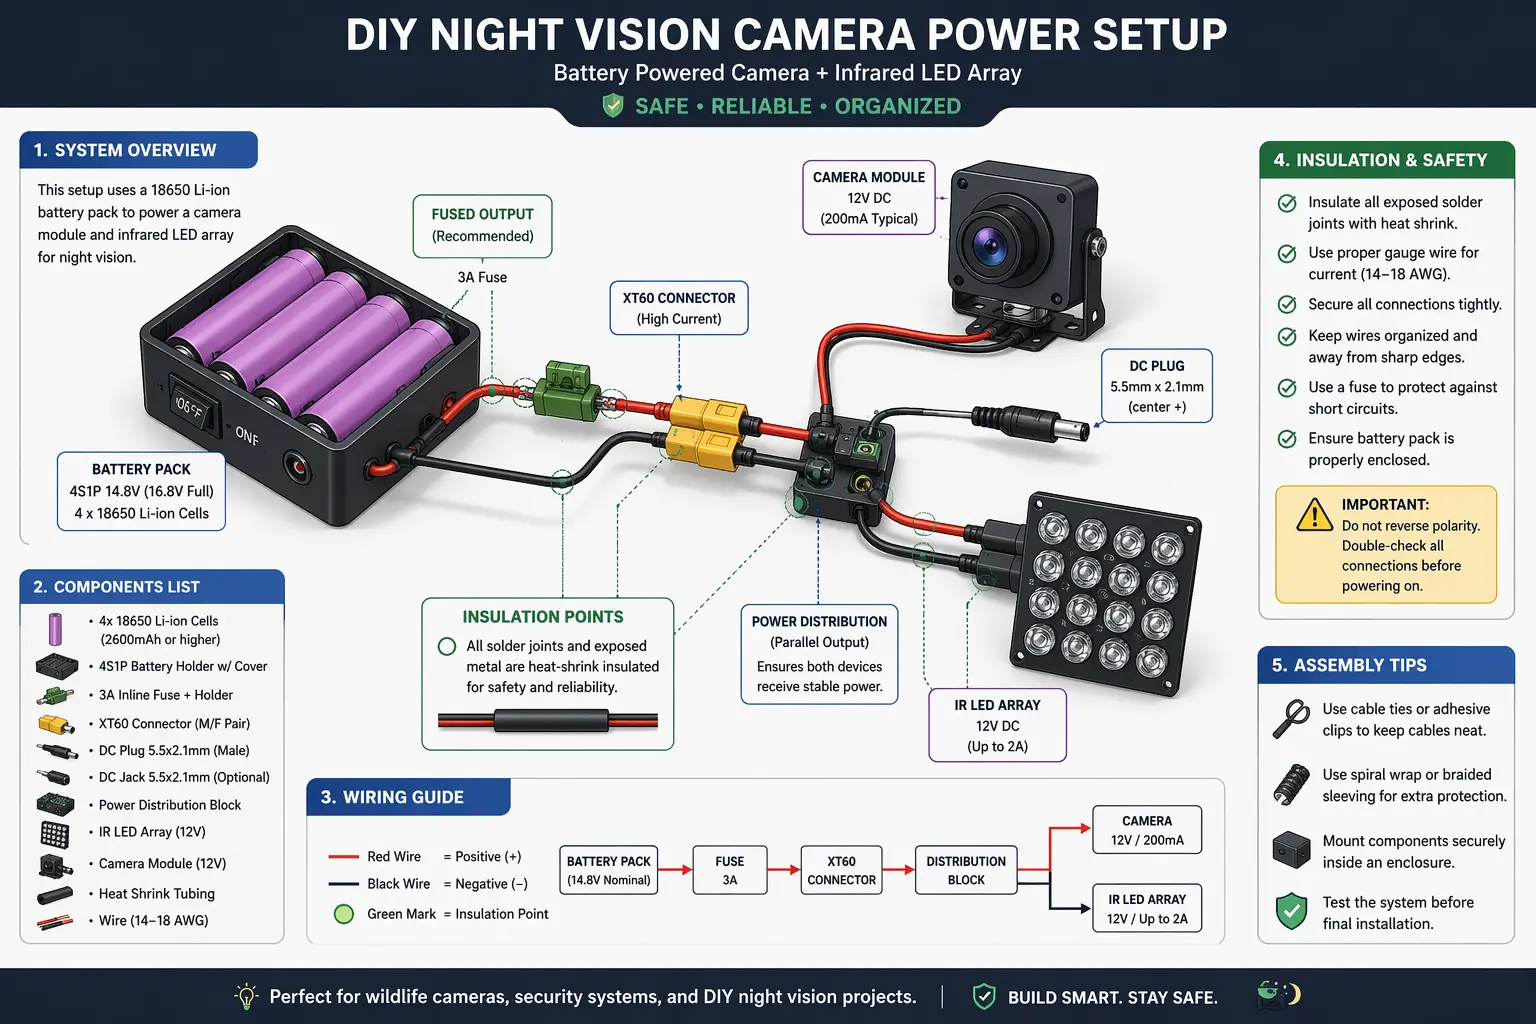
Use a battery pack to power both the camera and IR LEDs. Make sure everything is securely connected and insulated.
How to Test Your DIY Night Vision Goggles
Testing is where the magic happens.
Best Conditions for Testing
- Total darkness or low-light environments
- Indoor spaces first (safer)
- Avoid bright light exposure
Turn everything on and give your eyes time to adjust. You’ll start noticing shapes and movement that were invisible before.
Common Mistakes to Avoid
Even simple DIY projects can go wrong fast if you’re not careful.
- Using weak IR light → poor visibility
- Misaligned filters → distorted image
- Overpowering LEDs → eye strain
- Loose wiring → device failure
Think of it like cooking; small mistakes can ruin the whole dish.
DIY vs Professional Night Vision Goggles
Here’s the honest truth: DIY is fun, but professional gear is powerful.
| Aspect | DIY | Professional |
|---|---|---|
| Cost | <$50 | $1000+ |
| Performance | Basic | Advanced |
| Build Time | Few hours | Pre-built |
| Use Case | Hobby | Serious use |
Professional devices use image intensifier tubes, which amplify photons into visible images; a process far beyond simple DIY builds .
Tips to Improve Your Homemade Night Vision
Want better results? Try this:
- Use stronger IR LEDs
- Add multiple light sources
- Upgrade to a better camera
- Use a head mount for stability
Small upgrades can dramatically improve performance.
Legal and Safety Considerations
In most places, DIY night vision goggles are legal. But attaching them to weapons or using them in restricted areas can be illegal.
Always check local laws before using them outside your home.
Conclusion
Building your own night vision goggles is one of those projects that feels like unlocking a secret ability. You’re literally stepping beyond human limits; seeing what your eyes normally can’t. And while DIY versions won’t rival professional gear, they offer something just as valuable: understanding, creativity, and hands-on experience.
It’s not about perfection. It’s about exploration. Whether you’re experimenting in your room or exploring your backyard at night, you’re learning how technology bends reality; and that’s pretty powerful.
Read Also: How to Crochet a Valentine Heart
FAQs
1. Can I really see in complete darkness with DIY goggles?
Yes, but only if you use an infrared light source. Without it, visibility will be very limited.
2. Are homemade night vision goggles safe?
They can be, as long as you use low-power IR LEDs and follow safety precautions.
3. Do I need technical skills to build them?
Basic versions require no technical skills. Advanced setups need some knowledge of electronics.
4. How far can DIY night vision goggles see?
Typically around 10–15 meters depending on your setup .
5. Can I use my phone as night vision goggles?
Yes, especially with apps and IR modifications, though results vary.

Kareem Sallam is an Egyptian special writer based in Australia, with a strong interest in practical ideas and creative content that focuses on everyday solutions. He writes clear, engaging articles designed to be easy to follow and useful for a wide range of readers.
His work centers on DIY projects, handmade ideas, simple crafts, and home based creativity. Kareem aims to deliver content that is practical, inspiring, and accessible, helping readers turn simple materials into smart and enjoyable projects.