How to Reduce Brush Marks When Painting Interior Walls
A fresh coat of paint can completely transform a room, a cabinet, a door, or even an old piece of furniture. But nothing destroys that smooth, professional look faster than visible brush marks. You step back expecting a flawless finish, only to see ridges, streaks, and uneven texture catching the light from every angle. It feels a bit like ironing a shirt only to discover new wrinkles appear the second you put it on. Frustrating, right?
The good news is that brush marks are usually preventable. Professional painters rarely achieve glass-smooth finishes by accident. They understand how paint behaves, how brushes interact with different surfaces, and how timing changes everything. Real-world painting experts consistently point to a few major causes behind visible brush strokes, including paint that dries too quickly, overloaded brushes, cheap tools, and poor surface preparation.
If you have ever wondered why your paint looks textured instead of silky smooth, this guide breaks everything down in plain English. You will learn how to choose the right paint, how to handle your brush properly, why sanding matters more than most DIY painters realize, and how professionals get paint to level out beautifully. By the end, you will know exactly how to reduce brush marks when painting and create finishes that look clean, smooth, and professionally done.
Why Brush Marks Ruin an Otherwise Great Paint Job
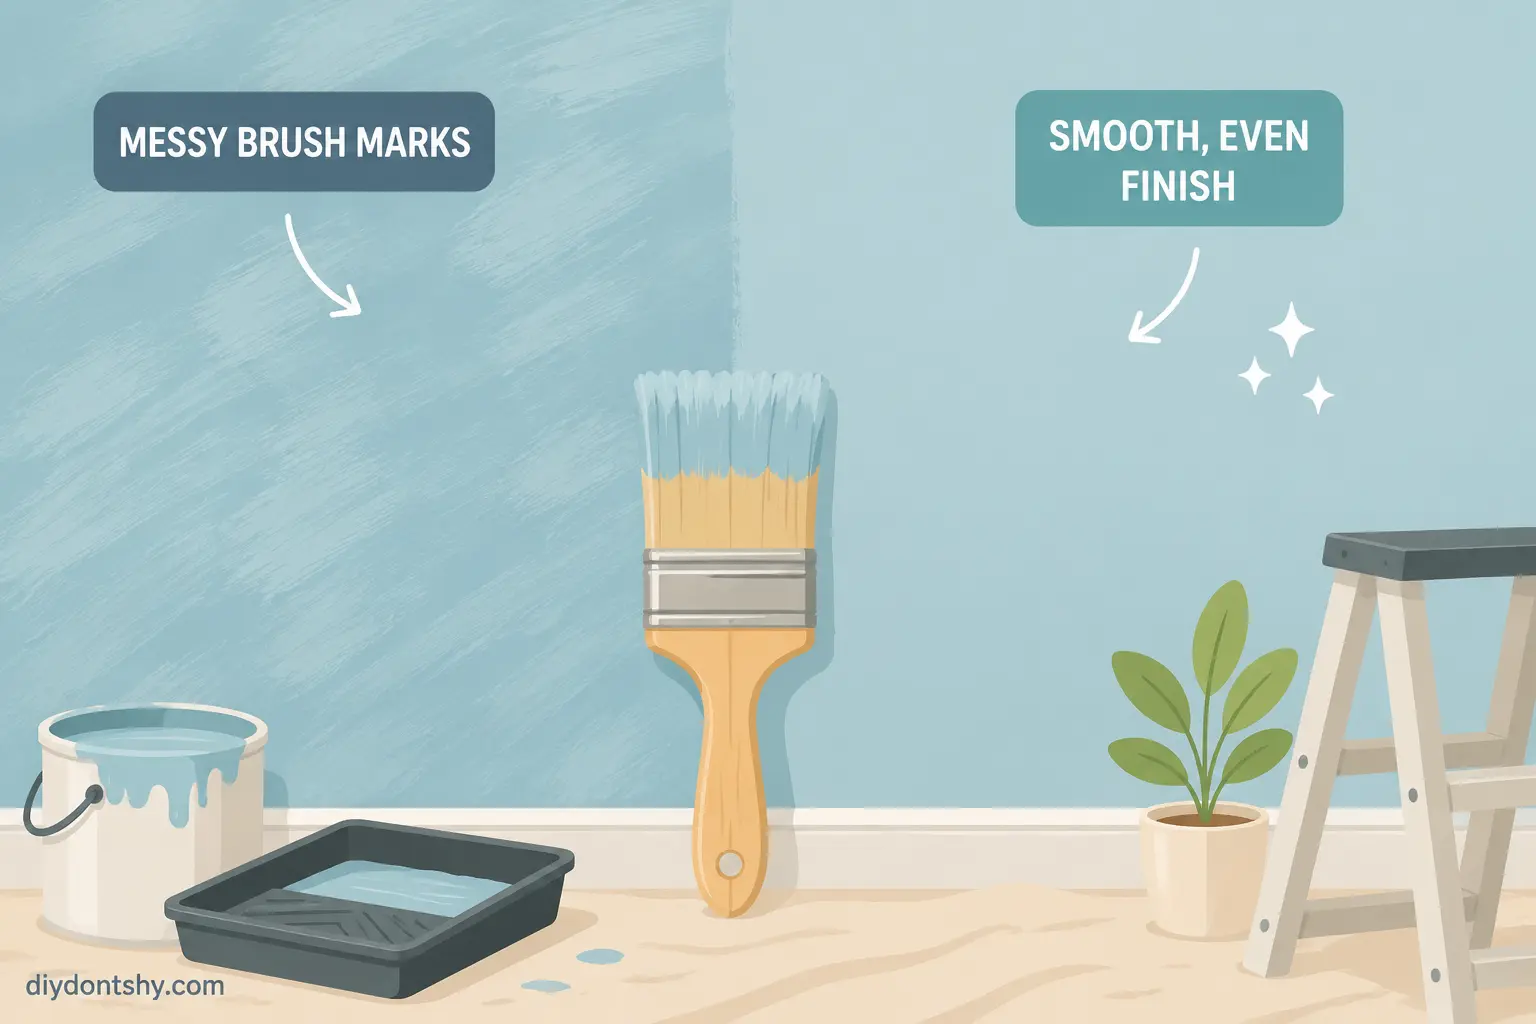
Brush marks are more than tiny imperfections. They change the entire appearance of a painted surface. Under direct lighting, even subtle ridges become obvious, especially on satin, semi-gloss, or gloss finishes. A cabinet door that looked smooth while wet can suddenly resemble dried waves once the paint cures. That happens because the paint failed to level out evenly before drying.
Professional painters often describe paint leveling as the paint’s natural ability to flatten itself after application. When paint has enough open time before drying, surface tension gently smooths away the ridges left behind by brush bristles. When drying happens too quickly, those ridges stay frozen in place. According to recent painting industry guidance, rapid evaporation caused by heat, sunlight, or low humidity is one of the leading reasons brush marks remain visible.
Different surfaces also reveal imperfections differently. Smooth cabinet doors, trim, metal surfaces, and interior doors tend to expose every tiny flaw because they reflect light evenly. Textured drywall hides imperfections much better because shadows naturally break up the surface. Think of it like looking at fingerprints on a glossy phone screen versus fingerprints on rough denim. One screams for attention while the other disappears into the texture.
Another major issue is that brush marks often compound over time. One uneven coat leads to heavier sanding, thicker repainting, and even more visible texture later. That is why professional painters spend so much time focusing on preparation and technique rather than rushing to finish quickly. The smoother your first coat goes down, the easier every additional coat becomes.
What Usually Causes Visible Brush Marks
Most brush marks come from a surprisingly small group of mistakes. The biggest culprit is thick paint. Paint that is too viscous cannot flow smoothly across the surface, so it drags instead of leveling naturally. Multiple painting experts recently noted that thick paint creates ridges that remain visible even after the paint cures.
Cheap brushes are another major problem. Low-quality brushes often have uneven bristles, weak ferrules, and poor paint distribution. Instead of releasing paint smoothly, they dump paint inconsistently across the surface. Imagine trying to spread butter evenly using a fork instead of a knife. The tool itself creates texture.
Overworking the paint is another common mistake. Many DIY painters keep brushing areas repeatedly after the paint has already started drying. This creates dragging, streaking, and rough texture. Experts repeatedly warn that once paint begins to tack up, continuing to brush over it only worsens the finish.
Environmental conditions matter too. High temperatures, direct sunlight, wind, and dry air shorten paint open time dramatically. Benjamin Moore specifically recommends maintaining a “wet edge” while painting because partially dried sections create lap marks and visible overlaps. When paint dries too fast, there is no opportunity for the surface to self-level.
Here is a quick breakdown of the most common causes of visible brush marks:
| Cause | Why It Creates Brush Marks |
|---|---|
| Thick paint | Prevents smooth leveling |
| Cheap brushes | Uneven paint application |
| Working too slowly | Paint dries before blending |
| Overbrushing | Disturbs partially dry paint |
| Hot or dry conditions | Reduces leveling time |
| Skipping sanding | Leaves surface imperfections |
The interesting thing is that most painting disasters are not caused by lack of effort. They are caused by too much effort. People keep brushing, correcting, and touching areas long after they should have left the paint alone.
Choosing Paint That Levels Out Smoothly
Not all paint behaves the same way. Some paints naturally flatten themselves beautifully, while others hold every brush stroke like wet cement. That is why choosing the right paint matters just as much as using proper technique.
Modern self-leveling paints are specifically designed to reduce visible brush marks. These paints remain wet slightly longer, allowing surface tension to smooth out imperfections before curing. Many trim enamels and cabinet paints now advertise self-leveling properties because smooth finishes are one of the biggest demands among homeowners. Recent painting experts emphasized that premium paints with better leveling characteristics dramatically reduce streaking and visible texture.
Water-based paints have improved enormously over the past decade, but they still dry faster than traditional oil-based paints. Faster drying means less leveling time. Oil-based paints generally produce smoother finishes because they stay workable longer, though they also involve stronger odors and longer cure times. For many modern DIY projects, premium acrylic enamel paints strike the best balance between smoothness and convenience.
Paint sheen also changes how noticeable brush marks appear. Flat and matte finishes hide imperfections because they scatter light. Semi-gloss and gloss finishes reflect light sharply, which makes every ridge more visible. If achieving a perfectly smooth finish feels difficult, choosing eggshell or satin instead of high gloss can instantly reduce the appearance of imperfections.
Many experienced painters also use paint conditioners or extenders to improve leveling. Products designed to slow drying slightly can help paint settle more evenly, especially in warm climates. Online painting communities consistently recommend thinning paint slightly and applying multiple thin coats rather than forcing thick coverage in one pass.
The biggest mistake people make is buying cheap paint to save money. Low-quality paint often lacks the additives that improve flow and leveling. You may save a little upfront, but you usually spend far more time sanding, repainting, and fixing texture later.
The Difference a Quality Brush Can Make
A great paintbrush feels almost invisible while you paint. The bristles glide smoothly, release paint evenly, and maintain a sharp edge without leaving harsh lines. A poor brush, on the other hand, fights you every step of the way.
High-quality brushes use carefully tapered bristles that distribute paint consistently across the surface. Recent brush experts explain that flagged bristle tips hold and release paint more evenly, which directly reduces streaking and brush marks. Cheap brushes tend to have blunt, uneven bristles that drag through the paint like tiny rakes.
Synthetic brushes are generally best for water-based latex and acrylic paints. Nylon-polyester blends maintain their shape well and resist absorbing water, which helps create smoother finishes. Natural bristle brushes remain popular for oil-based paints because they hold solvents differently and produce softer strokes.
Brush shape matters too. Angled sash brushes provide better control around trim and corners, while flat brushes work better for broad, smooth surfaces. Soft bristles generally leave fewer visible marks than stiff bristles because they glide rather than scrape.
One overlooked factor is brush maintenance. Even premium brushes perform badly if dried paint remains near the ferrule. Painting professionals emphasize cleaning brushes immediately after use because hardened paint changes how bristles spread and release paint later.
Think of a quality brush like a sharp kitchen knife. A professional chef can work faster and cleaner because the tool behaves predictably. The same principle applies when painting. Good brushes reduce effort while improving results simultaneously.
Getting the Right Amount of Paint on the Brush
Loading the brush correctly is one of the most underrated painting skills. Too much paint creates drips, ridges, and heavy texture. Too little paint forces you to drag the brush across the surface, creating dry streaks and uneven coverage.
Professional painters typically dip only about one-third of the bristle length into the paint. After dipping, they lightly tap the brush against the side of the container instead of scraping it dry. Scraping removes too much paint and creates inconsistent application. The goal is controlled saturation, not a dripping mess.
Overloaded brushes leave obvious warning signs. Paint starts pooling near edges, sagging develops on vertical surfaces, and thick ridges remain after each stroke. Underloaded brushes behave differently. The brush begins skipping across the surface, leaving faint streaks and requiring extra pressure to spread the paint.
Many online painting communities repeatedly stress the importance of unloading excess paint and working with thinner coats. Thin coats may seem slower initially, but they level better, dry more evenly, and require less correction later.
A useful trick is to watch how the paint leaves the brush. Smooth application should resemble spreading warm syrup, not pushing toothpaste across glass. If the paint feels resistant or sticky immediately, there is likely too little paint or the paint itself is too thick.
The right brush loading technique also reduces fatigue. Painters who constantly force dry brushes across surfaces tire quickly and lose consistency. Smooth painting should feel relaxed and controlled rather than tense and forceful.
Why Working Too Slowly Creates Texture
Timing matters enormously when painting. Paint has a limited open time where it remains workable and capable of self-leveling. Once that window starts closing, every additional brush stroke risks creating texture.
This is why professional painters focus heavily on maintaining a wet edge. Benjamin Moore specifically recommends brushing or rolling back into still-wet paint sections to prevent lap marks and visible overlap lines. If one section dries before the next overlaps it, the surface texture becomes uneven.
Working too slowly often happens when painters attempt perfection stroke by stroke. They constantly go back to fix tiny flaws, unknowingly creating bigger ones. Paint begins setting up, and fresh brush strokes disturb the partially dried film underneath.
Environmental conditions make timing even more important. Warm temperatures, direct sunlight, fans, and low humidity accelerate evaporation dramatically. According to recent painting experts, high heat and dry conditions shorten paint open time enough to permanently trap brush ridges before leveling can occur.
This is why many professionals avoid painting during the hottest parts of the day. Early morning or late afternoon conditions usually provide better working time and smoother finishes. Some painters even lightly dampen rollers or use conditioners to extend workability slightly.
One Reddit painter described the secret perfectly: apply the paint evenly and then leave it alone. That sounds simple, but it requires resisting the urge to keep touching the surface. Great painting often involves knowing when to stop.
Sanding Between Coats for a Cleaner Finish
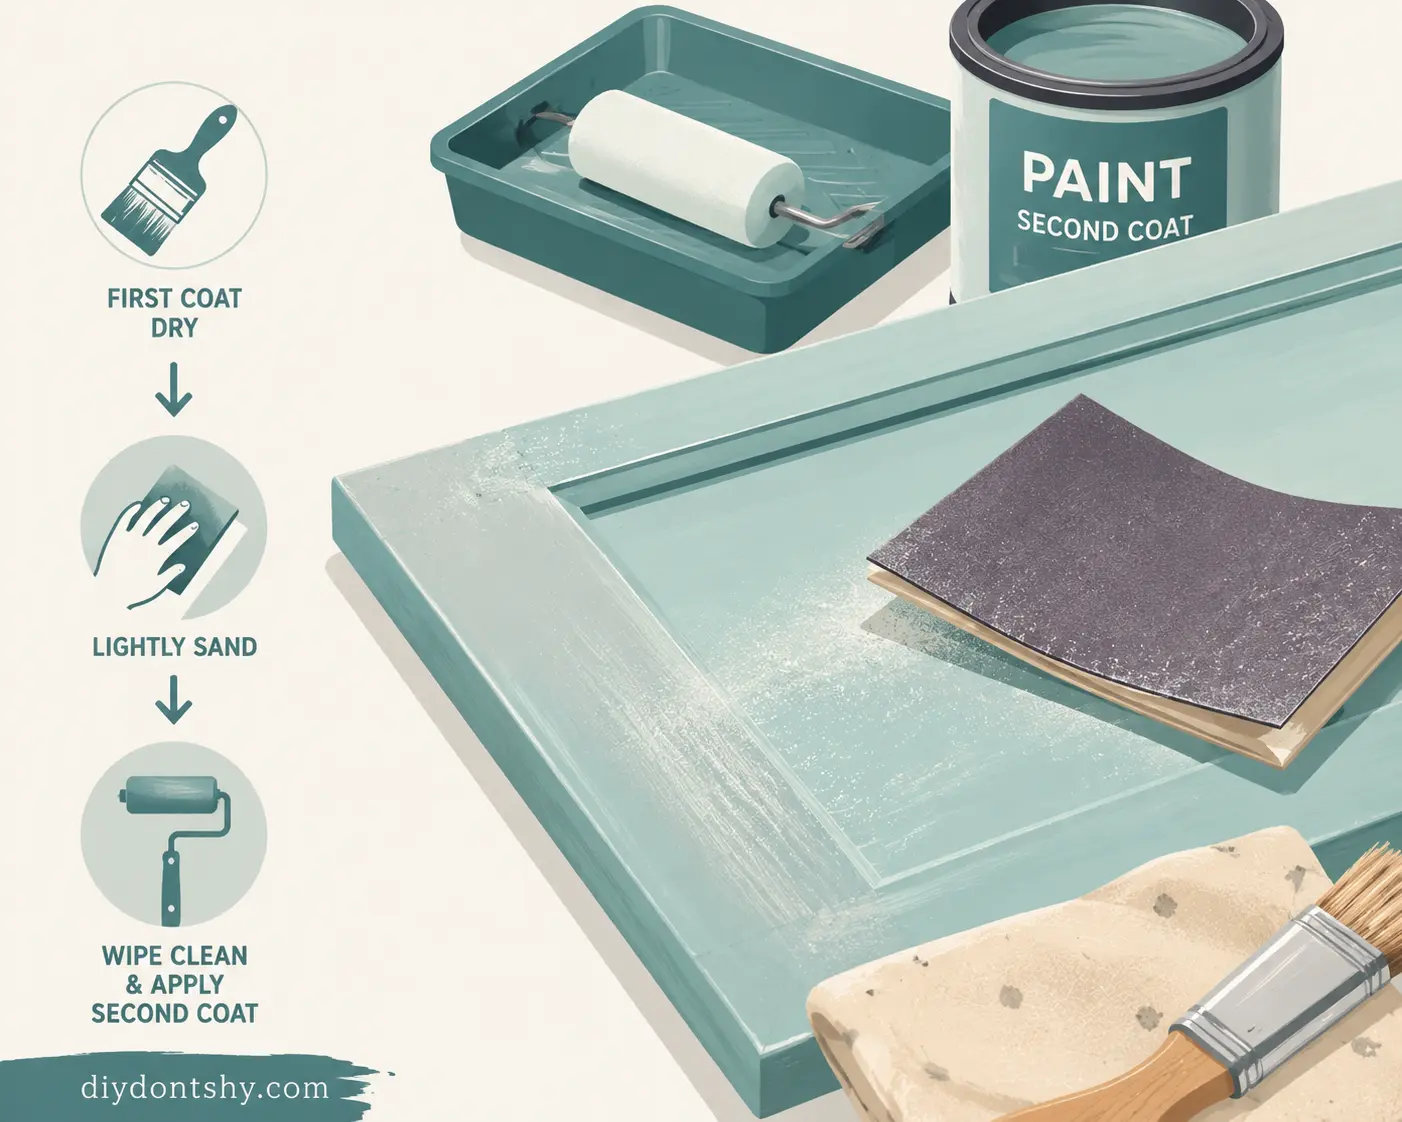
Sanding between coats separates average paint jobs from professional-looking finishes. Even well-applied paint develops tiny imperfections, dust nibs, or slight texture after drying. Light sanding removes those flaws and creates an ultra-smooth foundation for the next coat.
Recent sanding experts recommend using fine-grit sandpaper between coats, typically in the 220 to 600 grit range depending on the surface and finish quality desired. Lower grits remove imperfections quickly but risk cutting through the paint. Higher grits refine the surface without aggressive scratching.
The key is sanding lightly. You are not trying to remove the entire coat. You are only flattening raised texture. A sanding sponge or foam block helps distribute pressure evenly, reducing the risk of gouging the finish.
Dust removal matters just as much as sanding itself. After sanding, surfaces should be cleaned carefully using microfiber cloths or tack-free dust removal methods. Lingering dust particles become trapped under the next coat and create roughness instantly.
Professional painters often describe sanding as polishing rather than scraping. Each coat becomes progressively smoother, almost like refining layers of glass. This is especially important for cabinets, trim, furniture, and doors where reflected light highlights every flaw.
One common mistake is rushing recoating times. Applying fresh paint before previous layers cure properly traps softness underneath, making sanding messy and uneven. Experts often recommend waiting overnight before sanding premium enamel finishes. Patience really does pay off here.
Techniques That Help Paint Dry More Evenly
Even drying creates smoother finishes because the paint film settles consistently across the surface. Uneven drying leads to lap marks, texture variation, and visible overlap lines.
One of the most effective techniques is applying thin coats instead of heavy coats. Thin layers dry more consistently and allow solvents to evaporate evenly. Thick coats often skin over on top while remaining wet underneath, which creates sagging and uneven texture. Multiple painting communities strongly recommend several thin coats instead of one thick layer.
Brush direction matters too. Long, consistent strokes create smoother finishes than short, choppy motions. Many professionals “tip off” the final coat using very light strokes in one direction to reduce visible texture. The idea is to guide the paint gently rather than aggressively pushing it around.
Proper lighting also helps enormously. Painters frequently use angled lighting to spot ridges while the paint is still wet. Fixing imperfections immediately is much easier than sanding hardened texture later.
Ventilation needs balance as well. Good airflow helps paint cure properly, but excessive airflow from fans or open windows can dry paint too quickly. Controlled ventilation works best.
Surface preparation remains the hidden hero behind even drying. Clean, smooth, properly primed surfaces absorb and hold paint consistently. Recent painting professionals repeatedly emphasized that prep work determines how evenly paint spreads and cures.
There is also a psychological side to painting that many people overlook. Rushing creates mistakes. When people hurry, they overload brushes, skip sanding, and overwork drying paint. Smooth finishes usually come from calm, deliberate pacing rather than frantic speed.
Conclusion
Reducing brush marks when painting is less about secret tricks and more about understanding how paint behaves. Smooth finishes happen when paint has enough time to level out, when brushes distribute paint evenly, and when surfaces are prepared properly before each coat.
Most visible brush strokes come from a few predictable problems: thick paint, cheap brushes, rushed application, poor environmental conditions, and overworking partially dried paint. Once you recognize those causes, avoiding them becomes much easier. Premium self-leveling paints, high-quality synthetic brushes, thin coats, careful sanding, and maintaining a wet edge all work together to create finishes that look clean and professional.
Painting is a little like baking bread. Tiny details matter. Temperature matters. Timing matters. Ingredients matter. You cannot rush the process without affecting the final result. But once you learn the rhythm, painting becomes smoother, easier, and far more rewarding.
The next time you pick up a paintbrush, remember this simple principle: smooth finishes usually come from doing less, not more. Apply the paint evenly, trust the leveling process, and resist the urge to keep brushing once the paint begins settling. Sometimes the hardest part of painting well is knowing when to leave the surface alone.
FAQs
1. Why do brush marks appear more on glossy paint?
Glossy paint reflects light more directly, which makes every ridge and imperfection easier to see. Matte and flat finishes scatter light, helping hide minor texture.
2. Can sanding completely remove brush marks?
Yes, light sanding between coats can flatten brush ridges effectively. Fine-grit sandpaper between 220 and 600 grit is commonly recommended for smoothing painted surfaces.
3. Is it better to use foam brushes for smooth finishes?
Foam brushes can reduce streaking on small projects, but high-quality synthetic bristle brushes usually provide better control, smoother coverage, and fewer bubbles on larger surfaces.
4. Why does paint dry unevenly in hot weather?
Heat and low humidity accelerate solvent evaporation, shortening the paint’s open time. When paint dries too quickly, it cannot self-level properly, leaving visible texture behind.
5. How many coats are best for a smooth painted finish?
Most professionals prefer applying two to four thin coats rather than one heavy coat. Thin coats dry more evenly, level better, and reduce visible brush marks significantly.

Ahmed Elhor is an Egyptian SEO specialist, pharmacist, and copywriter based in Canada. He combines strong research skills with search focused writing to create clear, helpful content that answers real questions and ranks effectively in search engines.
With a passion for practical DIY ideas, homemade solutions, and creative projects, Ahmed focuses on producing easy to follow guides that are simple, affordable, and useful for everyday life. His work blends creativity with structure, helping readers turn basic materials into meaningful results.