How to Remove Chipped Paint From Wood Without Damaging the Surface
Old painted wood has a story hidden underneath every cracked edge and peeling layer. Maybe it is an antique dresser sitting in the garage, a staircase railing that has survived decades of repainting, or wooden trim that looks like it belongs in another century. The problem is that chipped paint rarely comes off neatly. One careless sanding session can scar the grain forever, while the wrong stripping method can leave wood warped, burned, or chemically stained.
Removing chipped paint from wood is not just about force. It is about reading the condition of the wood, understanding how many layers you are dealing with, and choosing methods that loosen paint while preserving the surface underneath. Recent DIY and restoration experts continue to stress that the safest and most effective approach depends heavily on the age of the paint, the detail of the woodwork, and whether lead paint may be present.
Before you attack peeling paint with the nearest power sander, there are several things you need to know. Some surfaces need complete stripping. Others only need careful sanding. And sometimes the smartest move is slowing down and inspecting the wood before any dust starts flying.
Contents
Understanding Why Paint Chips on Wood
Paint rarely peels for no reason. Wood naturally expands and contracts with temperature and humidity changes, and over time the paint layer loses flexibility. Add moisture, sunlight, poor preparation, or too many repainting jobs, and the finish starts breaking apart like dry leaves cracking under your shoes. Many homeowners assume the paint itself is the only problem, but the wood underneath often tells the real story.
One of the biggest clues is how the paint is failing. Small hairline cracks usually point to aging paint, while thick curling flakes often indicate multiple paint layers losing adhesion. If the paint lifts easily with a scraper, moisture may have weakened the bond underneath. In older homes, decades of repainting can create paint buildup so thick that trim details practically disappear under the layers. Restoration experts regularly point out that carved moldings and decorative trim suffer badly when repeated coats pile up over time.
Signs the Wood Surface Is Still Healthy
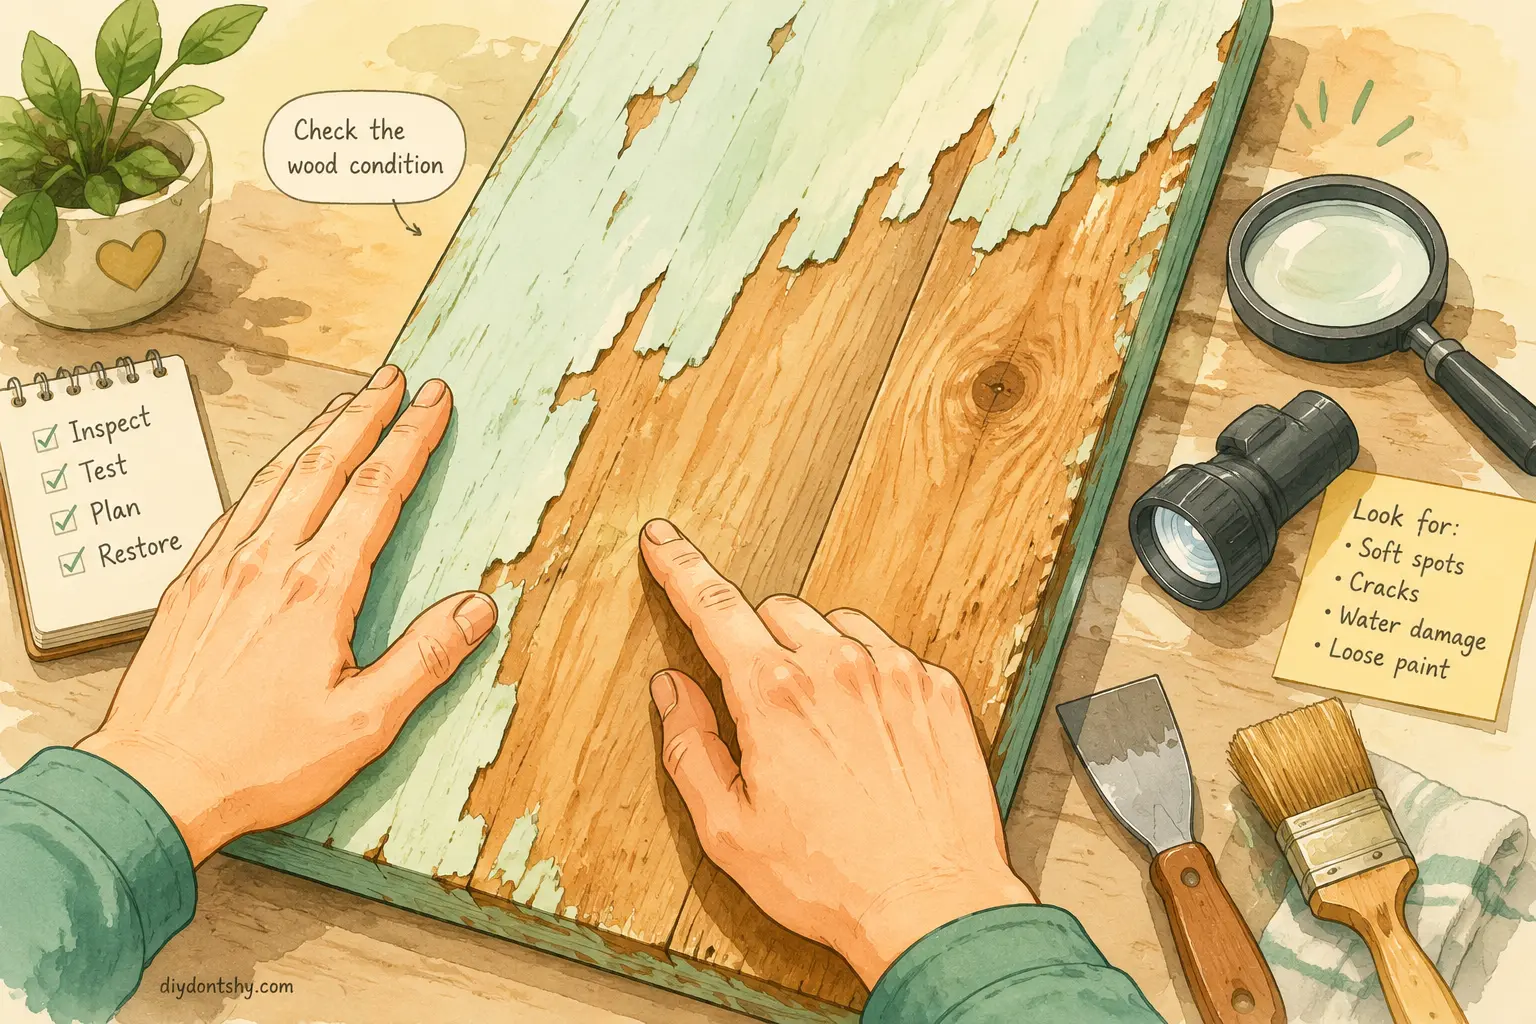
Healthy wood feels solid and dry. When you press gently with a screwdriver or fingernail, the surface should resist indentation. The grain should remain firm without crumbling or flaking apart. Minor surface cracks are common and usually repairable with filler after paint removal.
If the wood underneath remains smooth and structurally sound, you often do not need aggressive stripping. Light sanding and selective scraping may be enough to prepare the surface for refinishing. That saves time and reduces the risk of damaging the wood grain.
When the Wood Needs Major Restoration
Sometimes the paint is hiding much bigger problems. Rot, mildew, moisture damage, and insect activity can all exist beneath old finishes. Experts recommend checking for musty smells, warping, or soft spots before removing paint because severely damaged wood may need replacement instead of restoration.
This is especially important with outdoor wood like decks, window frames, or porch railings. Stripping paint from rotted wood is like polishing rusted metal; it may look better briefly, but the structural weakness remains underneath.
Figuring Out Whether the Wood Needs Stripping or Sanding
This is where many DIY projects go wrong. People often assume sanding is always the easiest option. In reality, sanding is best for surface preparation or thin paint layers, not necessarily for full paint removal. Thick, chipped coatings can clog sandpaper quickly and create uneven surfaces that look worse afterward.
The smartest approach is evaluating how deeply the paint problem goes. If only isolated areas are peeling while most of the finish remains stable, spot sanding may work perfectly. But if the paint is bubbling, separating in sheets, or covering intricate wood details, stripping becomes the better choice.
Situations Where Sanding Works Best
Sanding works well when:
| Condition | Best Approach |
|---|---|
| Thin paint layers | Sanding |
| Smooth flat wood | Orbital sanding |
| Minor peeling | Spot sanding |
| Prep before repainting | Fine sanding |
| Light surface imperfections | Hand sanding |
Experts recommend starting with 80-grit sandpaper, moving to 150-grit, then finishing with 220-grit for smooth results. The process should always follow the wood grain to avoid scratches that become painfully obvious after staining.
Hand sanding gives better control for delicate furniture and trim. Power sanders speed up large projects but can gouge softwoods like pine if handled aggressively. According to recent woodworking discussions, intricate trim and carved moldings are especially poor candidates for heavy machine sanding because the tools cannot evenly reach detailed surfaces.
When Full Paint Stripping Is Necessary
Full stripping becomes necessary when multiple layers of paint hide the wood entirely or when peeling extends across large sections. Chemical strippers and heat-based removal methods work better because they soften paint instead of grinding it away mechanically.
This matters especially for antique furniture or historic trim. Sanding thick paint buildup can flatten edges, erase decorative details, and permanently change the appearance of the wood.
Checking for Lead Paint Before Starting
This step gets ignored far too often, and it can create serious health risks. Paint used before 1978 frequently contained lead, especially in older homes. Once sanded, lead paint releases toxic dust that spreads easily through the air and settles into carpets, furniture, and ventilation systems.
Recent discussions among restoration experts strongly discourage sanding lead paint directly. Heat guns used at controlled temperatures, infrared stripping tools, or chemical strippers are generally considered safer alternatives because they minimize airborne dust.
Why Old Paint Can Become Dangerous
Lead exposure is especially dangerous for children and pregnant women. Even small amounts of contaminated dust can create long-term health concerns. That is why professionals often recommend using lead test kits before beginning restoration work on older painted wood.
The danger increases dramatically once power sanding begins. Fine dust spreads invisibly, making cleanup difficult without proper HEPA filtration and protective equipment.
Safe Handling and Ventilation Tips
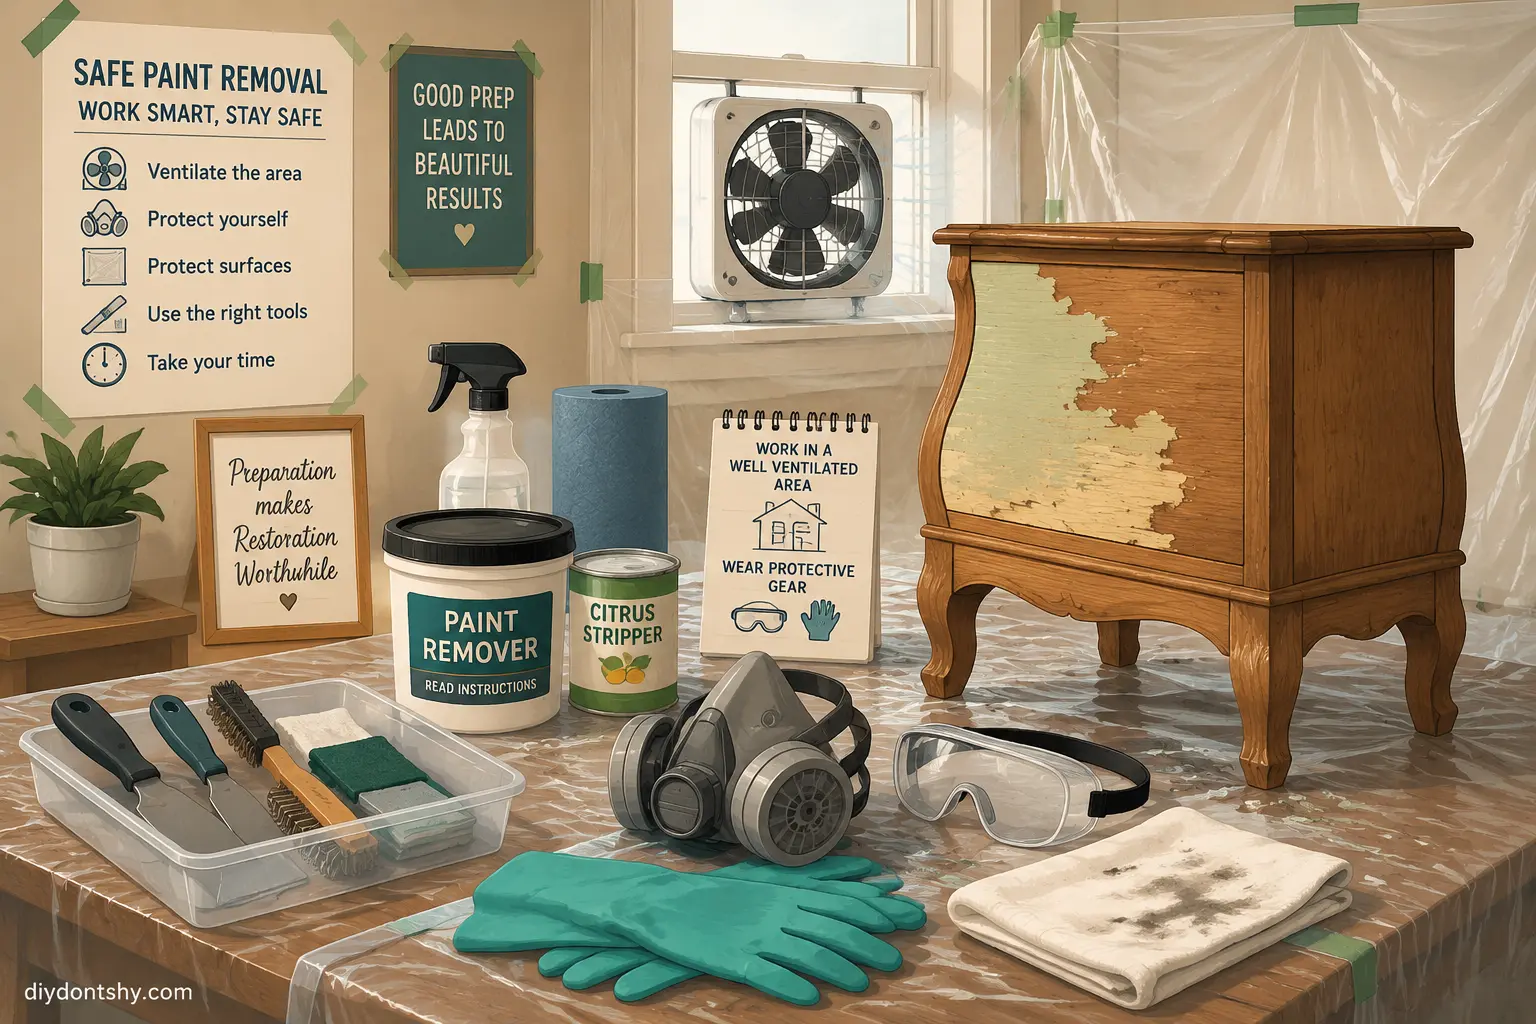
If there is any possibility of lead paint:
- Wear an N95 or higher-rated respirator
- Use gloves and eye protection
- Seal nearby areas with plastic sheeting
- Avoid dry sanding
- Work outdoors or in highly ventilated areas
- Use HEPA vacuums for cleanup
Some experienced DIY restorers even recommend assuming older paint contains lead if testing is unavailable. That cautious mindset prevents dangerous shortcuts.
Safe Ways to Loosen Flaking Paint Without Damaging the Surface
Removing chipped paint safely is more about patience than brute force. Think of it like peeling sunburned skin; forcing it aggressively only tears what is underneath. Wood behaves similarly when paint removal becomes too rough.
The first step is loosening paint carefully without gouging the grain. Plastic scrapers work well for fragile surfaces because they reduce scratching risk. Metal scrapers remove paint faster but require a lighter touch.
Using Scrapers Correctly
The angle matters more than people realize. Hold the scraper almost parallel to the surface and let the tool slide under loose paint rather than stabbing into it. Sharp scrapers cut cleaner, but dull ones tend to chatter and dig into wood fibers.
Working with the grain helps preserve smoothness. Short controlled strokes usually work better than aggressive long scraping motions.
Heat Guns Versus Chemical Strippers
Both methods soften paint effectively, but each has strengths and weaknesses.
| Method | Advantages | Drawbacks |
|---|---|---|
| Heat Gun | Fast, less chemical mess | Risk of scorching wood |
| Chemical Stripper | Great for detail work | Messy cleanup |
| Infrared Stripper | Safer for old paint | Slower process |
| Citrus-Based Stripper | Lower odor | May require multiple applications |
Recent DIY restoration discussions frequently mention citrus-based removers like Citristrip for delicate woodwork because they stay wet longer and soften multiple paint layers gradually.
Heat guns can work beautifully when used carefully. Too much heat, though, can scorch the wood or vaporize dangerous compounds from lead paint. Some restorers intentionally keep heat tools around 500°F to reduce risk.
Choosing Tools That Work Best on Detailed Woodwork
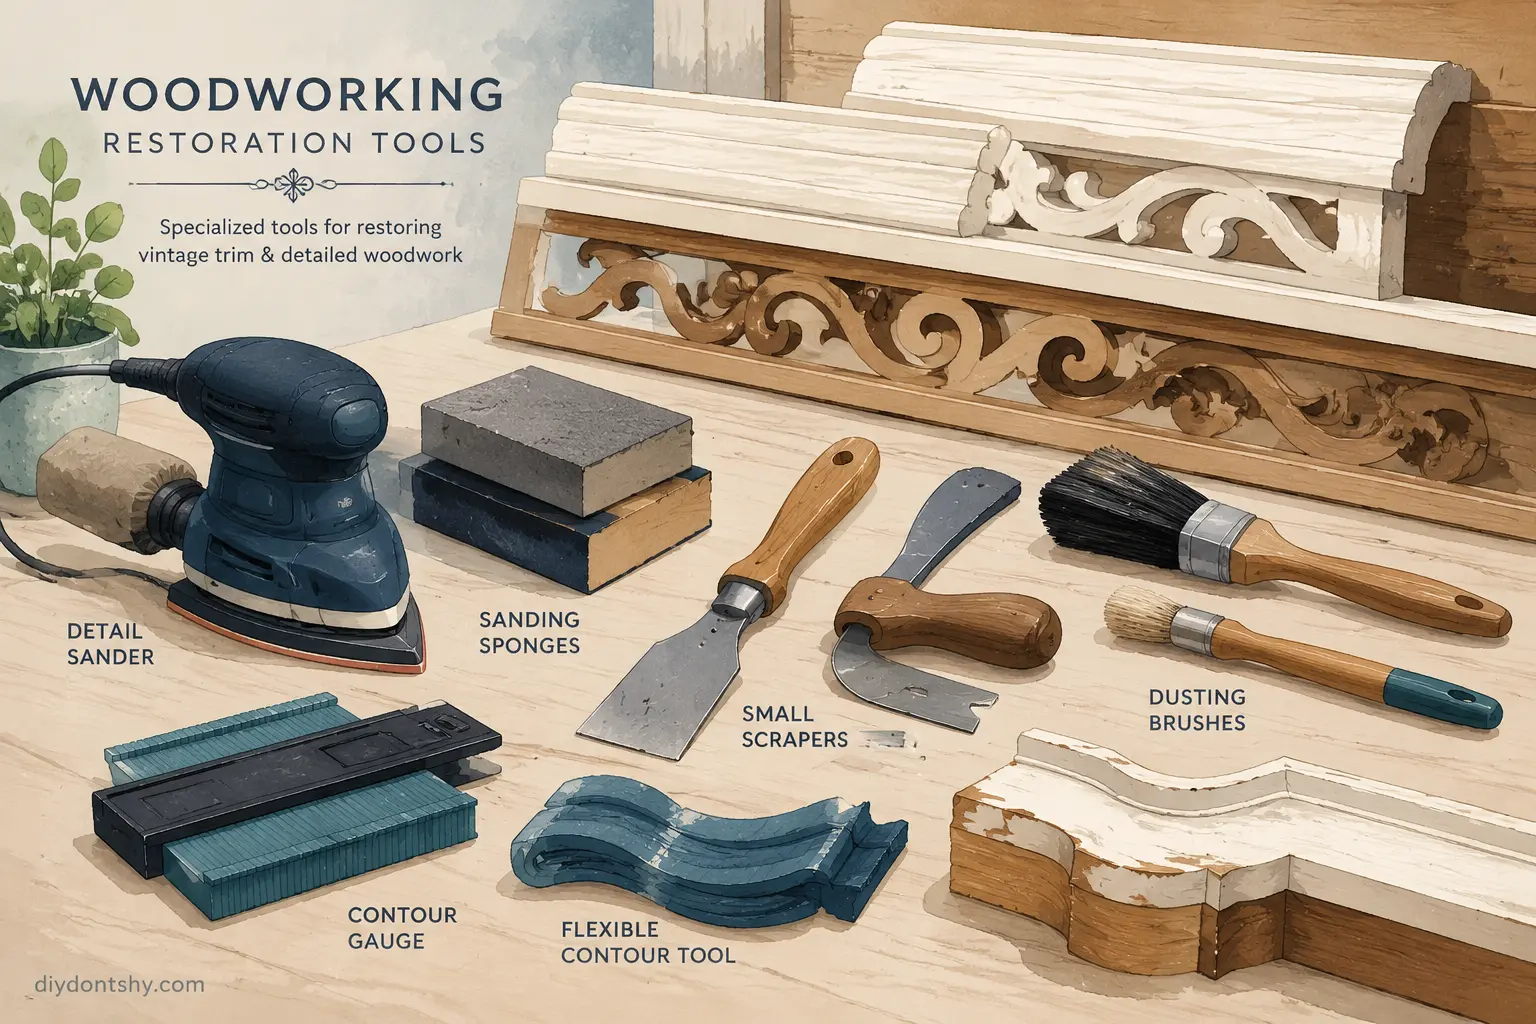
Flat boards are easy. Decorative wood trim is where patience gets tested. Corners, grooves, carvings, and molding profiles trap old paint like dried frosting in cake decorations. Standard sanders cannot reach these areas effectively.
That is why professionals often rely on specialized hand tools instead of brute-force sanding.
Tools for Corners, Curves, and Trim
Detailed woodwork benefits from:
- Detail sanders
- Flexible sanding sponges
- Dental picks
- Small contour scrapers
- Steel wool
- Nylon brushes
Many experienced restorers use dental tools to clean narrow crevices without damaging delicate carvings. It sounds excessive until you realize how easily decorative trim can splinter under aggressive scraping.
Flexible sanding pads also adapt better to curved surfaces than rigid sanding blocks.
Mistakes That Damage Decorative Wood
The most common mistake is over-sanding edges. Sharp trim profiles become rounded quickly under power sanders. Once those crisp details disappear, they cannot truly be restored.
Another common issue is excessive pressure. Many people assume harder sanding removes paint faster, but it often leaves uneven valleys and scratches across the grain.
Dealing With Multiple Layers of Old Paint
Old wood trim sometimes looks like geological history trapped in color form. White over green over beige over primer; every decade leaves another layer behind. Thick paint buildup does more than look ugly. It hides details, causes cracking, and prevents smooth refinishing.
According to restoration experts, chemical stripping usually works best for heavy paint buildup because sanding alone becomes inefficient and damaging.
Why Thick Paint Buildup Becomes a Problem
Heavy paint layers lose flexibility over time. As wood expands and contracts, the outer paint layers cannot move evenly anymore. That tension creates widespread cracking and chipping.
Doors and windows often stick because thick paint layers build up around edges. Decorative moldings also lose definition as repeated repainting fills grooves and carvings.
Best Removal Strategies for Heavy Layers
The most effective approach usually combines methods:
- Scrape loose paint first
- Apply stripper to stubborn areas
- Remove softened paint carefully
- Follow with light sanding
- Clean residue thoroughly
Trying to sand through ten layers of old paint alone is like digging a swimming pool with a spoon. Technically possible, painfully inefficient.
What Most People Overlook Before Sanding Begins
Most sanding problems actually start before the sander ever touches the wood. Dirt, grease, wax, and loose debris clog abrasives quickly and create uneven scratches.
Professionals almost always clean surfaces thoroughly first, even when the wood looks clean.
Cleaning the Surface First
Mild soap, degreasers, or specialized wood cleaners remove contaminants that interfere with sanding. Recent painting guides also stress removing leftover chemical stripper completely before sanding begins because residue can damage finishes later.
Skipping cleaning is similar to washing a car with muddy water. The surface only becomes dirtier and rougher during the process.
Selecting the Correct Sandpaper Grit
Choosing grit is like choosing the right knife in a kitchen. Too aggressive and you destroy the material. Too fine and nothing happens efficiently.
| Grit | Purpose |
|---|---|
| 60–80 | Heavy paint removal |
| 100–150 | Surface smoothing |
| 180–220 | Finish preparation |
Many beginners stay too long with coarse grit, which leaves scratches visible under paint or stain later.
Cleaning and Smoothing the Wood for Refinishing
Once the paint disappears, the real condition of the wood finally becomes visible. Tiny gouges, dents, nail holes, and rough grain suddenly stand out clearly. This is the stage where good restoration projects separate themselves from rushed DIY jobs.
Repairing Gouges and Cracks
Wood filler works well for shallow damage, especially on painted finishes. Stain-grade projects require more caution because fillers absorb stain differently than real wood.
Apply filler slightly proud of the surface, allow full drying time, then sand smooth gradually.
Removing Dust and Residue Completely
Dust is the silent enemy of smooth finishes. Even microscopic particles trapped under paint or stain create roughness.
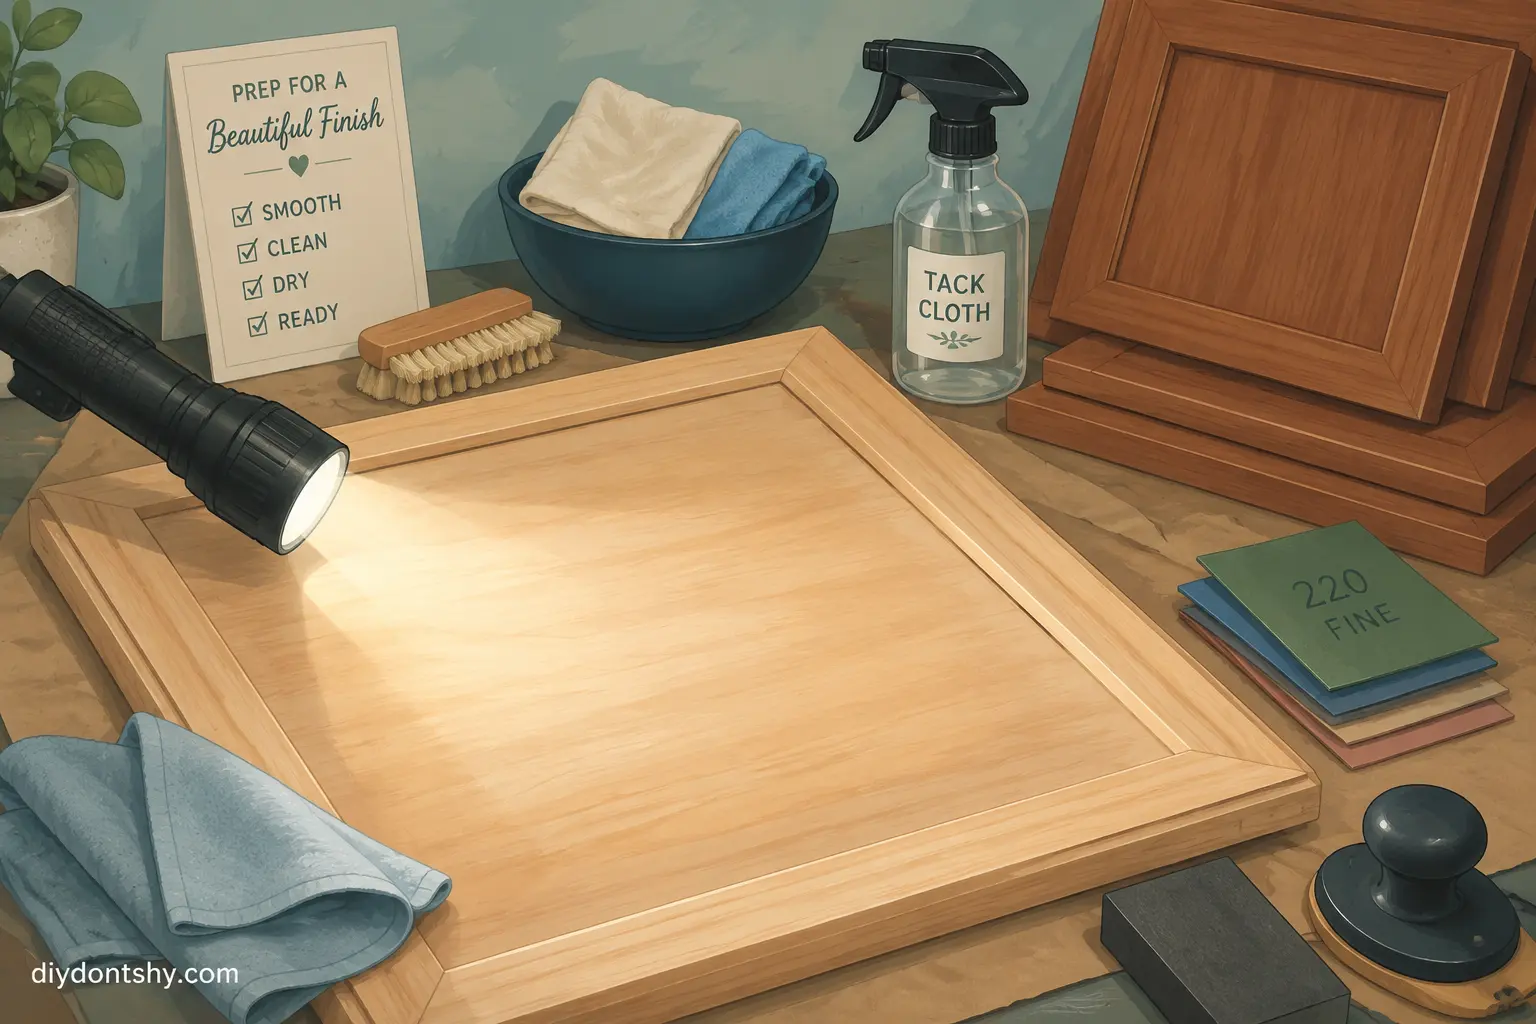
Professionals often vacuum first, wipe with microfiber cloths, then finish with tack cloths before applying primer or stain.
How to Spot Areas That Still Need Attention
Your eyes can miss flaws that your hands immediately notice. That is why experienced woodworkers constantly run fingertips across surfaces during prep work.
Recognizing Hidden Paint Residue
Residual paint often hides in corners, pores, or end grain. Under bright lighting, these spots usually appear duller or shinier than surrounding wood.
Some pigmented finishes even soak into the wood itself, making full removal impossible without damaging the grain.
Testing Surface Smoothness Properly
A simple trick is shining a flashlight sideways across the wood. Low-angle light exaggerates imperfections, scratches, and leftover paint ridges.
If the surface feels uneven under your palm, the final finish will usually exaggerate the problem even more.
Preparing the Surface for Fresh Paint or Stain
At this stage, preparation matters just as much as the final coating itself. Beautiful finishes depend on smooth, clean, stable surfaces underneath.
Priming Bare Wood Correctly
Primer seals porous wood and improves paint adhesion. Without primer, bare wood often absorbs paint unevenly, causing blotchy results.
For stain projects, wood conditioner may help softwoods absorb color more evenly.
Getting the Best Finish From Paint or Stain
Always follow the grain during application. Thin even coats outperform thick heavy applications nearly every time.
Temperature and humidity also matter more than people expect. High humidity slows curing and can trap moisture beneath finishes.
The final finish should feel smooth, not sticky or gritty. When properly prepared, wood almost seems to glow beneath fresh stain or paint because the surface reflects light evenly across the grain.
Conclusion
Removing chipped paint from wood is part craftsmanship, part detective work. Every project tells you something different through the condition of the paint, the hardness of the wood, and the layers hidden underneath. Some surfaces only need gentle sanding. Others demand careful stripping and restoration. The trick is understanding which method preserves the wood instead of fighting against it.
The biggest mistakes usually come from rushing. Aggressive sanding, excessive heat, skipped cleaning, and ignoring possible lead paint create problems that are much harder to fix later. Careful preparation, patient removal, and gradual smoothing always produce better results than brute force.
When done properly, stripped wood reveals details and grain patterns that may have been hidden for decades. That transformation is what makes the entire process worth the effort.
FAQs
1. Is sanding or stripping better for chipped paint on wood?
Sanding works best for thin or lightly damaged paint layers, while stripping is usually better for thick, cracked, or multi-layered paint buildup.
2. Can I remove chipped paint from wood without chemicals?
Yes. Scrapers, heat guns, and sanding methods can remove paint without chemicals, although stubborn multi-layer paint often comes off faster with a stripper.
3. How do I know if old paint contains lead?
Homes built before 1978 may contain lead paint. Lead test kits are inexpensive and strongly recommended before sanding or scraping old painted surfaces.
4. What grit sandpaper should I start with?
Most projects begin with 80-grit sandpaper for removal, then move to 150-grit and finally 220-grit for smoothing and finishing.
5. Why does paint keep peeling after repainting?
Peeling usually happens because the surface was not cleaned, sanded, or primed correctly before repainting. Moisture problems can also cause recurring paint failure.

Ahmed Elhor is an Egyptian SEO specialist, pharmacist, and copywriter based in Canada. He combines strong research skills with search focused writing to create clear, helpful content that answers real questions and ranks effectively in search engines.
With a passion for practical DIY ideas, homemade solutions, and creative projects, Ahmed focuses on producing easy to follow guides that are simple, affordable, and useful for everyday life. His work blends creativity with structure, helping readers turn basic materials into meaningful results.