How to Paint Ornaments with Acrylic Paint for Handmade Holiday Decor
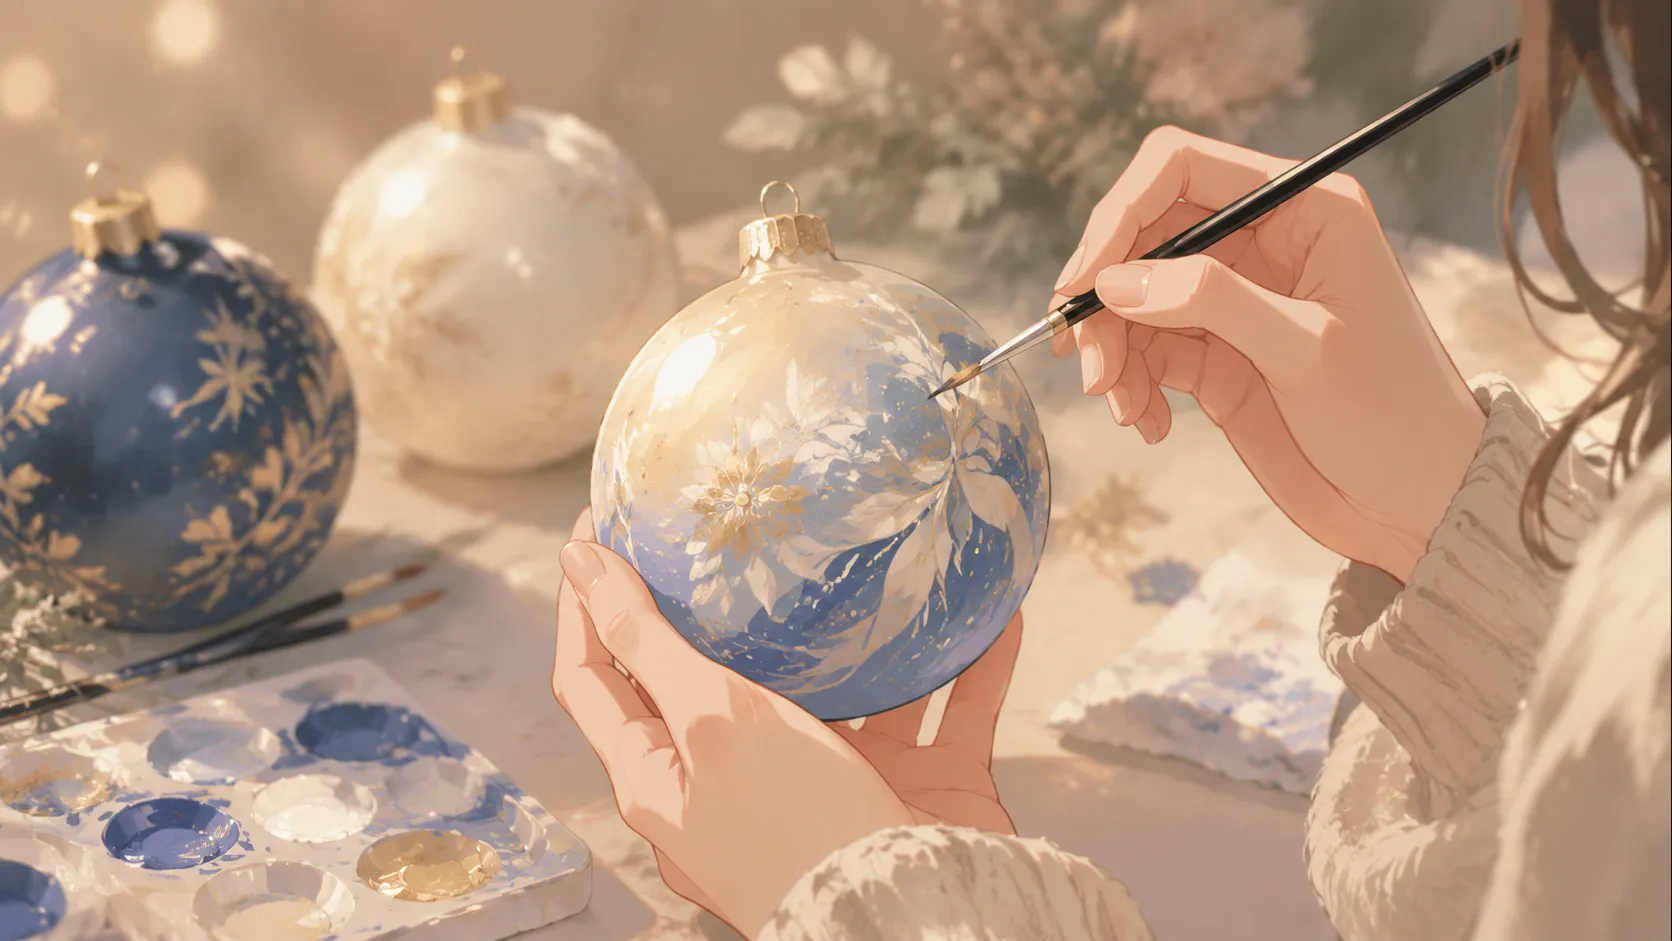
Painting ornaments with acrylic paint feels a little like turning ordinary objects into tiny pieces of magic. One minute you’re holding a plain glass bulb, wooden star, ceramic bell, or plastic ornament, and the next, you’re creating something that looks like it belongs in a boutique holiday shop. The best part? You don’t need to be a professional artist to make ornaments that look beautiful, personal, and surprisingly high-end. Acrylic paint is forgiving, versatile, affordable, and beginner-friendly, which makes it one of the most popular choices for DIY holiday décor and handmade gifts.
Handcrafted ornament trends have exploded recently, especially vintage-inspired decorations, matte finishes, personalized designs, and textured metallic effects. Recent décor trend reports also show that nostalgic and handmade ornament styles are becoming more popular than mass-produced matching decorations. People are craving decorations with personality and warmth rather than factory-perfect uniformity. That’s exactly why acrylic-painted ornaments are having such a moment right now.
Before diving into painting techniques, layering tricks, glitter effects, and sealing methods, it helps to understand how ornament painting actually works. Different materials react differently to paint. Some surfaces absorb color quickly, while others repel it. Some paints dry smoothly, while others streak if layered incorrectly. Knowing how to prepare, paint, and protect your ornaments makes the difference between a decoration that chips after one season and one that lasts for years.
Contents
Why Acrylic Paint Works So Well for Ornaments
Acrylic paint has become the go-to choice for ornament painting because it combines flexibility with durability. Unlike watercolor, which can fade or run easily, acrylic paint adheres to a wide range of surfaces and dries into a stable finish. Unlike oil paint, it dries quickly and doesn’t require complicated solvents or cleanup. That means beginners can start painting ornaments almost immediately without feeling intimidated by professional-level materials.
One of the biggest advantages of acrylic paint is how adaptable it is. You can create soft matte finishes, glossy luxury effects, distressed rustic looks, or sparkling holiday glam using the same basic paint type. Modern ornament trends are leaning heavily toward personalized textures and layered handcrafted finishes rather than perfectly flat factory coatings. Acrylic paint makes those textured, artisanal styles much easier to achieve because it layers beautifully and holds detail exceptionally well.
Another reason acrylic paint works so effectively is its fast drying time. While that may sound simple, it changes everything during ornament painting. You can build multiple layers in a single session instead of waiting days between coats. This makes blending colors, adding details, and correcting mistakes far less frustrating. Fast drying also reduces smudging risks, which is especially important when working with curved surfaces like round ornaments.
Paint finish selection also matters more than most people realize. Gloss acrylic paint reflects holiday lights beautifully and gives ornaments a polished appearance. Matte paint creates a softer, modern designer look that has become increasingly popular in current décor trends. Metallic acrylics add richness and depth without needing additional foil or specialty materials. Combining finishes often creates the most visually interesting ornaments because contrast naturally draws the eye.
Preparing Ornament Surfaces Before Painting
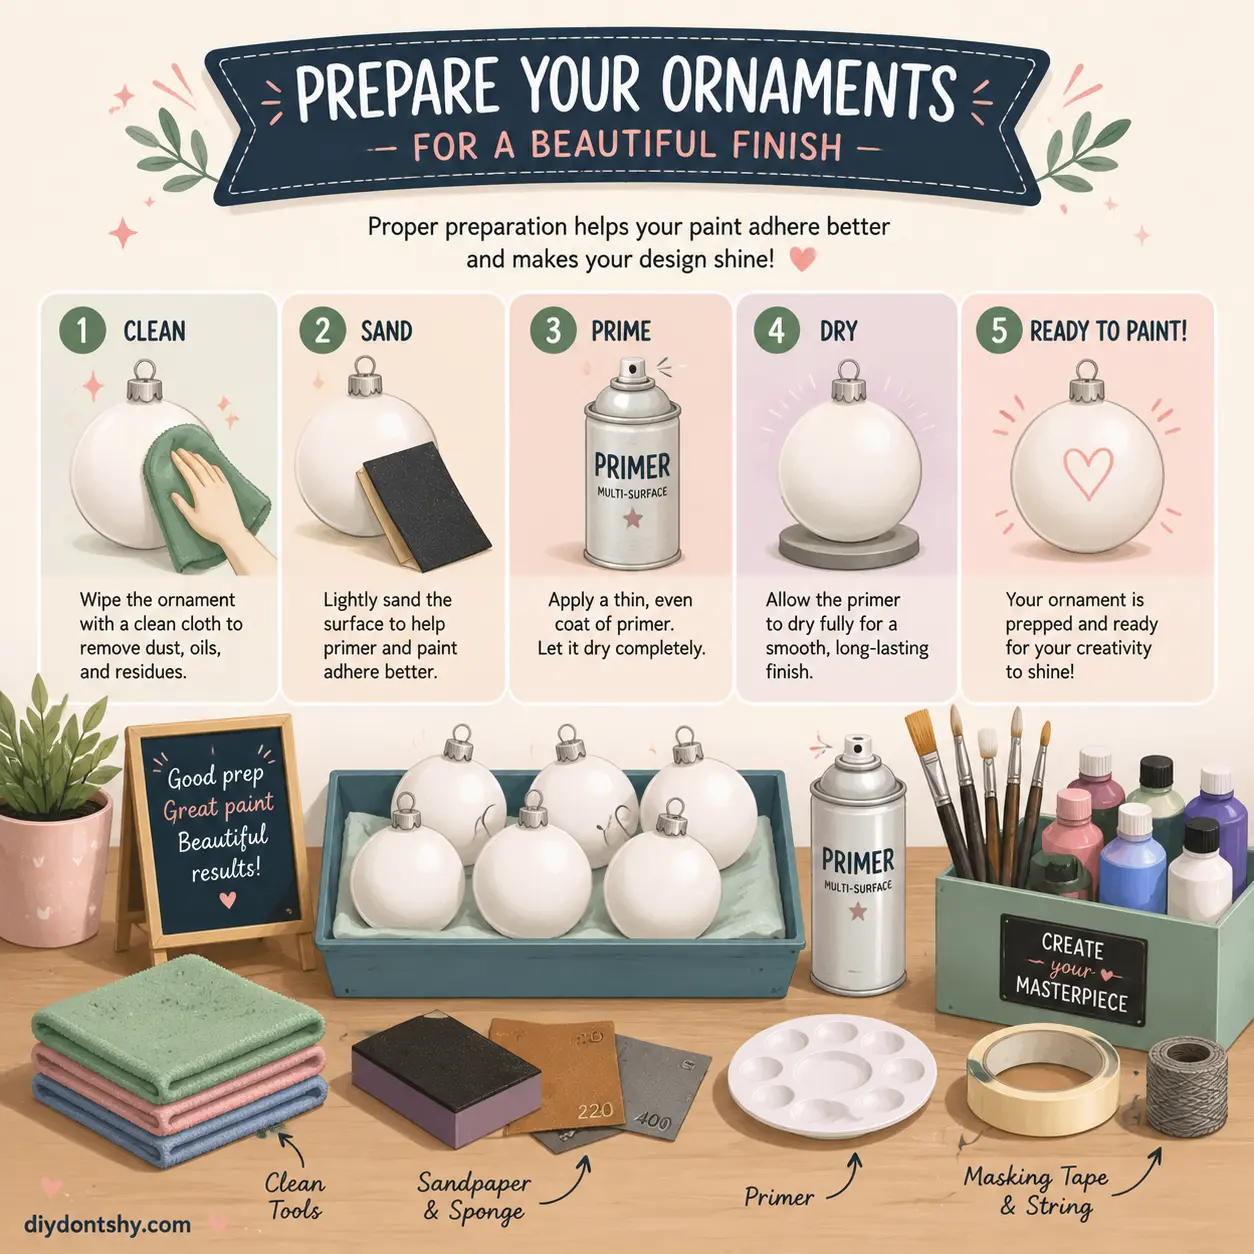
Preparation is the secret ingredient that separates amateur-looking ornaments from professional-looking handmade decorations. Skipping prep work might save time initially, but it often leads to peeling paint, streaking, bubbling, or uneven coverage later. Think of preparation like building a foundation for a house. If the base isn’t stable, the beautiful details on top won’t last very long.
The first step is cleaning the ornament surface thoroughly. Glass ornaments often carry invisible oils from fingerprints or manufacturing residue. Plastic ornaments may have glossy coatings that resist paint. Wooden ornaments can contain dust particles trapped in the grain. Ceramic surfaces sometimes have polishing residues that interfere with adhesion. Washing ornaments gently with mild soap and warm water removes contaminants that could prevent smooth painting.
After cleaning, sanding becomes important for certain materials. Wood ornaments usually benefit from light sanding because it smooths rough fibers and helps paint spread evenly. Plastic ornaments often need gentle sanding with fine-grit sandpaper to reduce slipperiness and create texture for the paint to grip. Even glossy ceramic ornaments sometimes benefit from slight surface roughening before priming.
Priming is another step many beginners ignore, but it dramatically improves paint performance. A primer acts like double-sided tape between the ornament and the acrylic paint. White primer creates brighter, more vibrant colors, while gray or black primers deepen metallic tones and create moodier aesthetics. For glass ornaments especially, specialty primers help prevent paint from scratching off later.
A smart preparation routine usually includes:
| Step | Purpose | Best For |
|---|---|---|
| Cleaning | Removes oils and dust | All materials |
| Sanding | Improves paint grip | Plastic, wood |
| Priming | Enhances adhesion and color | Glass, ceramic, plastic |
| Drying | Prevents trapped moisture | All materials |
Good preparation may not feel exciting, but it creates smoother brushwork, stronger durability, and cleaner details later in the process.
Acrylic Paint Techniques That Work on Different Materials
Different ornament materials behave almost like different personalities. Some cooperate immediately, while others demand patience and specific techniques. Learning how each surface responds to acrylic paint helps avoid frustration and wasted supplies.
Glass ornaments are often the trickiest because their slick surface naturally resists paint. Thin coats work best here. Thick paint tends to slide or pool unevenly, especially on curved surfaces. Many experienced crafters prefer dabbing paint onto glass using makeup sponges rather than brushes because it minimizes streaking. Sponge application creates soft, even coverage and reduces visible brush marks dramatically.
Wood ornaments are usually the easiest surface for beginners. Wood absorbs acrylic paint naturally, allowing colors to appear rich and vibrant quickly. The challenge with wood is preventing blotchiness. Thin coats layered gradually work far better than one heavy application. Dry brushing techniques also create beautiful rustic textures on wood surfaces, especially for farmhouse or vintage-inspired holiday themes.
Ceramic ornaments offer a middle ground between glass and wood. They hold paint well but can show brush marks if overloaded. Using soft synthetic brushes and diluted acrylic paint creates smoother finishes on ceramic surfaces. Some artists even slightly dampen brushes before painting ceramics to help the paint glide more evenly.
Plastic ornaments often require the most patience because paint adhesion can be inconsistent. Using a plastic-friendly primer changes everything. Once primed properly, acrylic paint works beautifully on plastic and can mimic expensive glass or ceramic finishes surprisingly well.
One of the most useful techniques across all materials is layering translucent color washes instead of applying opaque coats immediately. Think of it like building flavor in cooking rather than dumping all spices into a dish at once. Multiple delicate layers create depth, richness, and smoother results that feel more refined and handmade.
Building Layers Without Streaks or Clumping
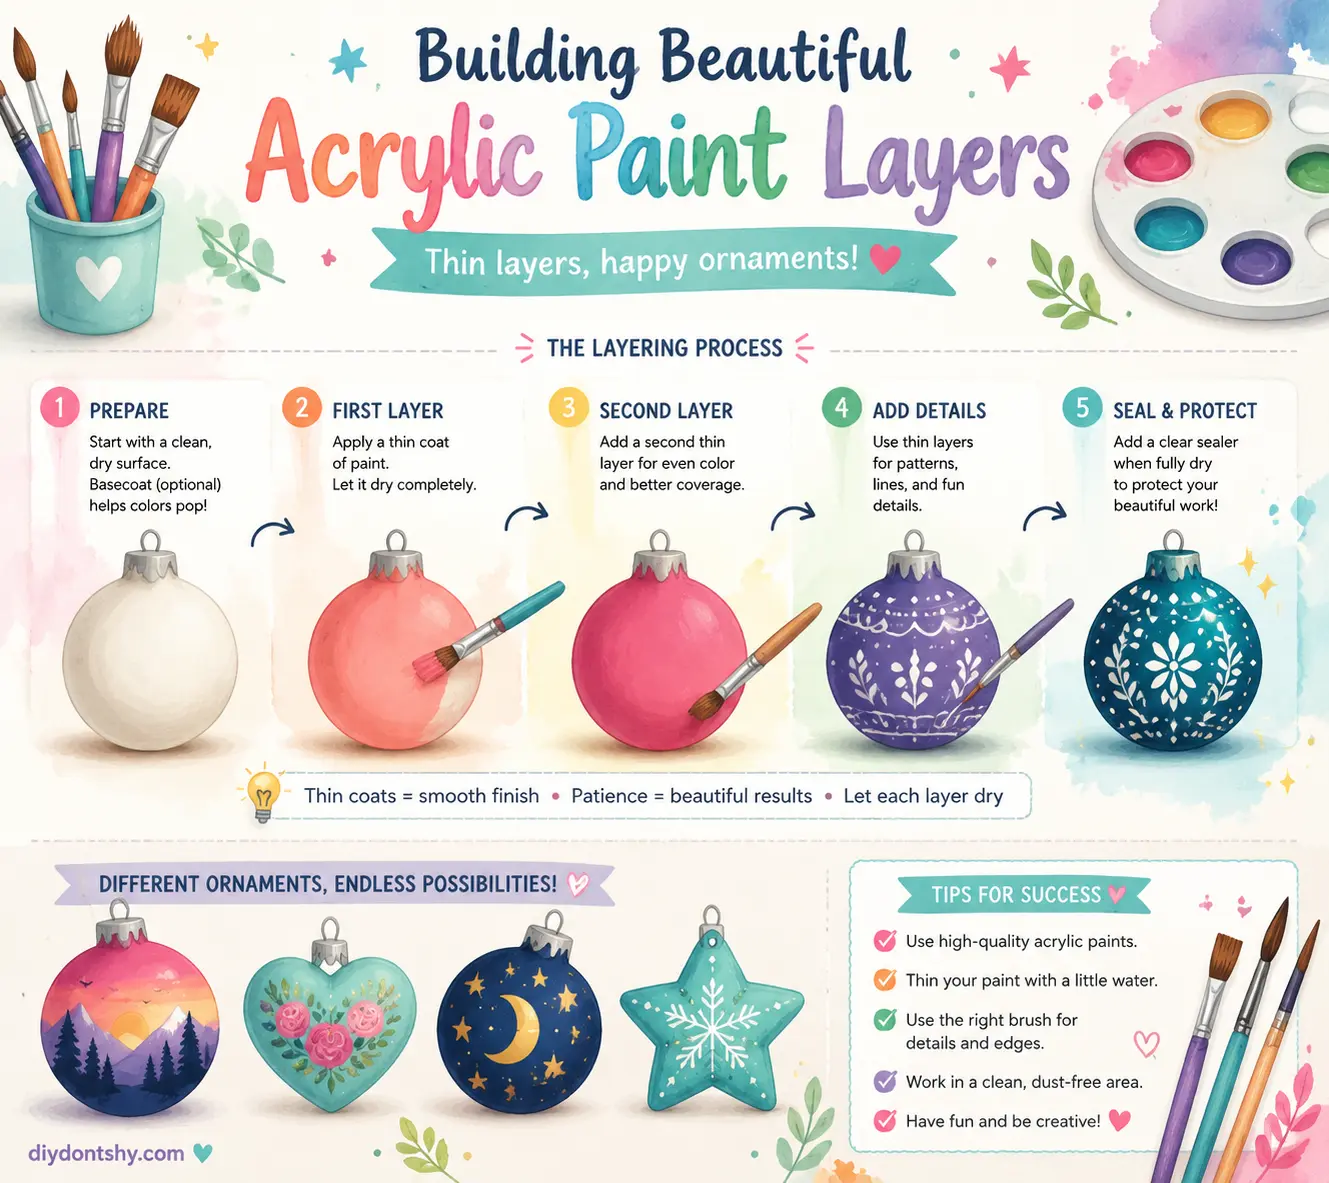
Nothing ruins a beautiful ornament faster than thick, clumpy paint. Acrylic paint dries quickly, which is helpful in many ways, but it also means mistakes can become permanent fast if you overload the surface. Learning how to build layers correctly creates cleaner, smoother, and more professional-looking decorations.
The biggest mistake beginners make is using too much paint at once. Thick coats seem faster, but they often dry unevenly and trap moisture underneath the surface. That trapped moisture can eventually crack, bubble, or peel. Thin layers dry evenly and create stronger adhesion. It’s a little like icing a cake. Several smooth layers always look better than one giant messy slab.
Using slightly diluted acrylic paint helps reduce streaks dramatically. A few drops of water or acrylic medium create smoother brush movement and allow the paint to level itself more naturally. This is especially important on curved ornaments where gravity can cause pooling.
Drying time between layers matters too. Even if paint feels dry to the touch, deeper layers may still be curing underneath. Waiting at least 20–30 minutes between coats prevents lifting or texture problems. Rushing often causes tacky surfaces and visible brush drag.
Dry brushing is one of the most underrated ornament techniques. Instead of loading the brush fully, you remove most paint before lightly dragging the brush across the surface. This creates weathered textures, snowy effects, rustic woodgrain looks, and vintage charm. Sponge layering also works beautifully for soft gradients and blended backgrounds.
Here are some effective anti-streak strategies:
- Use soft synthetic brushes instead of stiff bristles
- Apply paint in thin directional strokes
- Rotate ornaments while drying
- Avoid repainting partially dried areas
- Work under good lighting to catch uneven spots early
Handmade ornaments look best when they have depth rather than perfectly flat color. Layering slowly builds that visual richness naturally.

Adding Metallic, Glitter, or Matte Effects Creatively
Special finishes transform simple ornaments into eye-catching decorations that feel luxurious and artistic. Metallics, glitter accents, and matte textures each create different emotional effects, almost like choosing different moods for your holiday décor.
Metallic acrylic paints have become especially trendy in recent ornament designs because they reflect light beautifully without feeling overly flashy. Gold, champagne bronze, antique silver, and copper are especially popular for vintage-inspired decorations. Metallics work best when layered selectively rather than covering the entire ornament. Highlighting edges, raised details, or painted patterns creates elegance without overwhelming the design.
Glitter can easily become messy or childish if overused, but controlled glitter placement creates incredible dimension. One of the smartest techniques is mixing fine glitter directly into clear acrylic medium rather than dumping loose glitter onto wet paint. This creates sparkle with much better control and durability. Glitter gradients also look stunning when concentrated heavily at the top or bottom of an ornament and faded gradually outward.
Matte finishes are dominating modern holiday aesthetics because they feel softer and more sophisticated than ultra-glossy coatings. Recent design trends show growing interest in muted palettes, natural textures, and understated elegance. Matte ornaments pair especially well with minimalist Scandinavian-inspired holiday themes.
Combining finishes often creates the strongest visual impact. A matte black ornament with metallic gold stars immediately feels elegant and modern. A frosted matte white ornament with subtle silver glitter resembles fresh snow. Rustic wooden ornaments with brushed bronze accents feel warm and nostalgic.
Texture also matters enormously. Some artists intentionally leave visible brushstrokes because handmade texture is increasingly valued in modern craft aesthetics. Perfectly smooth isn’t always the goal anymore. Sometimes those tiny imperfections are exactly what make handmade ornaments feel authentic and memorable.
Fine Detail Ideas That Make Ornaments Feel Handmade
The smallest details often create the biggest emotional impact. Tiny brush accents, delicate patterns, personalized names, and subtle textures make ornaments feel deeply personal rather than mass-produced. These details transform decorations into keepsakes.
Lettering is one of the most popular ornament personalization techniques because it instantly connects the decoration to a memory or person. Hand-painted names, wedding dates, baby milestones, or short phrases create sentimental value that lasts for years. Using ultra-fine detail brushes or acrylic paint markers helps maintain clean lettering without shaky edges.
Miniature patterns also elevate ornament design beautifully. Snowflakes, pine branches, stars, plaid textures, botanical motifs, and tiny dots all add visual interest without overwhelming the ornament. Repeating patterns create rhythm and balance, which naturally feels pleasing to the eye.
Vintage-inspired ornament styles are especially popular right now. Handcrafted decorations with distressed finishes, muted colors, antique metallics, and nostalgic imagery are replacing perfectly coordinated store-bought sets. Slight imperfections actually enhance the charm because they reinforce the handmade quality.
Minimalist designs are trending too, especially in modern home décor. Simple matte ornaments with tiny gold stars or elegant line art can feel more luxurious than heavily decorated pieces. It’s similar to fashion. Sometimes one beautiful detail creates more impact than excessive embellishment.
Creative detail ideas include:
| Design Style | Detail Ideas |
|---|---|
| Rustic | Distressed paint, faux woodgrain |
| Vintage | Antique metallic edges |
| Minimalist | Tiny stars or line art |
| Whimsical | Hand-painted characters |
| Personalized | Names and milestone dates |
| Nature-Inspired | Pine needles, berries, leaves |
Adding depth through shadows and highlights also makes ornaments look more professional. Even tiny painted shadows beneath lettering or around designs create subtle dimension that tricks the eye into seeing texture.
Sealing the Paint to Prevent Chipping and Scratches
Painting an ornament beautifully means very little if the finish chips off after one holiday season. Sealing protects your hard work from scratches, moisture, fading, and general wear. Think of sealers like invisible armor for your decorations.
Spray sealers are often preferred because they provide even coverage without disturbing painted details. Matte spray sealers preserve soft finishes, while gloss sealers intensify colors and increase shine. Satin finishes offer a balance between the two. Applying several light coats works much better than one heavy spray because thick sealant layers can drip or cloud.
Brush-on sealers provide more control for detailed ornaments, especially when working with glitter or textured surfaces. However, aggressive brushing can sometimes smear delicate paint layers underneath if the paint hasn’t fully cured. Patience matters here. Waiting at least 24 hours before sealing reduces risks significantly.
Waterproof sealers are especially important if ornaments will be stored in humid environments or handled frequently. Acrylic paint itself is somewhat durable, but unsealed surfaces remain vulnerable to scratching over time.
Different finishes create different visual moods:
- Gloss sealer: Rich, reflective, vibrant
- Matte sealer: Soft, modern, elegant
- Satin sealer: Balanced, subtle sheen
One often-overlooked detail is sealing the ornament cap area or hanging hole. These spots experience friction during hanging and storage, which can gradually wear away paint if left unprotected.
A well-sealed ornament can last for many years, becoming part of family traditions and holiday memories instead of ending up chipped and discarded after a single season.
Drying Tips That Help Avoid Smudges
Drying may sound simple, but poor drying habits ruin countless ornament projects every year. Smudging, sticking, uneven curing, and accidental fingerprints usually happen during the drying stage rather than the painting process itself.
The biggest mistake is laying freshly painted ornaments directly onto flat surfaces. Gravity causes pressure points that can flatten paint texture or create sticking. Hanging ornaments while drying is usually the safest option. Many crafters use skewers, wire racks, or suspended string systems to allow full airflow around the ornament.
Temperature and humidity matter more than most people realize. Acrylic paint dries best in moderate temperatures with low humidity. Excessive moisture slows curing and can leave paint tacky for hours. Direct heat, however, can dry the outer layer too quickly while trapping moisture underneath.
Rotating ornaments occasionally during drying also helps prevent drips or pooling, especially when using metallic or diluted paints. Some artists even use slow-turning drying stands for perfectly even finishes.
Patience becomes especially important with layered effects. Glitter mediums, metallic paints, and thick textures often require longer curing times than standard acrylic coats. Touching them too soon can leave fingerprints that permanently disrupt the finish.
Helpful drying strategies include:
- Dry ornaments vertically whenever possible
- Avoid dusty environments
- Keep ornaments separated while curing
- Allow full curing before stacking or storing
- Use fans gently rather than direct heat
Drying properly protects all the creative work you’ve already invested into the ornament.
Seasonal Design Inspiration for Personalized Decorations
Seasonal inspiration is where ornament painting becomes truly exciting because there are endless possibilities. Some people love classic Christmas palettes with red, green, and gold. Others prefer icy winter themes, rustic woodland aesthetics, minimalist neutrals, or playful candy-inspired color schemes.
Current ornament trends strongly favor personalized collections over perfectly matching sets. Instead of buying identical decorations, many decorators now mix handcrafted ornaments that reflect memories, personalities, and individual artistic styles. This creates trees that feel curated and emotionally meaningful rather than showroom-perfect.
Vintage-inspired ornaments are especially popular right now. Mercury-glass effects, antique metallics, distressed textures, and nostalgic motifs all create a sense of warmth and tradition. Soft matte finishes paired with subtle shimmer also dominate modern décor aesthetics.
Nature-inspired themes remain timeless. Pinecones, snowy forests, winter birds, stars, moons, berries, and botanical patterns all work beautifully with acrylic paint. Earthy palettes like sage green, cream, warm beige, muted blue, and terracotta are increasingly replacing overly bright primary colors.
Minimalist Scandinavian-inspired ornaments are another huge trend. These often feature:
- Neutral matte colors
- Clean geometric patterns
- Tiny metallic accents
- Sparse botanical designs
- Handwritten typography
Family milestone ornaments are also deeply meaningful. Personalized ornaments celebrating weddings, new homes, babies, graduations, or anniversaries become treasured keepsakes over time. Even simple designs can hold enormous emotional value when tied to a memory.
The beauty of acrylic ornament painting is that there are no strict rules. Some of the most charming ornaments come from experimentation, unexpected color combinations, and visible handmade imperfections that give each piece character.
Conclusion
Painting ornaments with acrylic paint combines creativity, craftsmanship, and personal storytelling in a way few DIY projects can match. A plain ornament becomes a tiny canvas where color, texture, memories, and personality come together. With the right preparation, layering techniques, and sealing methods, handmade ornaments can look polished enough for gifting while still retaining the warmth and charm that makes handcrafted décor special.
The process itself is also part of the appeal. Mixing colors, adding metallic highlights, experimenting with glitter gradients, or carefully painting tiny details creates a slower, more meaningful holiday experience. In a world full of mass-produced decorations, handmade ornaments stand out because they feel alive with intention and creativity.
As ornament trends continue shifting toward vintage charm, personalized décor, matte textures, and handcrafted aesthetics, acrylic-painted ornaments fit perfectly into modern seasonal decorating. Whether you love rustic farmhouse styles, minimalist Scandinavian themes, nostalgic vintage looks, or playful colorful designs, acrylic paint gives you the flexibility to create ornaments that reflect your own style beautifully.
The most memorable ornaments are rarely the most perfect ones. They’re the ones connected to stories, traditions, experiments, and moments shared while creating them. That’s what makes ornament painting more than just a craft project. It becomes part of the holiday memory itself.
FAQs
1. What type of acrylic paint is best for ornaments?
Multi-surface acrylic paints work best because they adhere well to glass, plastic, ceramic, and wood. Artist-grade acrylics usually provide richer pigmentation and smoother coverage than cheaper craft paints.
2. Do I need to sand ornaments before painting?
Not always, but lightly sanding glossy plastic or ceramic ornaments improves paint adhesion significantly. Wooden ornaments may also benefit from sanding for a smoother finish.
3. How do I stop acrylic paint from streaking on glass ornaments?
Use thin paint layers and apply with a sponge instead of a brush whenever possible. Multiple light coats create smoother coverage than one thick layer.
4. Can I use glitter with acrylic paint?
Yes. Mixing fine glitter into acrylic medium or wet paint works beautifully. Sealing afterward helps prevent glitter fallout and preserves durability.
5. How long should painted ornaments dry before sealing?
Waiting at least 24 hours is ideal. While acrylic paint may feel dry sooner, deeper layers often continue curing underneath the surface.

Kareem Sallam is an Egyptian special writer based in Australia, with a strong interest in practical ideas and creative content that focuses on everyday solutions. He writes clear, engaging articles designed to be easy to follow and useful for a wide range of readers.
His work centers on DIY projects, handmade ideas, simple crafts, and home based creativity. Kareem aims to deliver content that is practical, inspiring, and accessible, helping readers turn simple materials into smart and enjoyable projects.