How to Paint a Door Without Removing It Like a Pro
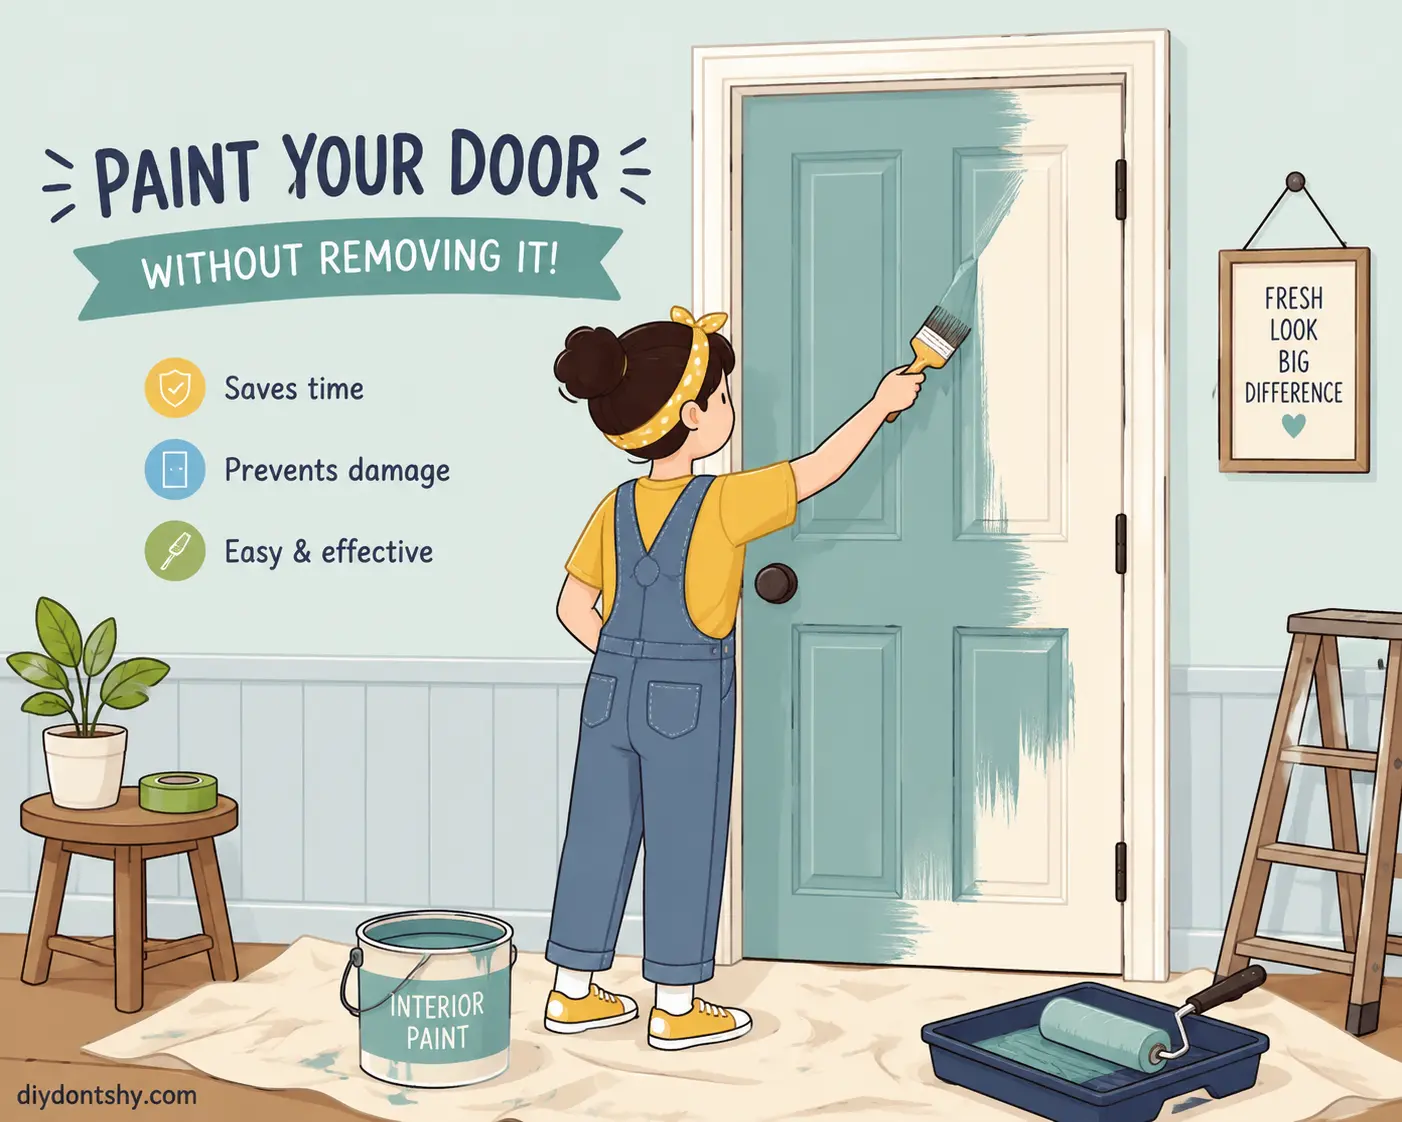
Painting a door without taking it off the hinges sounds simple until you actually start. Suddenly, the hinges are covered in paint, the handle has drips around it, and the door sticks shut like it was glued to the frame. Most DIY painters discover very quickly that doors are one of the trickiest surfaces in the house. They look flat and easy, but doors are filled with edges, grooves, raised panels, and narrow spaces that can trap excess paint faster than you think.
The good news is that you absolutely can get a smooth, professional-looking finish without removing the door. You just need the right preparation, a smart painting order, and techniques that prevent common mistakes before they happen. Professional painters rarely rely on luck. They rely on process. Think of it like cooking a complicated meal. The ingredients matter, but timing and preparation make the real difference.
This guide walks through every stage of painting a door while keeping it attached to the frame. From preparing hinges and handles properly to fixing brush marks and avoiding sticky edges, you’ll learn how to make the finished result look factory-smooth instead of obviously DIY.
Contents
Why Keeping the Door Installed Can Be a Smart Choice
Removing a door sounds like the “proper” way to paint it, but in many homes, it creates more problems than it solves. Older hinges may be difficult to remove, screws can strip easily, and heavy solid-core doors are awkward to handle alone. If you have multiple doors to paint, removing every one can turn a weekend project into an exhausting marathon. Keeping the door installed saves time, reduces setup work, and allows you to paint one section at a time without turning your house into a temporary construction zone.
Another major advantage is alignment. Doors that stay on their hinges remain perfectly positioned within the frame. That means you can immediately see if paint thickness is affecting the fit. When doors are removed and painted separately, some people accidentally apply too much paint along the edges, only to discover later that the door sticks badly when rehung. Leaving the door attached helps you monitor those tight gaps in real time.
Still, attached-door painting only works if you stay organized. Gravity becomes your enemy. Paint naturally wants to collect along edges, corners, and lower panels. This is why many DIY projects end with ugly drips and visible streaks. The secret is learning how to control paint application rather than simply applying more paint for coverage. Thin, even coats almost always beat thick coats, even if they require extra patience.
Professional painters often compare painting doors to icing a cake. If you rush or overload the surface, the finish starts sagging immediately. Controlled layers produce smoother results, cleaner lines, and a finish that actually lasts.
Tools and Materials You Need Before Starting
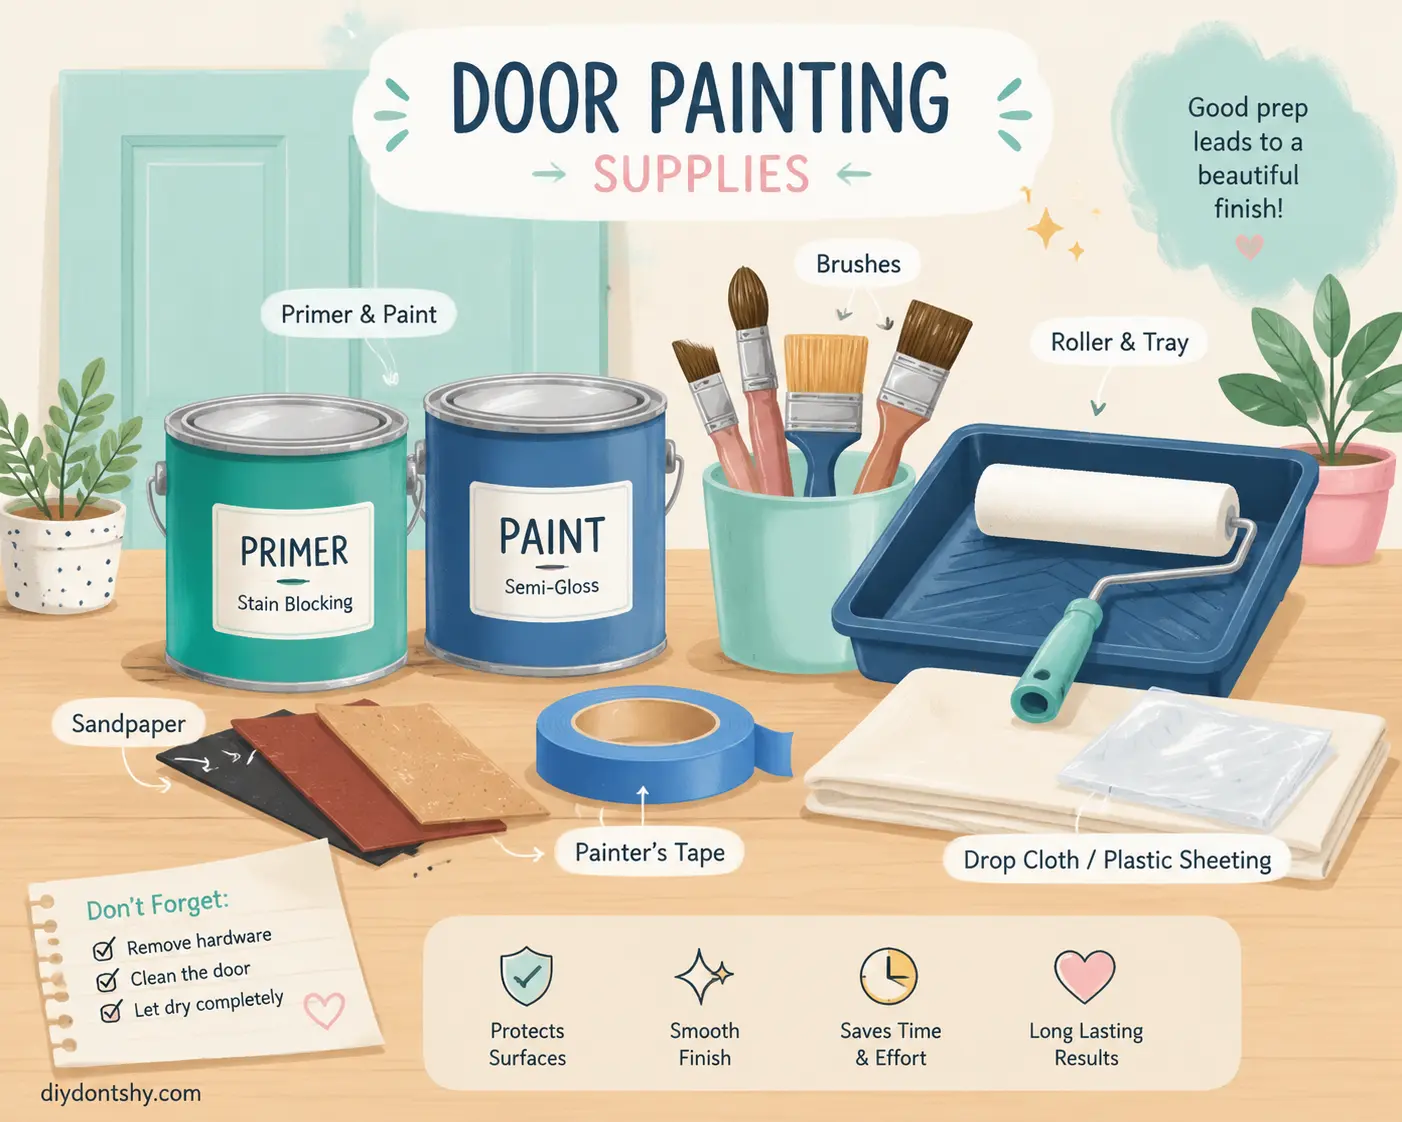
A professional-looking door finish begins long before the first brushstroke. The tools you choose directly affect how smooth the final surface appears. Cheap brushes shed bristles, low-quality rollers leave texture behind, and poor tape allows paint bleed that ruins clean trim lines. Investing in better supplies often saves both time and frustration.
Here’s a quick comparison of essential tools and why they matter:
| Tool | Best Use | Why It Matters |
|---|---|---|
| Angled brush | Edges and panels | Creates cleaner detail work |
| Foam roller | Smooth flat surfaces | Reduces roller texture |
| Painter’s tape | Protecting trim and hardware | Prevents accidental paint marks |
| Fine-grit sandpaper | Between coats | Helps achieve smooth finishes |
| Tack cloth | Dust removal | Keeps paint free of debris |
| Drop cloth | Floor protection | Prevents messy cleanup |
Choosing the right paint is equally important. Semi-gloss and satin finishes remain the most popular for interior doors because they resist fingerprints and are easier to clean. High-gloss paint can look beautiful, but it highlights every imperfection like a spotlight. If your door has dents, scratches, or uneven grain, satin often produces a more forgiving appearance.
water-based enamel paints have become especially popular because they dry faster and yellow less over time compared to oil-based products. They also create fewer fumes, which matters when painting indoors with the door still attached. Fast drying times help keep the door functional sooner, although rushing the curing process can still lead to sticking problems later.
One overlooked detail is lighting. Strong side lighting exposes drips and missed spots instantly. Many painters only notice flaws after the paint dries because they worked in dim conditions. Bright lighting turns tiny imperfections into visible warnings before they harden permanently.
Preparing Hinges, Handles, and Surrounding Trim Properly
Preparation is where professional-looking paint jobs are truly won or lost. Painting directly over dusty hinges, greasy fingerprints, or dirty trim guarantees disappointing results. Doors collect oils from hands constantly, especially around knobs and edges. Even invisible grime can interfere with paint adhesion.
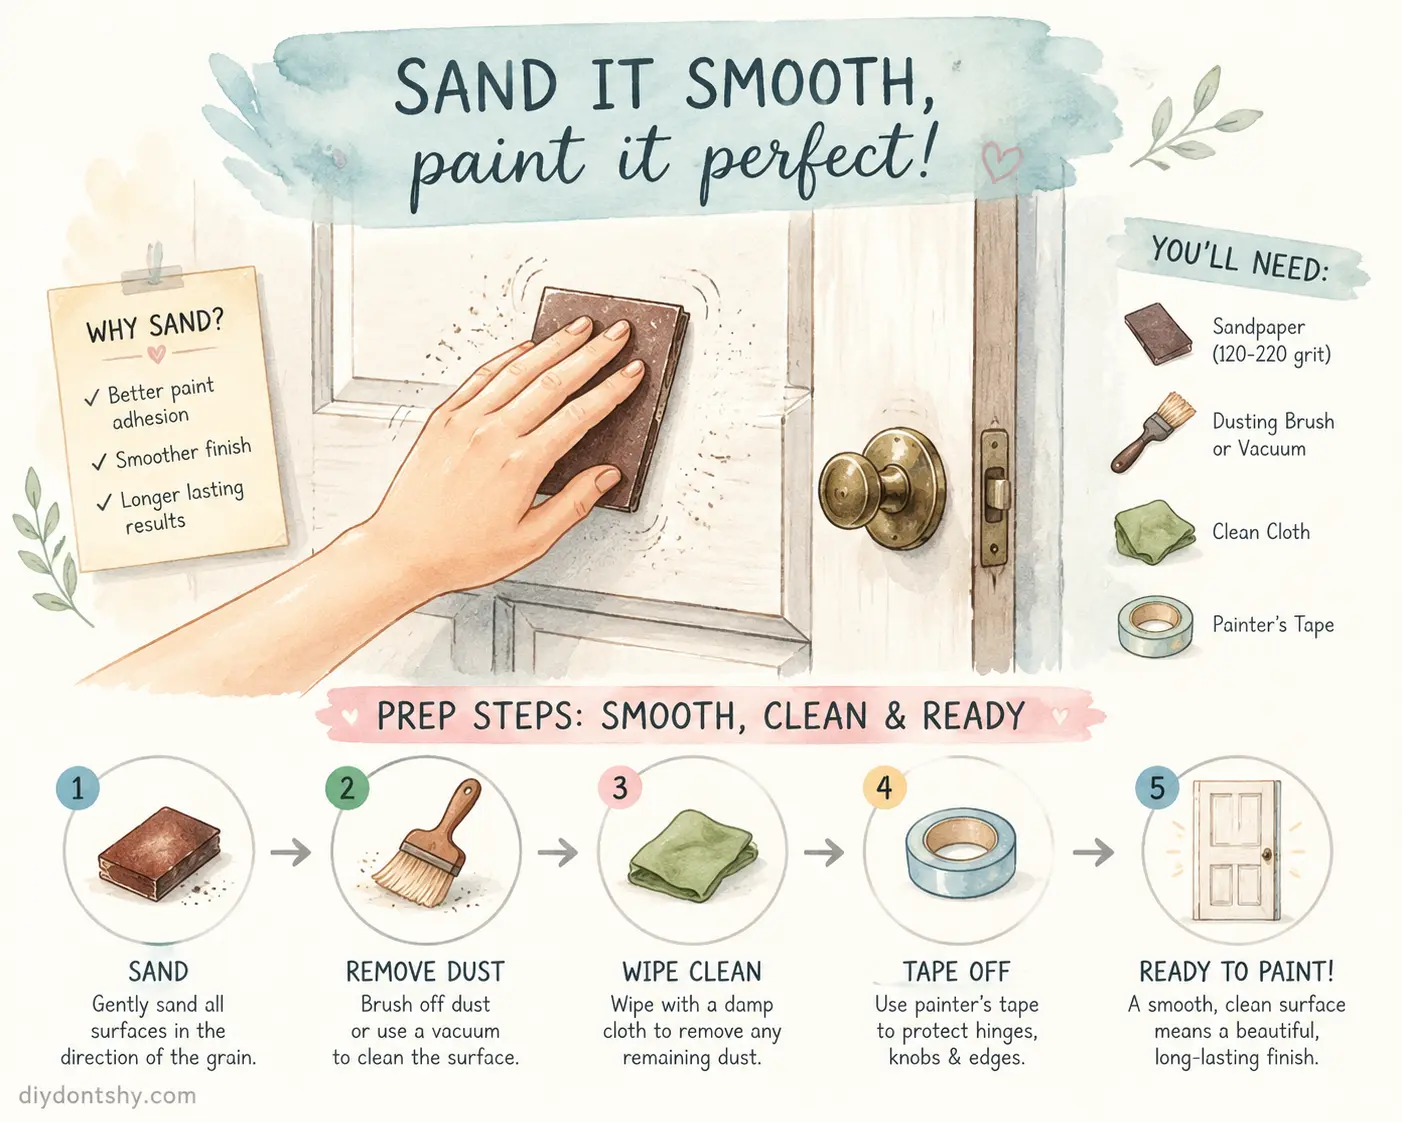
Start by cleaning the entire door thoroughly with a degreasing cleaner or mild soap solution. Pay extra attention to areas near handles because these spots usually carry the most oils. Once clean, let the surface dry completely before sanding. Painting over moisture traps problems beneath the finish and can eventually lead to peeling.
When it comes to hinges and handles, you have two options: remove or mask. Removing hardware creates the cleanest result, but if you prefer speed, careful masking works surprisingly well. Use painter’s tape to cover hinges precisely, pressing edges firmly so paint cannot seep underneath. For knobs or handles, plastic wrap combined with tape often provides quicker coverage than tape alone.
The surrounding trim also deserves attention. Sloppy trim edges instantly make a paint job look amateurish, no matter how smooth the door itself appears. Run painter’s tape along trim lines carefully, ensuring consistent spacing. Think of masking tape like guardrails on a mountain road. It keeps mistakes from becoming disasters.
Sanding lightly after cleaning helps dull glossy surfaces and improves adhesion dramatically. You do not need to strip the old finish completely unless the paint is peeling badly. A light scuff sanding usually provides enough “tooth” for fresh paint to grip properly.
Sanding and Surface Preparation for Better Paint Adhesion
Many DIY painters underestimate how important sanding really is. They see it as optional because the door already “looks smooth.” The problem is that smooth-looking surfaces can still resist paint adhesion. Glossy finishes especially act almost like nonstick pans for fresh paint. Without sanding, even expensive paint may chip prematurely.
Use fine-grit sandpaper between 120 and 220 grit depending on the door’s condition. The goal is not to remove all previous paint but to create a slightly roughened surface that helps new paint bond securely. If the door contains old brush marks or rough patches, spend extra time leveling those areas because fresh paint tends to magnify imperfections rather than hide them.
Small dents and scratches should also be repaired before painting. Wood filler works well for minor damage. Apply it sparingly, let it dry fully, then sand smooth until it blends seamlessly into the surrounding surface. Skipping this step often leaves visible flaws that catch light awkwardly after painting.
Dust removal is another critical stage people often rush through. Sanding dust creates tiny bumps in wet paint if left behind. A tack cloth or microfiber cloth removes fine particles effectively without leaving lint. Imagine trying to paint over breadcrumbs on a table. Even tiny debris becomes painfully obvious once sealed beneath glossy paint.
Professional painters frequently sand lightly between coats as well. This sounds excessive, but it creates an incredibly smooth finish. Each coat levels imperfections from the previous one, gradually building that polished appearance homeowners associate with factory-finished doors.
Choosing a Painting Order That Prevents Drips
Painting order matters far more than most people realize. Random painting leads to overlapping wet areas, pooled paint, and drips that form before you even notice them. Following a deliberate sequence keeps paint balanced and manageable.
Flat doors are relatively straightforward. Start with edges first, then move to the main face. Work from top to bottom because gravity naturally pulls excess paint downward. If you begin at the bottom, drips from upper sections can ruin areas you already completed.
Raised-panel doors require more strategy. Always begin with recessed or detailed sections first. Paint the panels, then horizontal rails, and finally vertical stiles. This sequence allows you to smooth overlaps naturally before they dry. Think of it like mowing a lawn in organized rows instead of wandering randomly around the yard.
Here’s a helpful sequence for raised-panel doors:
- Inner panel edges
- Panel centers
- Horizontal sections
- Vertical sections
- Outer edges
This order minimizes lap marks and helps maintain consistent paint thickness. It also prevents heavy buildup around decorative details, which commonly causes sagging.
Keeping a “wet edge” is another professional technique worth learning. That simply means working continuously so fresh paint overlaps slightly into still-wet paint. If paint begins drying before overlap occurs, visible lines form between sections.
Many beginners overload brushes or rollers trying to finish faster. Ironically, this slows everything down because thick paint requires constant correction. Controlled application reduces drips dramatically and creates smoother drying overall.
Brush and Roller Techniques for a Smoother Finish
Technique matters just as much as paint quality. Even premium paint can look terrible if applied poorly. One of the biggest mistakes people make is pressing too hard with rollers or brushes. Excess pressure creates texture, streaks, and uneven distribution.
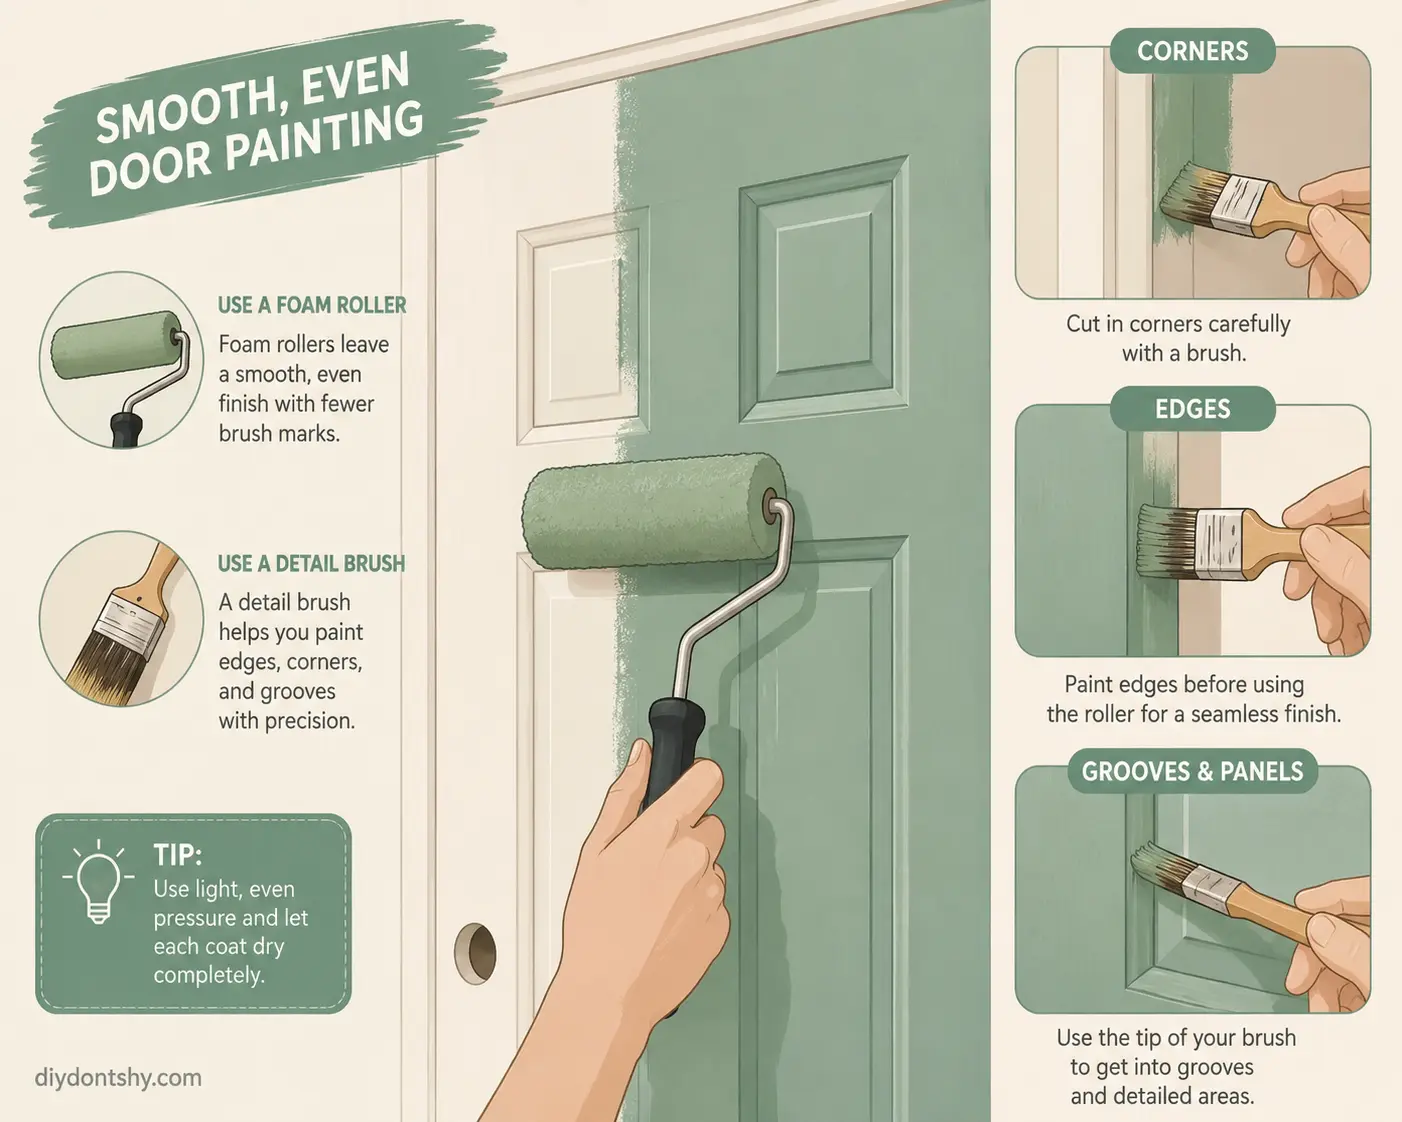
Foam rollers work exceptionally well for doors because they apply thin, smooth layers with minimal stippling. Traditional thick-nap rollers hold too much paint and often leave an orange-peel texture behind. Load the roller lightly and roll slowly. Fast rolling traps air bubbles, which dry into rough imperfections.
Brushes should mainly handle corners, edges, and detailed sections. Use long, smooth strokes rather than short scrubbing motions. Imagine brushing your hair carefully instead of aggressively scrubbing a pan. Controlled movement creates cleaner results.
One useful trick professionals use is “tipping off.” After rolling paint onto a flat section, they lightly drag a brush over the surface using minimal pressure. This smooths bubbles and levels texture beautifully. Timing matters though. Wait too long, and the paint becomes tacky instead of workable.
Temperature also affects paint behavior significantly. Hot rooms cause paint to dry too quickly, increasing brush marks and lap lines. Cooler, well-ventilated conditions allow paint more time to level naturally. This is why professional painters often prefer moderate weather conditions rather than extreme heat.
Patience plays a surprisingly large role here. Doors usually look worse midway through painting than they do after leveling and drying. Constantly reworking partially drying paint often creates more flaws than it fixes.
Working Around Panels and Raised Door Details
Raised-panel doors are beautiful, but they can also be frustrating to paint neatly. Corners collect excess paint quickly, especially where panels meet rails. If paint pools there, drips form slowly and often go unnoticed until partially dry.
The best strategy is using less paint than you think you need. Apply thin coats carefully into corners, then feather outward immediately. Feathering means lightly spreading paint away from heavy areas to prevent accumulation. Think of it like spreading butter evenly across toast rather than dumping it in one spot.
Brush size matters here too. Large brushes feel faster initially but make detail control harder. A smaller angled brush provides better accuracy around grooves and decorative profiles. Precision prevents messy edges and keeps details crisp instead of rounded over with thick paint.
One challenge many people face is maintaining consistent sheen across complex surfaces. Overbrushing some sections while barely touching others changes how light reflects after drying. Smooth, even application keeps sheen uniform and helps the entire door appear professionally finished.
Raised details also require careful inspection during drying. Walk around the door from different angles under strong lighting. Drips often hide until viewed sideways. Professional painters constantly reposition themselves because surface reflections reveal flaws that direct viewing can miss.
Managing Drying Time While Keeping the Door Functional
Painting an attached door creates one unavoidable challenge: the door still needs to function. You cannot simply leave it wide open for days in most homes. Balancing drying time with practical use requires planning.
Ventilation helps enormously. Open nearby windows, use fans gently, and keep airflow moving without blasting dust directly at wet paint. Faster airflow encourages drying, but excessive wind can push debris into the finish.
One common professional trick involves painting one side of the door at a time. Start early in the day so the first side gains several hours of drying before evening. Once dry enough to touch lightly without tackiness, paint the opposite side carefully.
When closing a freshly painted door, avoid shutting it tightly. Leave it slightly cracked whenever possible. Some painters place wax paper along edges temporarily because paint does not stick easily to wax surfaces. This simple trick can prevent frustrating peeling later.
Dry-to-touch does not mean fully cured. Many paints require days or even weeks to harden completely. During that period, handle the door gently and avoid repeated slamming or heavy friction around edges.
Humidity also affects curing dramatically. High humidity slows evaporation, which can leave paint soft longer than expected. Air-conditioned environments usually help paint stabilize faster indoors.
Avoiding Sticky Edges After the Paint Cures
Sticky doors are one of the most common complaints after repainting. The problem usually comes from excess paint along edges or insufficient curing time before regular use resumes.
Door edges naturally fit tightly against frames, so even slight paint buildup creates friction. This is why professionals apply especially thin coats around perimeter edges. Heavy edge buildup behaves almost like adding extra thickness to the door itself.
Sanding edges lightly between coats helps prevent sticking too. Some painters even avoid painting the latch edge entirely if coverage already looks acceptable. Strategic restraint sometimes produces better functionality than obsessive coverage.
Paint chemistry also matters. Lower-quality paints remain soft longer and stick more aggressively under pressure. Premium enamel formulations cure harder, reducing sticking issues substantially over time.
Temperature fluctuations can worsen problems. Warm weather softens uncured paint slightly, making edges tackier. If a door feels sticky after several days, lightly sanding the contact points often solves the issue immediately.
A tiny amount of paste wax applied carefully to fully cured edges can also reduce friction. Professionals occasionally use this method for stubborn doors in humid climates where sticking becomes recurring.
Fixing Brush Marks and Uneven Paint Build-Up
Brush marks happen to almost everyone at some point. The key difference between professionals and beginners is knowing how to correct them before they become permanent.
If you notice marks while paint remains wet, lightly feather the area with a clean brush using long strokes. Avoid aggressive brushing because partially drying paint quickly becomes gummy. Gentle correction works best.
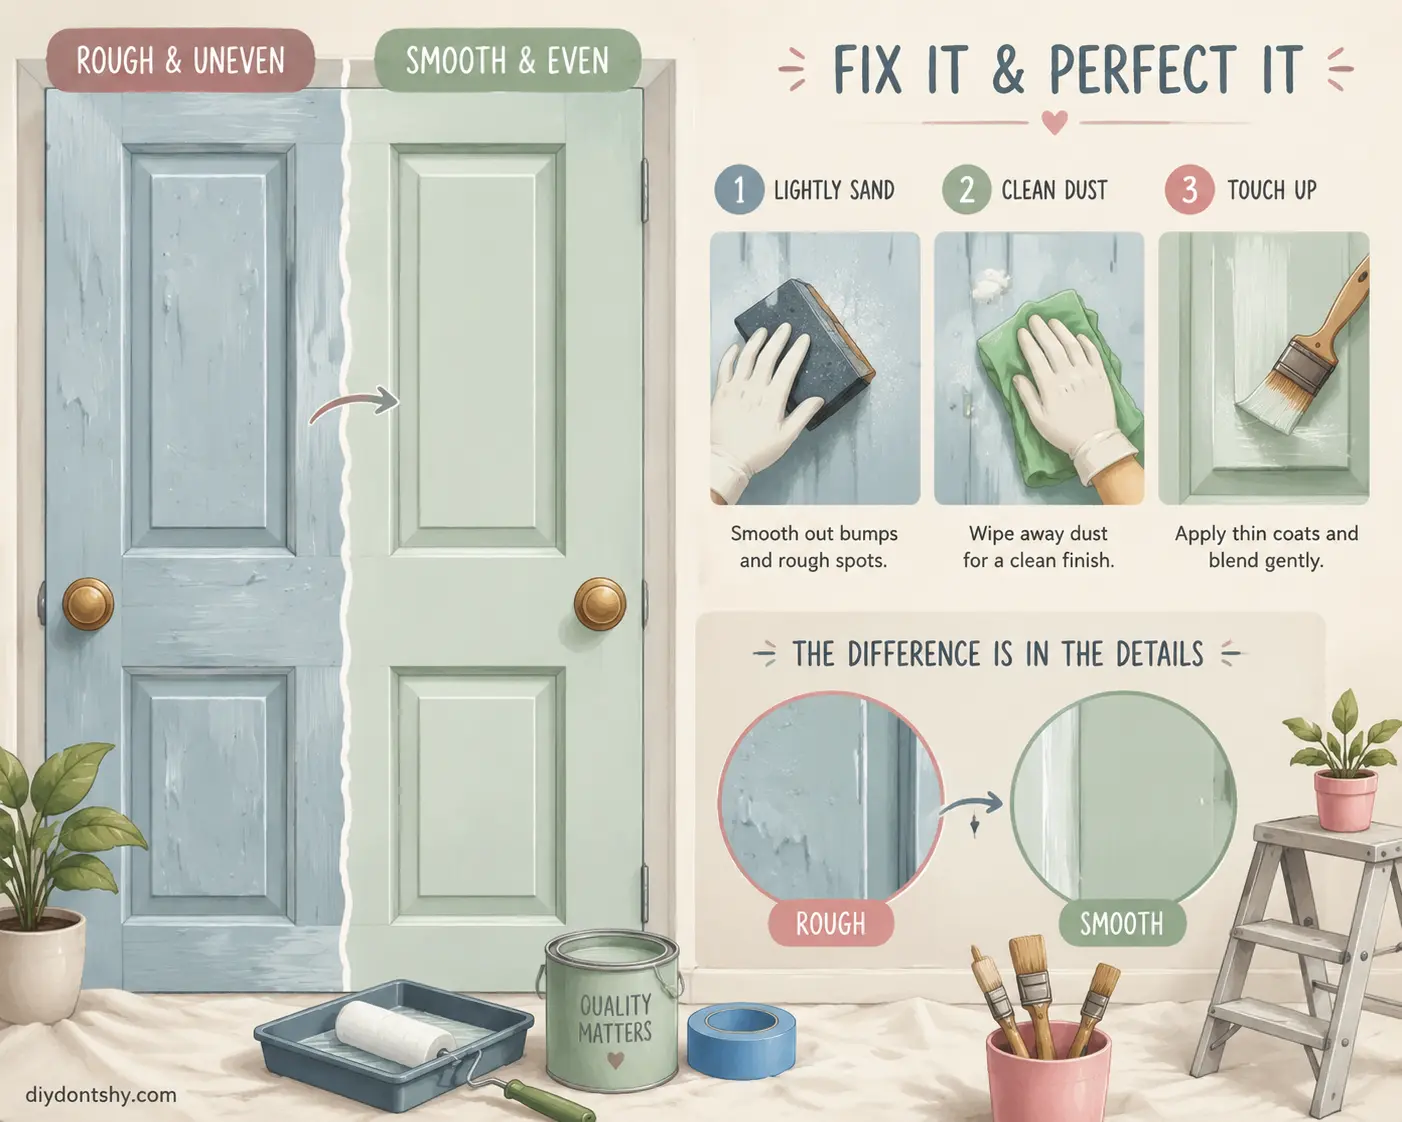
Once paint dries, sanding becomes your best friend again. Fine-grit sandpaper smooths ridges effectively without removing too much paint. After sanding, wipe dust away carefully before recoating.
Uneven paint buildup around corners and trim details often comes from overloaded brushes. Instead of trying to spread excess paint endlessly, remove some paint from the brush before application. Thin coats level more naturally and reduce sagging dramatically.
Lighting remains crucial during corrections. Position a work light sideways across the door surface. Ridges and brush marks suddenly become much easier to identify. Many painters miss flaws simply because overhead lighting hides texture inconsistencies.
Multiple thin coats almost always outperform one thick coat. Thick paint traps brush marks permanently because the surface skins over before leveling fully underneath. Thin layers dry more evenly and create smoother finishes overall.
Final Touches That Help the Door Look Professionally Painted
The difference between an average paint job and a professional-looking finish often comes down to the final details. Clean hardware installation, crisp edges, and proper curing habits elevate the entire appearance dramatically.
Once paint cures fully, remove tape carefully using slow, angled pulls. Ripping tape away quickly can peel fresh paint accidentally. If edges resist, score lightly with a utility knife before removal.
Clean hinges and handles thoroughly before reinstalling. Tiny paint splatters on metal hardware immediately signal rushed workmanship. Polished hardware against a freshly painted surface creates striking contrast that makes the entire door feel newer.
Inspect the surface under both daylight and artificial lighting. Different lighting conditions reveal different imperfections. A door that looks perfect at night may expose subtle roller texture in morning sunlight.
Long-term maintenance matters too. Avoid harsh chemical cleaners that dull the finish prematurely. Mild soap and microfiber cloths usually keep painted doors looking fresh for years. Small chips should also be touched up quickly before moisture or dirt worsens damage.
A beautifully painted door changes how an entire room feels. It becomes one of those subtle details people notice without immediately understanding why the space feels cleaner, brighter, or more polished.
Conclusion
Painting a door without removing it is absolutely achievable when approached with patience and strategy. The biggest mistakes usually come from rushing preparation, overloading paint, or ignoring drying behavior. Smooth results depend far more on technique and sequencing than brute effort.
By preparing hinges and trim carefully, choosing the right painting order, and applying thin controlled coats, you can create a finish that looks professionally sprayed instead of obviously brushed. Paying attention to drying conditions and edge buildup prevents frustrating sticking problems later, while light sanding between coats transforms average results into polished ones.
Doors may seem like small parts of a home, but they receive constant attention and daily use. A clean, smooth finish instantly upgrades the look of the surrounding space. When done correctly, even a simple painted door can feel like a major home improvement project.
FAQs
1. Can I paint a door without sanding it first?
You technically can, but the finish usually will not last as long. Sanding helps paint adhere properly, especially on glossy surfaces. Even light scuff sanding makes a huge difference in durability and smoothness.
2. What is the best paint finish for interior doors?
Semi-gloss and satin finishes are the most popular choices. They resist fingerprints, clean easily, and provide a balanced appearance without highlighting imperfections too aggressively.
3. How long should I wait before closing a painted door?
Most doors can be closed carefully after several hours, depending on paint type and humidity. Still, full curing often takes several days, so avoid shutting the door tightly too soon.
4. Why does my painted door feel sticky days later?
Sticky doors usually result from thick paint buildup on edges or insufficient curing time. Humidity and lower-quality paint can also contribute to prolonged tackiness.
5. Should I use a brush or roller for doors?
Using both works best. Foam rollers create smoother finishes on flat areas, while angled brushes handle corners, edges, and detailed sections more accurately.

Ahmed Elhor is an Egyptian SEO specialist, pharmacist, and copywriter based in Canada. He combines strong research skills with search focused writing to create clear, helpful content that answers real questions and ranks effectively in search engines.
With a passion for practical DIY ideas, homemade solutions, and creative projects, Ahmed focuses on producing easy to follow guides that are simple, affordable, and useful for everyday life. His work blends creativity with structure, helping readers turn basic materials into meaningful results.