How to Seal Painted Wood for Outdoor Use and Protect It From Weather
Outdoor wood looks beautiful when it’s freshly painted. The color pops, the surface feels smooth, and everything looks protected from the weather. Then reality shows up. Rain starts soaking into tiny cracks, sunlight fades the finish, and temperature swings slowly stress the paint film until peeling begins. That’s why sealing painted wood for outdoor use is not just a cosmetic upgrade; it’s a survival strategy for the wood itself.
Recent studies on exterior wood finishing show that moisture, UV radiation, and repeated wet-dry cycles are the biggest reasons painted wood fails outdoors. Researchers also found that proper sanding, multiple protective layers, UV-resistant coatings, and careful sealing dramatically extend the lifespan of outdoor wood finishes.
Why Outdoor Painted Wood Needs Extra Protection
Paint alone is rarely enough to protect wood outdoors for years at a time. Many homeowners assume exterior paint acts like armor, but paint is more like a rain jacket; it works well until wear and tear begin creating weak points. Once the outer layer starts cracking or fading, water slowly sneaks underneath and starts attacking the wood from the inside out. That process may happen quietly for months before visible damage appears.
Sunlight is one of the biggest enemies of painted outdoor wood. Ultraviolet rays break down the chemical structure of paint binders, causing fading, chalking, and brittleness over time. Researchers studying outdoor wood coatings found that UV exposure weakens both paint and clear coatings, eventually leading to peeling and moisture intrusion. Think of UV rays like a slow-burning fire constantly attacking the surface every single day. Even premium exterior paint loses strength without additional protection.
Moisture is equally destructive. Wood naturally expands and contracts as humidity changes. During rainy seasons, wood fibers absorb water and swell. During dry weather, they shrink again. That constant movement stresses the paint film until microscopic cracks appear. Water enters through those tiny openings and begins creating rot, mildew, and internal decay. Experts reviewing exterior wood performance noted that repeated wetting and drying cycles are major contributors to cracking and coating failure.
Adding a protective sealer creates another defensive layer above the paint. This topcoat shields the paint from UV rays, repels water, and improves flexibility so the finish can better tolerate temperature and humidity changes. It also extends the life of the paint job, reducing the need for expensive repainting projects every few years.
How UV Rays Break Down Paint
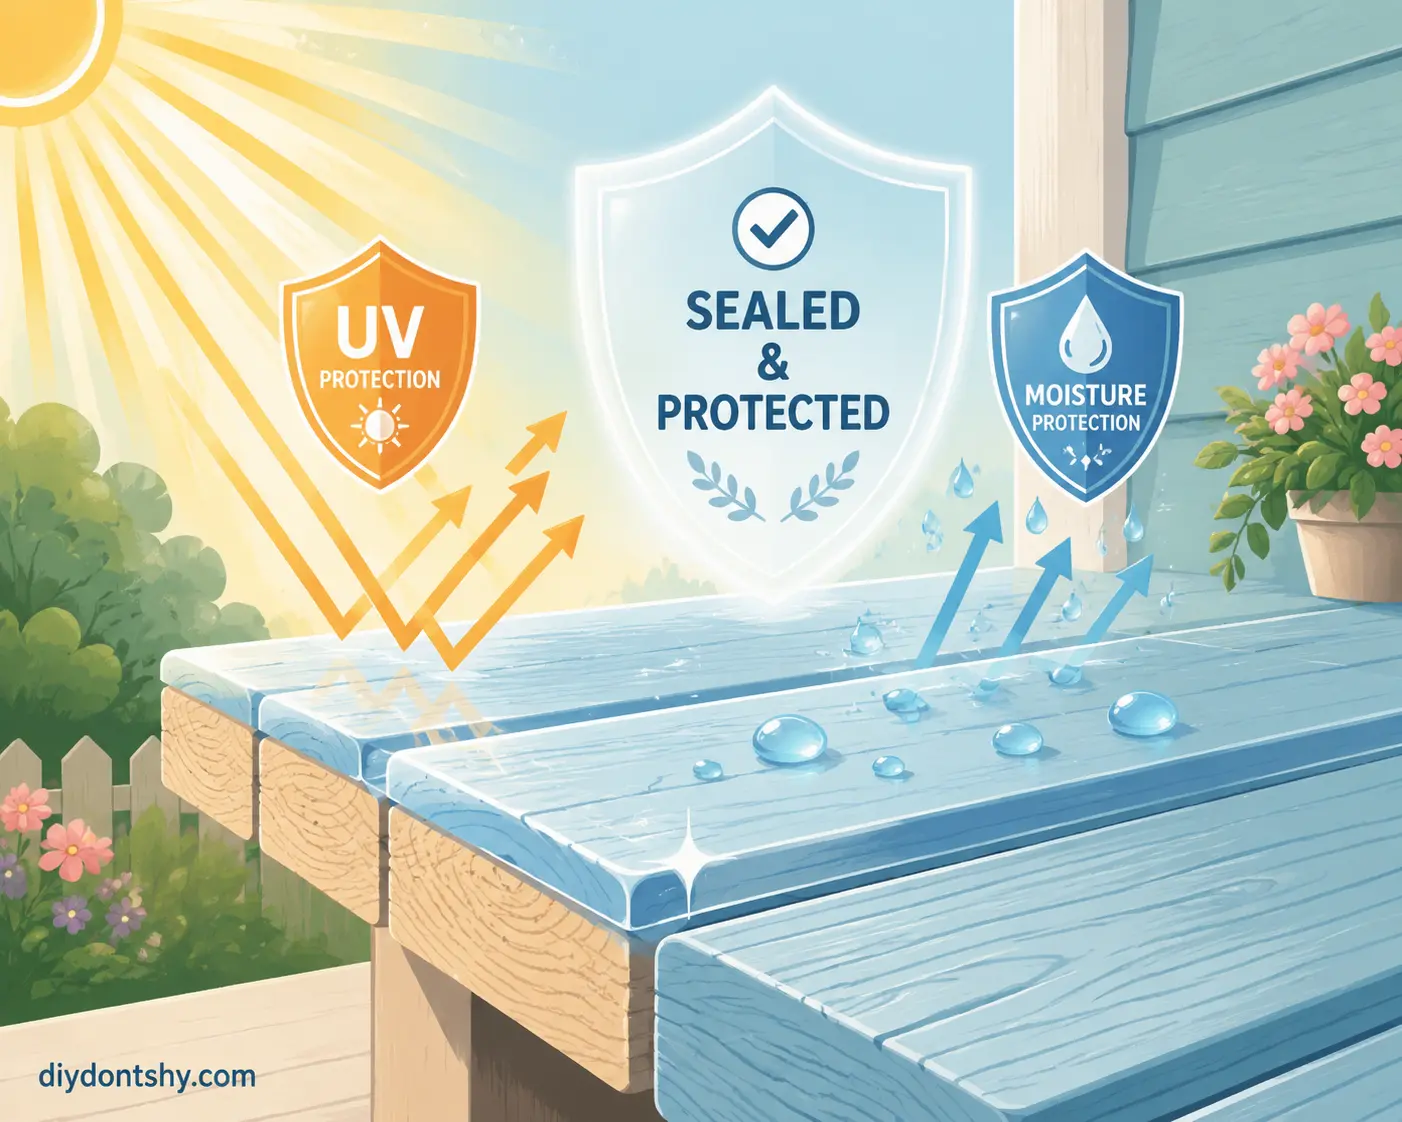
Ultraviolet damage happens slowly enough that many people don’t notice it until the paint already looks tired and aged. The sun’s rays attack the resins inside paint, weakening the bonds that hold pigments together. Once those bonds begin breaking apart, colors fade and the surface becomes chalky. Dark colors usually show UV damage faster because they absorb more heat and radiation.
Scientific reviews on outdoor wood coatings explain that UV exposure can degrade both the coating and the lignin inside wood itself. That means sunlight isn’t just fading the paint; it’s slowly affecting the wood beneath it too. Clear outdoor sealers containing UV absorbers help slow this process dramatically by intercepting harmful radiation before it reaches the paint layer.
This is why marine-grade spar urethane and exterior polyurethane products are so popular for outdoor projects. They contain additives specifically designed to resist UV degradation while remaining flexible. Unlike rigid indoor coatings, outdoor sealers need elasticity because wood never stops moving. Heat, rain, and humidity constantly force expansion and contraction.
You can compare outdoor wood protection to sunscreen for your skin. One layer of paint might offer some protection, but without a topcoat acting like SPF, the surface gradually burns and weakens. Over time, that exposure leads to cracking, peeling, and eventually wood damage that costs far more to repair than a quality sealer ever would.
The Hidden Damage Caused by Moisture
Water damage rarely starts where people expect. Most homeowners focus on visible surfaces while ignoring seams, edges, corners, and underside areas where moisture actually begins infiltrating the wood. By the time paint bubbles or peels appear, internal damage may already be developing beneath the surface.
Research on outdoor wood performance highlights how moisture intrusion accelerates cracking, fungal growth, coating failure, and wood degradation. Wood behaves almost like a sponge at the microscopic level. Open wood fibers pull water inward through capillary action, especially at cut ends and exposed joints.
One of the most vulnerable areas is the end grain. Experts note that end grain can absorb moisture up to 250 times faster than face grain because the wood fibers are fully exposed. Imagine drinking through thousands of tiny straws; that’s essentially what exposed end grain does during rainfall or humidity exposure.
Moisture trapped beneath paint creates a dangerous cycle. The trapped water expands when heated, placing pressure on the paint film from underneath. Eventually, blistering and peeling begin. Once that happens, even more moisture enters the wood. Mold and rot can then spread internally while the outside still appears relatively normal.
Sealing painted wood interrupts this cycle by adding a hydrophobic barrier that repels water before it penetrates vulnerable areas. A good outdoor sealer also reduces the speed of moisture absorption and release, helping stabilize the wood and reduce stress on the painted surface.
Choosing the Right Sealer for Painted Wood
Choosing the wrong sealer can ruin an otherwise beautiful paint job. Some products yellow over time, others crack under outdoor stress, and some simply fail to bond properly with existing paint. That’s why compatibility matters just as much as durability.
Exterior-grade polyurethane, spar urethane, marine varnish, and acrylic sealers are among the most common choices for painted wood outdoors. Spar urethane is especially popular because it remains flexible and contains UV-resistant additives. Researchers and finishing experts consistently emphasize the importance of flexibility and moisture resistance for outdoor wood coatings.
Here’s a quick comparison of common outdoor sealers:
| Sealer Type | Best For | Pros | Cons |
|---|---|---|---|
| Water-Based Polyurethane | Light-colored paint | Fast drying, low odor, clear finish | Slightly less durable |
| Oil-Based Polyurethane | Heavy weather exposure | Strong moisture resistance | Can yellow over time |
| Spar Urethane | Outdoor furniture & trim | Flexible, UV-resistant | Longer drying time |
| Marine Varnish | Extreme outdoor conditions | Excellent durability | Higher cost |
| Acrylic Outdoor Sealer | Decorative projects | Easy application | Moderate lifespan |
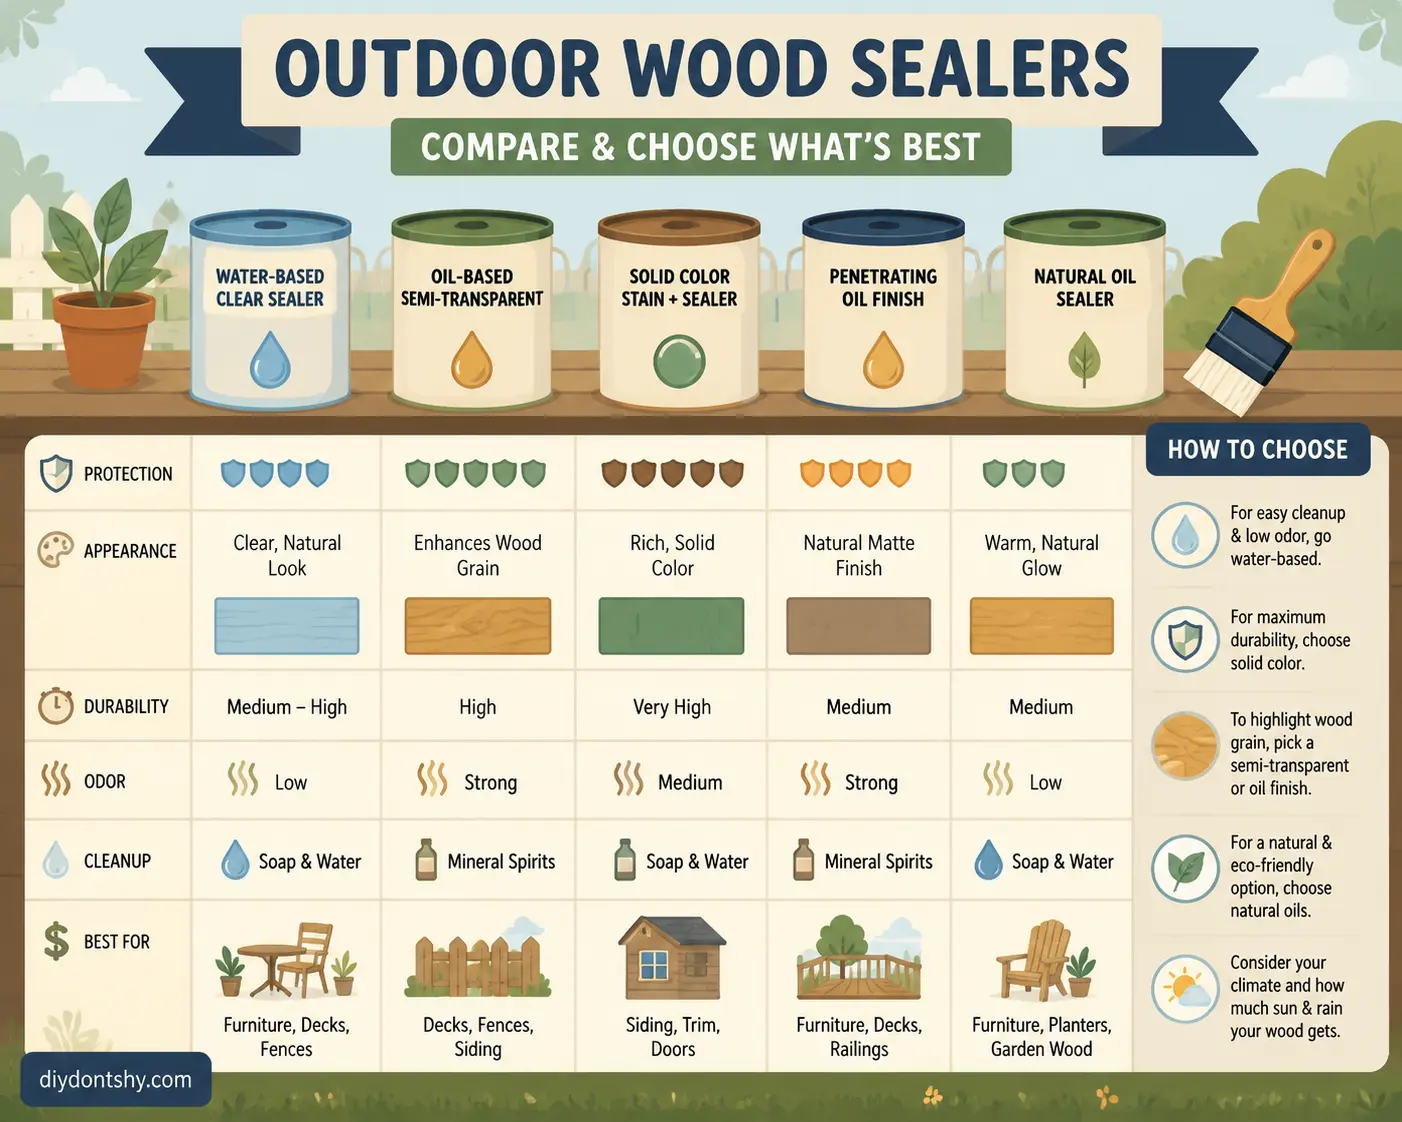
The best choice often depends on climate conditions. In areas with intense sun exposure, UV resistance becomes critical. In humid or rainy regions, moisture resistance matters even more. Coastal environments usually demand marine-grade products because salt and humidity accelerate deterioration.
Another important factor is appearance. Some sealers enhance gloss dramatically, while others preserve a natural matte finish. Always test the product on a hidden area first because the final look can differ from the label expectations.
Water-Based vs Oil-Based Sealers
The debate between water-based and oil-based sealers is almost like choosing between sneakers and work boots. One prioritizes convenience and clarity, while the other focuses on rugged durability.
Water-based sealers dry quickly, produce less odor, and remain crystal clear over time. They work especially well over white or light-colored paints because they resist yellowing. Many homeowners also prefer them because cleanup is simple and indoor air quality remains better during application.
Oil-based sealers provide stronger penetration and often create a richer-looking finish. Studies on finished woods have shown oil-based coatings can offer better moisture resistance in certain conditions. They also tend to hold up better under harsh outdoor exposure. The downside is longer drying times and a tendency to amber slightly over the years.
For outdoor painted wood, spar urethane often strikes the best balance because it’s engineered specifically for weather exposure. It stays flexible enough to move with expanding wood while resisting water intrusion and UV damage.
If your project sits under constant direct sunlight or heavy rain exposure, durability should outweigh convenience. For decorative pieces under covered patios, water-based options may work perfectly while preserving color accuracy.
Matching the Sealer to the Paint Finish
Not every sealer complements every paint sheen. A mismatch can create visual inconsistencies, uneven reflection, or an overly plastic appearance that ruins the project’s aesthetics.
Matte and satin paints usually look best with satin or matte-compatible clear coats. Applying a high-gloss sealer over matte paint can create strange reflective patches and make imperfections more visible. Satin finishes maintain a more natural appearance while still offering protection.
Gloss and semi-gloss paints pair well with glossy clear sealers because the reflective properties stay consistent. These combinations often produce the strongest moisture resistance too, since smoother glossy surfaces repel water more effectively.
The key is consistency. Imagine wearing polished dress shoes with torn sweatpants; it technically works, but something feels off visually. The same principle applies to paint sheen and clear coatings. Matching finishes creates a smoother, more professional final appearance.
Always check manufacturer compatibility recommendations before combining products. Some water-based sealers may not adhere properly to certain oil-based paints unless the surface is fully cured and lightly sanded first.
Matte and Satin Paint Considerations
Matte finishes are beautiful outdoors because they create a softer, more natural appearance. They hide imperfections well and blend nicely into gardens, patios, and rustic settings. The downside is that matte surfaces are often more porous and slightly harder to clean.
When sealing matte paint, avoid overly thick glossy topcoats that completely change the aesthetic. Instead, choose satin or low-sheen outdoor sealers designed to preserve the original look while adding protection.
Thin, even coats are especially important on matte finishes because buildup can create cloudy or uneven patches. A foam brush or high-quality synthetic brush usually works best for maintaining smooth application.
Gloss and Semi-Gloss Paint Considerations
Glossy painted wood tends to repel moisture more effectively because the smoother surface gives water fewer places to settle. That makes gloss and semi-gloss paints naturally easier to maintain outdoors.
A matching glossy sealer can deepen color richness and enhance durability. Outdoor furniture, doors, railings, and trim often benefit from this combination because it creates a tougher moisture-resistant shell.
The tradeoff is visibility. Gloss surfaces highlight scratches, brush marks, and imperfections much more easily than matte finishes. Careful sanding and dust removal become essential before applying the clear coat.
Preparing the Surface Before Sealing
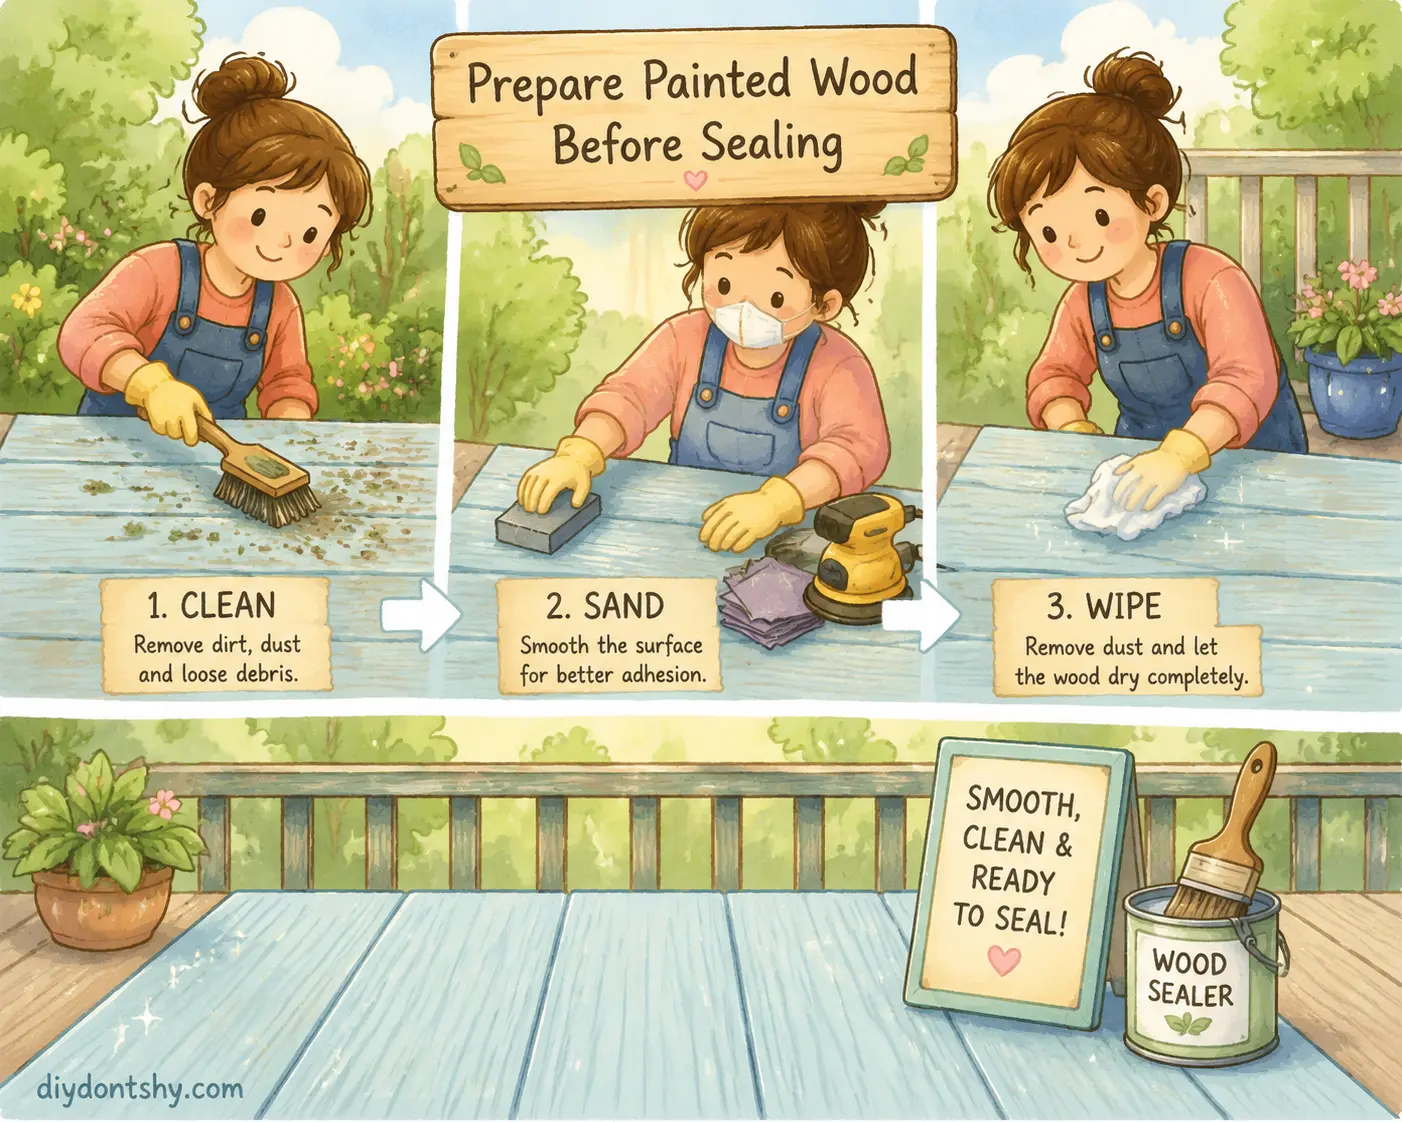
Even the best sealer in the world cannot compensate for poor preparation. Applying a topcoat over dirty, peeling, or contaminated paint is like putting expensive wallpaper over a cracked wall; it may look fine temporarily, but failure is almost guaranteed.
Start by thoroughly cleaning the painted wood. Dirt, mildew, pollen, grease, and chalky residue interfere with adhesion. Mild soap, water, and a soft scrub brush usually work well for most surfaces. For mildew, use a diluted bleach solution or specialized outdoor wood cleaner.
Once clean, inspect the paint carefully. Any loose or peeling sections should be scraped away and repaired before sealing. Light sanding helps create microscopic texture that improves bonding between the paint and the sealer.
Experts studying outdoor coating durability consistently identify surface preparation as one of the biggest factors influencing long-term performance. Skipping preparation might save an hour today, but it often costs years of durability later.
Dust removal matters too. After sanding, wipe everything down with a tack cloth or damp microfiber cloth. Tiny dust particles trapped beneath clear coats become surprisingly visible once the finish dries.
Cleaning Dirt, Mold, and Residue
Outdoor wood accumulates contamination slowly, almost invisibly. Pollen settles into corners, mildew forms in shaded areas, and airborne pollutants leave behind oily films that interfere with adhesion.
Cleaning isn’t just cosmetic; it’s structural preparation. Mold trapped beneath a clear coat can continue growing underneath the finish. Dirt particles can weaken bonding and create rough textures.
Allow the surface to dry completely after washing. Moisture trapped inside the wood during sealing can later create bubbling, haziness, or peeling. Drying times vary depending on humidity and temperature, but waiting at least 24 hours after cleaning is usually safest.
Sanding Without Damaging the Paint
Many people sand too aggressively and accidentally remove the very paint they’re trying to protect. The goal isn’t stripping; it’s smoothing and improving adhesion.
Use fine-grit sandpaper, usually between 220 and 320 grit, and sand lightly by hand or with a finishing sander. Focus on rough patches, raised grain, or glossy surfaces needing slight abrasion.
Think of sanding like preparing a road before paving. You’re not demolishing the surface; you’re creating conditions for the next layer to bond securely.
Applying the Sealer Correctly
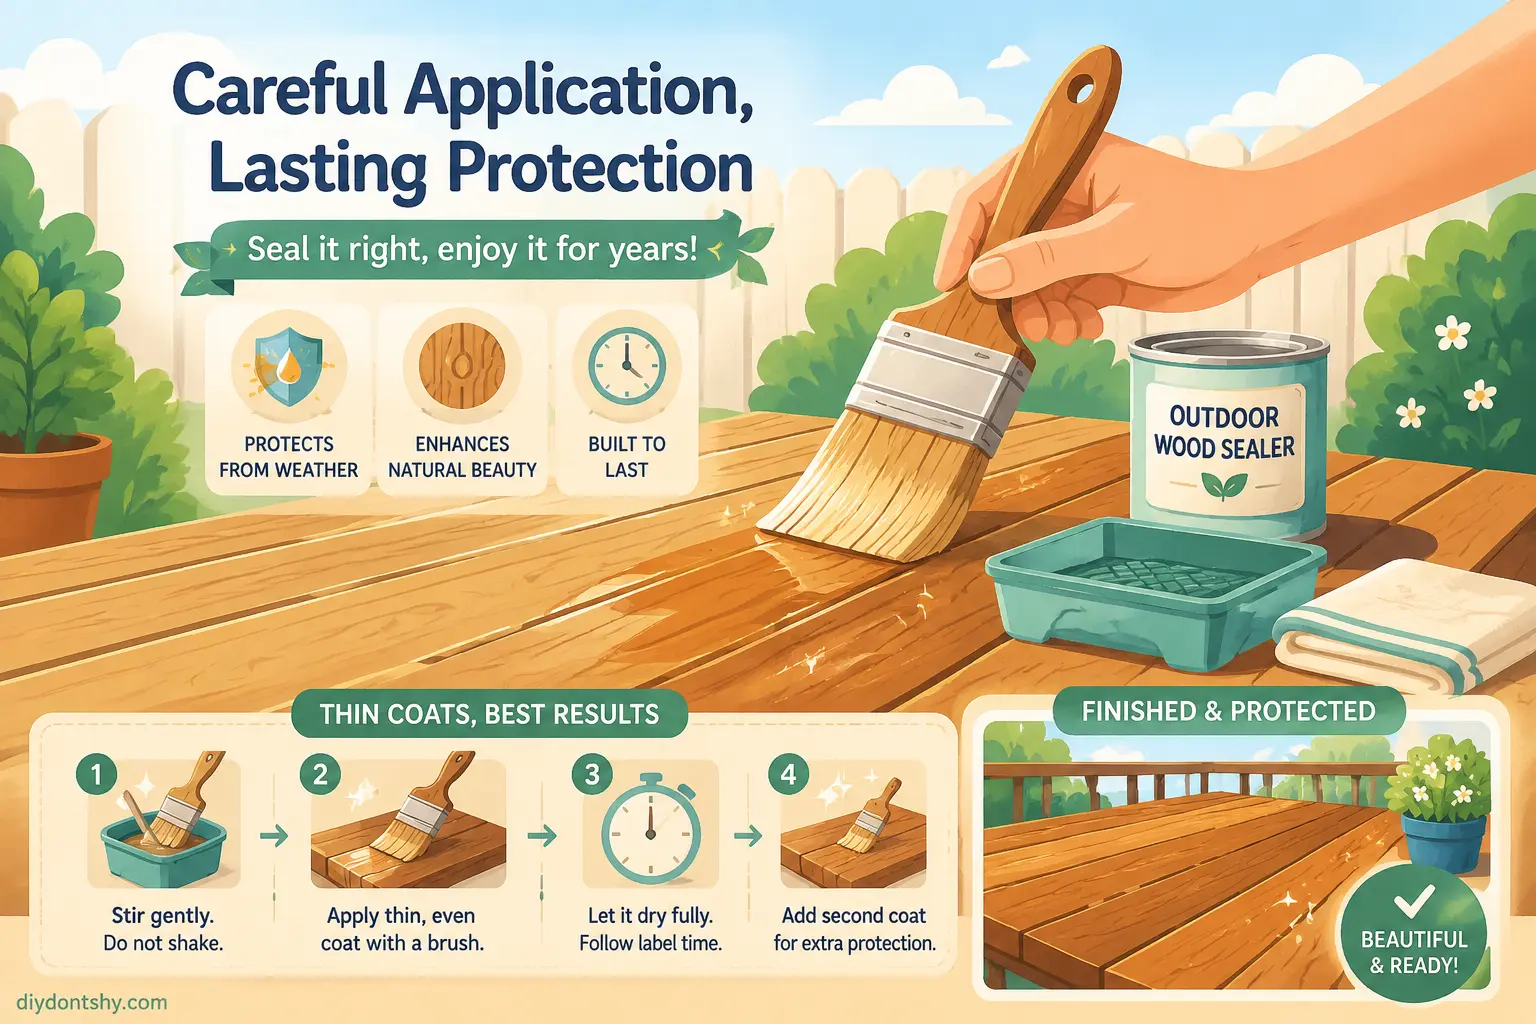
Application technique matters just as much as product selection. Even premium sealers can fail if applied incorrectly. Thick coats, rushed drying, or poor weather conditions often create more problems than they solve.
Professionals typically recommend applying several thin coats instead of one heavy coat. Thin layers cure more evenly and reduce the risk of bubbling, wrinkling, or trapped solvents. Exterior finishing experts specifically note that thinner coats improve long-term durability and minimize finish defects.
Brush quality also matters. Cheap brushes shed bristles and leave streaks behind. High-quality synthetic brushes work well with water-based sealers, while natural-bristle brushes suit many oil-based products.
Pay close attention to edges, seams, joints, and end grain. These vulnerable areas often need extra coats because they absorb more moisture and experience faster deterioration.
Patience is critical during curing. The surface may feel dry within hours, but full curing can take days. Premature exposure to rain or heavy use can permanently weaken the protective film.
Why Thin Coats Last Longer Than Thick Coats
At first glance, thick coats seem stronger. More material should mean more protection, right? Ironically, the opposite is often true outdoors.
Heavy coats trap solvents and dry unevenly. The outer surface hardens while lower layers remain soft, leading to wrinkling, cracking, or “alligatoring.” Thin coats allow proper evaporation and stronger curing throughout the entire layer.
Exterior wood experts repeatedly emphasize that multiple thin coats create more durable protection than a single thick application. Thin layers also flex more effectively as wood expands and contracts with weather changes.
Picture thick ice on a lake versus flexible rubber. Ice cracks under movement, while rubber bends and survives. Outdoor sealers need that same flexibility to remain intact over time.
Best Tools for Applying Outdoor Sealers
Brushes remain the most reliable option for many outdoor wood projects because they work the sealer deeply into the surface and provide excellent control around edges and corners.
Foam brushes are useful for smaller decorative pieces because they minimize brush marks. Rollers can speed up large flat surfaces but may create bubbles if used aggressively. Sprayers offer smooth professional finishes but require experience and careful masking.
Whichever tool you choose, consistency matters most. Uneven application leads to uneven protection.
Drying and Curing Conditions That Matter
Temperature and humidity dramatically influence how outdoor sealers perform. Applying finish under poor conditions is like baking bread in a broken oven; the ingredients may be correct, but the outcome won’t be.
Most outdoor sealers perform best between 50°F and 85°F with moderate humidity. Excess moisture in the air slows curing and may create cloudy finishes. Extreme heat causes the surface to dry too quickly before leveling properly.
Wind also affects application. Dust, debris, and insects become more likely to stick to wet coatings outdoors. Choosing calm, dry weather improves final appearance significantly.
Always check weather forecasts before sealing outdoor wood. Rain arriving before curing completes can permanently damage the finish.
Moisture-Prone Areas You Should Never Ignore
Most outdoor paint failures begin in small overlooked areas rather than broad visible surfaces. Water follows gravity, enters cracks, and attacks weak points first.
Bottom edges, horizontal surfaces, joints, screw holes, and end grain absorb moisture faster than flat vertical areas. These locations require extra attention during sealing.
Experts studying outdoor wood coatings specifically highlight end grain as a major vulnerability because it absorbs water dramatically faster than face grain. Failing to seal these areas thoroughly often shortens the lifespan of the entire project.
Furniture legs, fence bottoms, railing tops, and deck edges are common trouble spots. Horizontal surfaces suffer most because water pools instead of draining away.
End Grain and Joint Areas
End grain acts like an open doorway for moisture. Every exposed fiber provides a pathway inward. Applying extra coats to these sections significantly reduces absorption.
Joints create another danger zone because tiny gaps trap moisture while limiting airflow. Over time, trapped water promotes swelling, cracking, and fungal growth.
Sealing these areas carefully is similar to weatherproofing windows in a house. Ignore the seams, and eventually leaks appear no matter how strong the surrounding structure seems.
Horizontal Surfaces and Bottom Edges
Horizontal surfaces endure the harshest exposure outdoors because rainwater lingers there longer. Tabletops, deck rails, and fence caps often deteriorate faster than vertical sections.
Bottom edges deserve attention too. Water frequently collects underneath furniture or trim where visibility is poor. Many outdoor projects fail from below upward because these hidden areas remain unsealed.
Applying extra coats to these moisture-prone regions creates a stronger defensive barrier where it matters most.
Long-Term Maintenance for Outdoor Painted Wood
Sealing painted wood is not a one-time task forever. Outdoor exposure slowly wears down every protective coating eventually. Maintenance is what separates wood that lasts decades from wood that deteriorates within a few seasons.
Routine inspection helps catch problems early before widespread damage develops. Look for fading, chalkiness, peeling, hairline cracks, or areas losing their sheen. These are warning signs the protective barrier is weakening.
Many professionals recommend inspecting outdoor wood yearly and reapplying clear coats every one to three years depending on climate severity and sun exposure. Harsh environments naturally require more frequent upkeep.
Cleaning also extends coating life. Dirt and mildew hold moisture against the surface longer, accelerating breakdown. Simple seasonal washing prevents buildup and preserves appearance.
Think of maintenance like changing oil in a car. Skip it long enough, and the damage becomes far more expensive than the preventive care ever would have been.
Seasonal Inspection Habits
Spring and fall are ideal times for inspection because weather transitions reveal weaknesses in the finish. Winter moisture and summer UV exposure both stress outdoor coatings heavily.
Walk around the project slowly and examine vulnerable areas closely. Pay attention to corners, edges, joints, and surfaces facing direct sunlight.
Touch the surface too. Roughness, softness, or stickiness often indicate coating problems before visual damage becomes severe.
When to Reapply the Protective Topcoat
Don’t wait until peeling begins. Recoating works best while the existing finish still remains mostly intact.
Light sanding followed by a fresh maintenance coat restores UV protection and moisture resistance before major deterioration occurs. This preventive approach saves enormous effort compared to full stripping and repainting later.
If the paint itself begins failing extensively, the surface may require complete refinishing before resealing.
Conclusion
Outdoor painted wood faces constant attacks from sunlight, rain, humidity, and temperature changes. Paint alone rarely provides enough long-term defense against those forces. A high-quality outdoor sealer acts like a protective shield, extending the life of the paint while helping the wood resist moisture intrusion, UV damage, cracking, and rot.
Success comes down to several key factors: choosing the right sealer, preparing the surface carefully, applying multiple thin coats, sealing vulnerable moisture-prone areas, and maintaining the finish over time. Scientific research on outdoor wood coatings consistently supports these practices as essential for maximizing durability and weather resistance.
The extra effort may seem tedious initially, but properly sealed painted wood rewards you with longer-lasting beauty, fewer repairs, and dramatically better protection against the elements. Whether you’re protecting outdoor furniture, fences, railings, doors, or decorative projects, the right sealing strategy can add years to the life of your wood surfaces.
FAQs
1. What is the best sealer for painted wood outdoors?
Spar urethane is often considered one of the best options because it combines UV resistance, flexibility, and moisture protection. Marine varnish also performs exceptionally well in harsh climates.
2. Can I apply a sealer directly over exterior paint?
Yes, but the paint must be fully cured, clean, dry, and lightly sanded for proper adhesion. Loose or peeling paint should always be repaired first.
3. How many coats of sealer should I apply?
Most outdoor projects benefit from at least three thin coats. Moisture-prone areas like end grain and horizontal surfaces may require additional coats.
4. How long does sealed painted wood last outdoors?
Properly maintained sealed painted wood can last many years outdoors. Climate conditions, sun exposure, and maintenance frequency heavily influence lifespan.
5. Should I use a water-based or oil-based sealer?
Water-based sealers dry faster and resist yellowing, while oil-based sealers usually provide stronger moisture resistance and durability in severe outdoor conditions.

Kareem Sallam is an Egyptian special writer based in Australia, with a strong interest in practical ideas and creative content that focuses on everyday solutions. He writes clear, engaging articles designed to be easy to follow and useful for a wide range of readers.
His work centers on DIY projects, handmade ideas, simple crafts, and home based creativity. Kareem aims to deliver content that is practical, inspiring, and accessible, helping readers turn simple materials into smart and enjoyable projects.