How To Sew A Patch Onto A Hat Without Ruining the Shape
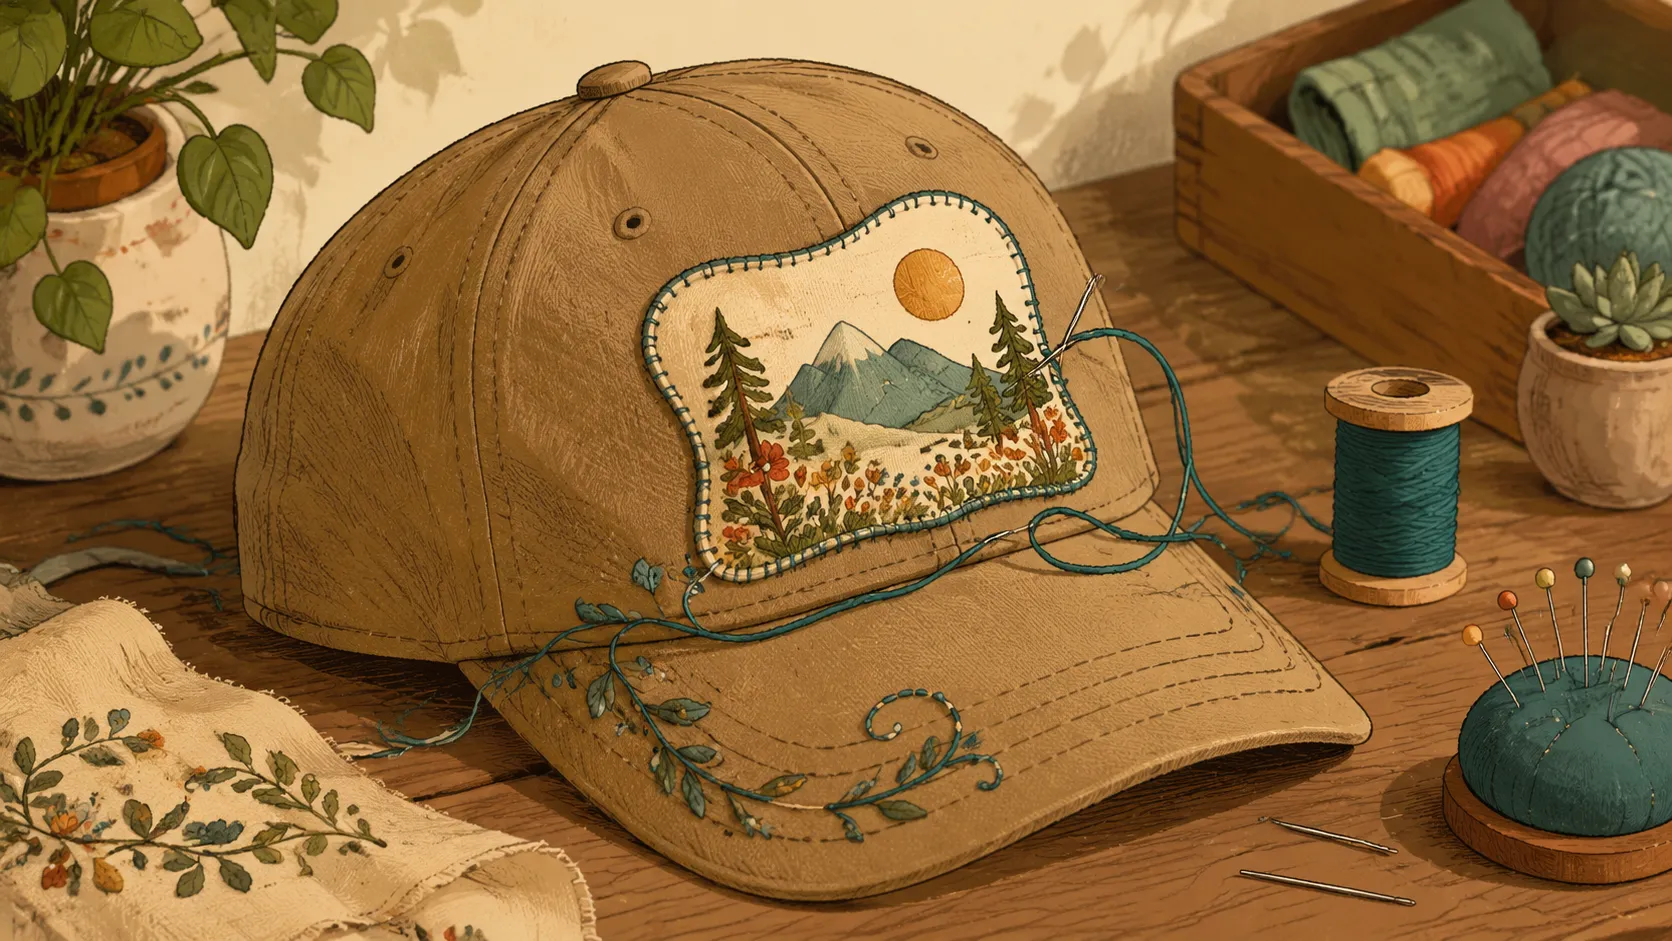
Hats used to be simple accessories. You grabbed one for sun protection, sports, or bad hair days and moved on with life. Today, though, hats have become walking billboards for personality, creativity, and branding. A single patch can completely transform a plain cap into something that feels custom-made and meaningful. Whether it is a vintage military patch, a motorcycle club emblem, a minimalist leather logo, or a fun embroidered design, sewing a patch onto a hat gives ordinary headwear an entirely new identity.
The tricky part is that hats are not flat like jackets or backpacks. They curve, bend, stretch, and sometimes fight you every step of the way. That curved front panel on a baseball cap can turn a simple sewing project into a frustrating puzzle if you do not know the right techniques. People often rush into the process, only to end up with crooked patches, puckered fabric, loose edges, or stitching that looks messy after just a few wears. The good news is that sewing a patch onto a hat is absolutely manageable when you understand the proper placement, tools, and sewing methods.
Professional embroidery shops and patch makers consistently recommend using strong polyester thread and sharp needles for hat applications because hats experience constant bending, sweat exposure, sunlight, and friction. Recent industry guidance from embroidery specialists also highlights that structured caps require different sewing approaches than soft hats due to their reinforced front panels. This article walks you through everything step by step so you can achieve a clean, durable, professional-looking result without turning your favorite hat into a sewing disaster.
Contents
Why Hat Patches Have Become So Popular
Customized headwear has exploded in popularity because people want products that feel personal instead of mass-produced. A patch tells a story instantly. Think about it like bumper stickers for your personality, except much more stylish. Brands, sports teams, outdoor companies, musicians, and even small businesses now rely heavily on patch hats because they create a textured, premium appearance that stands out more than direct printing.
Embroidered patches remain the most popular choice because they combine durability with a handcrafted appearance. Industry patch manufacturers note that embroidered patches typically use polyester thread because it resists fading, moisture, and repeated washing much better than cotton alternatives. Leather patches have also surged in popularity, especially on trucker hats and workwear-inspired caps, because they provide a rugged aesthetic that ages beautifully over time. Woven patches, on the other hand, allow finer detail and smaller lettering than traditional embroidery.
Different patch types behave differently during sewing, which matters more than most beginners realize. Thick embroidered borders create resistance while stitching, whereas woven patches tend to lie flatter against curved surfaces. Leather patches require stronger needles and slower sewing speeds because the material resists penetration. Understanding these differences before you even touch the needle saves enormous frustration later. It is a little like cooking with different ingredients; you would not treat steak the same way you treat fish, and you should not handle every patch type identically either.
The rise of DIY customization culture has also fueled interest in sewing patches at home. Social media platforms are full of creators transforming basic hats into premium-looking accessories with surprisingly simple tools. That accessibility makes the process appealing, but the polished results people admire usually come from patience, proper alignment, and good sewing habits rather than pure artistic talent.
Picking the Best Patch Placement for Different Hat Styles
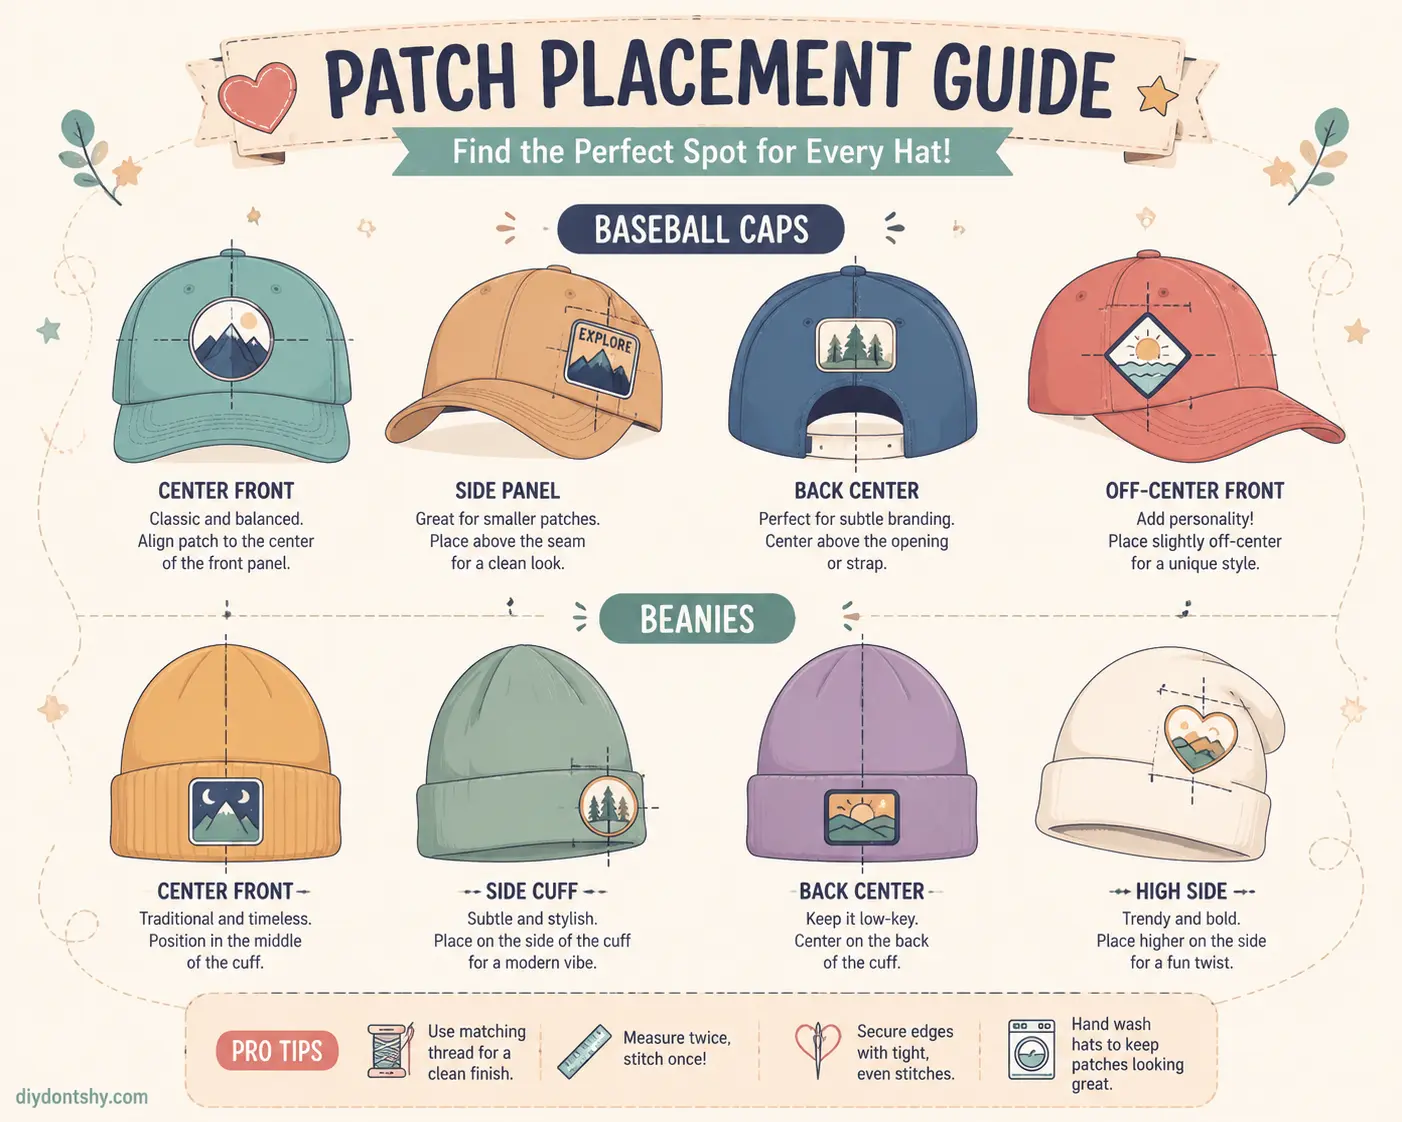
Patch placement is where most projects either succeed brilliantly or fall apart visually. Even a beautifully stitched patch can look awkward if it sits too high, too low, or slightly off-center. Placement determines balance, readability, and overall style. Before threading a needle, take time to actually wear the hat and study how the patch appears from different angles. Professional patch guides often recommend positioning the hat on your head first before deciding on placement because the curve changes visually once worn.
Baseball caps usually work best with centered front patches because the front crown offers the largest uninterrupted surface area. Structured baseball caps, especially snapbacks and fitted caps, naturally highlight front-center designs. Smaller patches can also work well on side panels, but oversized patches may wrinkle or distort due to seam placement. Trucker hats follow similar principles, though the foam front panel sometimes allows easier stitching because it has a flatter surface than stiff buckram-supported caps.
Beanies require a completely different approach. Since knit fabric stretches constantly, patches should typically sit slightly above the fold line to avoid distortion during wear. Sewing directly onto heavily stretched areas can cause uneven tension and puckering over time. Bucket hats create another unique challenge because their sloping sides distort rectangular patches visually. Circular or shield-shaped patches generally look more natural on bucket hats because they follow the curve more smoothly.
Patch size matters just as much as location. Industry patch experts commonly recommend a sweet spot between three and four inches for most hat patches because this size maintains detail visibility without overpowering the hat shape. A giant patch on a small cap looks clumsy, while a tiny patch may disappear visually. Think of placement like framing artwork on a wall; balance and proportion matter just as much as the art itself.
Essential Tools and Materials Before You Start
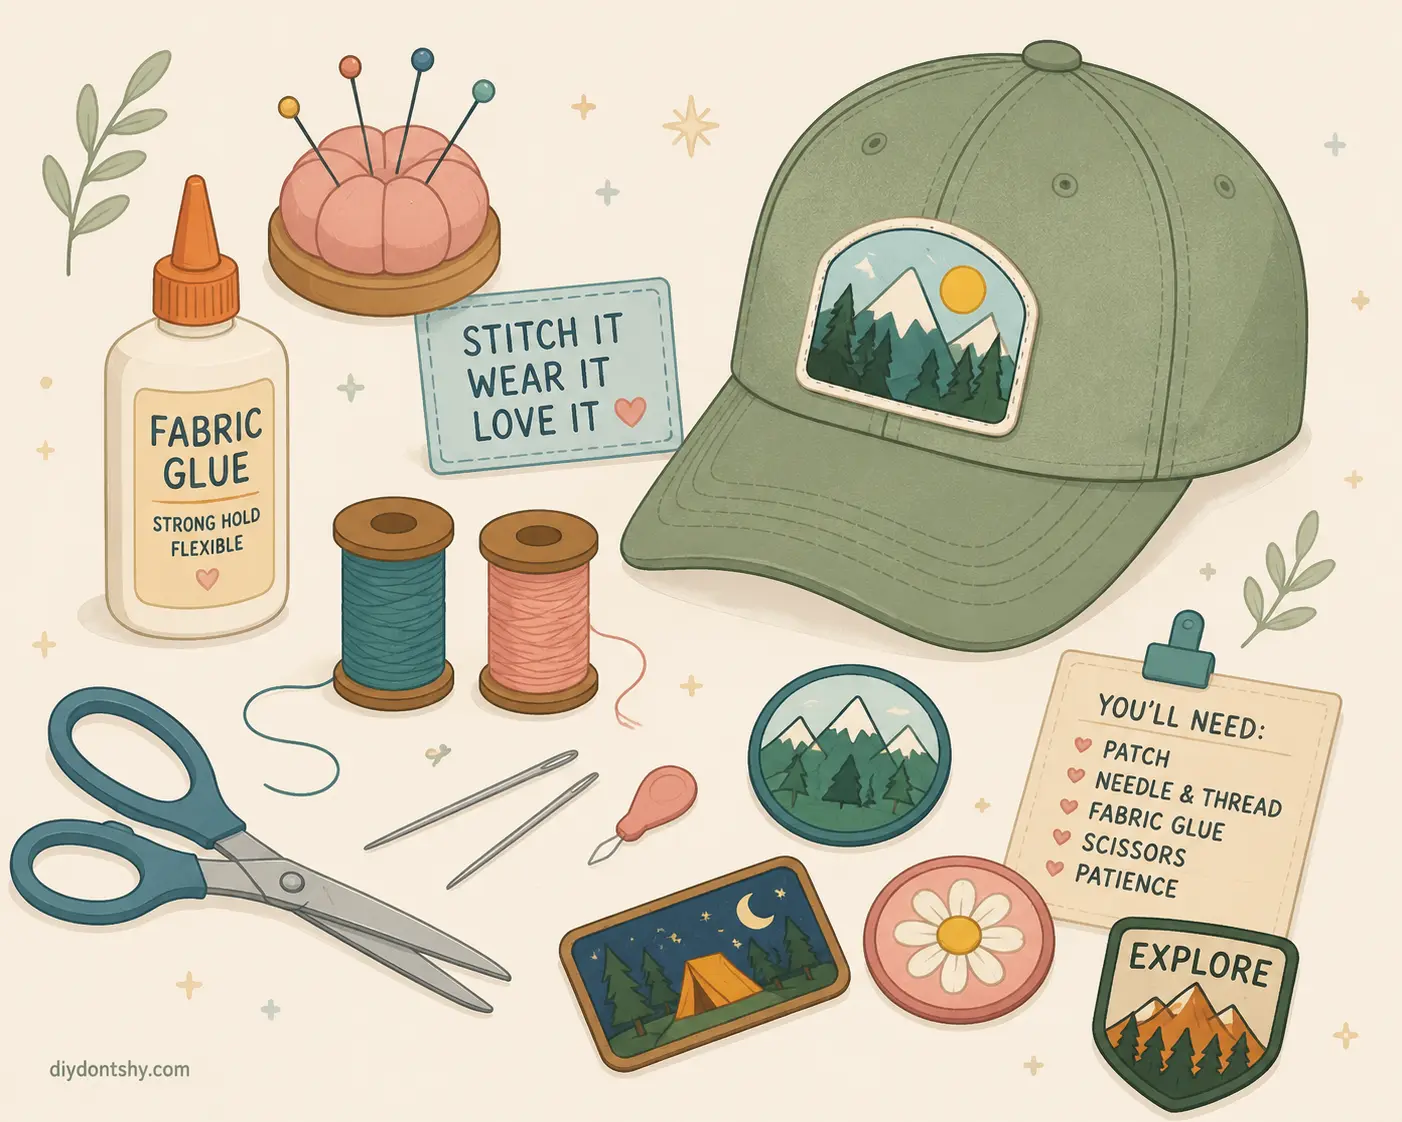
The difference between a professional-looking hat patch and a sloppy one often comes down to tool selection. Many beginners assume any sewing needle and random thread spool will work fine, but hats demand stronger materials because they experience constant movement and wear. Choosing proper supplies makes stitching smoother, cleaner, and far more durable.
A sharp-point sewing needle works best for structured hats because the reinforced front panels can be surprisingly tough. Embroidery specialists frequently recommend sharp 75/11 needles for cap work because they pierce heavy fabric and stabilizers more cleanly than ballpoint needles. If you are hand sewing thick embroidered patches onto sturdy caps, upholstery needles or denim needles can also perform well because they resist bending under pressure.
Thread selection matters enormously for longevity. Polyester thread consistently ranks as the preferred option among embroidery professionals due to its strength, color retention, and resistance to moisture and sunlight. Cotton thread can look attractive initially, but it tends to weaken faster under repeated sweat exposure and outdoor use. Some experienced crafters even double-thread their needles for added durability when sewing onto heavy materials. Reddit sewing communities regularly recommend stronger upholstery or doubled polyester thread for patches expected to endure rough use.
Beyond needle and thread, a few supporting tools dramatically simplify the process:
| Tool | Purpose |
|---|---|
| Fabric clips or pins | Hold the patch in place |
| Fabric glue or double-sided tape | Prevent shifting during sewing |
| Thimble | Protect fingers on thick panels |
| Tailor’s chalk | Mark alignment points |
| Small scissors | Trim loose threads cleanly |
| Measuring tape | Keep placement centered |
Fabric glue deserves special mention because it acts like an invisible extra pair of hands. Temporary adhesive prevents the patch from drifting while stitching around curved surfaces. Multiple patch guides recommend light adhesive positioning before sewing because hats naturally shift during handling. Just avoid excessive glue, since thick adhesive buildup can make needle movement sticky and frustrating.
Preparing the Fabric Surface Before Sewing
Preparation is the sewing equivalent of building a solid foundation for a house. Skip it, and problems appear quickly. Hats collect oils, dust, sweat residue, and invisible grime over time, all of which can interfere with stitching accuracy and patch adhesion. Before attaching anything, clean the sewing area gently with a damp cloth and allow it to dry completely.
Flattening the work surface helps more than most people expect. Hats naturally curve, which can distort patch alignment while sewing. Stuffing the inside of the hat with a towel or soft cloth helps stabilize the crown and creates resistance while stitching. It is similar to placing a hand behind paper while writing against a wall; the support makes control easier.
Alignment should happen slowly and deliberately. Measure the center line of the hat using seams as guides. Many people eyeball placement and later discover the patch drifts slightly sideways once worn. Even a few millimeters of misalignment become surprisingly obvious on the human head because the eyes naturally notice symmetry. Tailor’s chalk or washable fabric markers help mark reference points before sewing begins.
Temporary attachment methods dramatically reduce frustration. Fabric glue, adhesive spray, or double-sided sewing tape keeps the patch stable while you work around the curve. Professional patch tutorials frequently recommend securing the patch before stitching because movement during sewing creates uneven borders and warped designs. Pins can work too, though they sometimes distort curved hats or create visible holes in delicate materials.
One overlooked step involves testing needle penetration before full sewing begins. Structured caps often contain stiff internal buckram layers that feel tougher than expected. Running a few practice stitches in an inconspicuous spot helps determine how much pressure you need. This prevents accidental needle bending or uneven stitch spacing once the real sewing starts.
Hand Sewing Versus Machine Sewing for Hat Patches
The debate between hand sewing and machine sewing resembles choosing between a paintbrush and a spray gun. Both methods can produce excellent results, but each suits different situations. Hand sewing gives maximum control, while machine sewing offers speed and consistency when handled correctly.
Hand sewing remains the preferred method for many patch enthusiasts because hats are awkwardly shaped objects. A sewing machine struggles with tight curves and bulky crown panels unless you have specialized equipment. Hand stitching allows you to rotate the hat naturally, adjust tension in real time, and navigate seams carefully. This flexibility becomes especially valuable when working with thick embroidered patches or oddly shaped designs.
Machine sewing shines when durability and production speed matter most. Straight stitches followed by zigzag reinforcement create extremely secure patch attachment. Several sewing guides recommend combining straight stitching with zigzag edging for extra protection against peeling or fraying. Machine stitching also tends to look more uniform, particularly on symmetrical circular patches.
The downside is accessibility. Standard flatbed sewing machines struggle with structured hats because the crown shape limits maneuverability. Experienced embroidery users on Reddit point out that proper patch application on curved caps often requires specialized post-bed or cap-driver machines for truly professional alignment. That does not mean home machines are useless; it simply means patience and slow stitching become critical.
For beginners, hand sewing usually produces better results because it encourages slower, more careful stitching. A simple whip stitch or ladder stitch works wonderfully around patch borders. Small consistent stitches matter more than speed. Imagine tracing a drawing carefully instead of rushing with shaky hands. Precision creates professionalism.
Machine sewing works best on softer hats like bucket hats or unstructured dad caps because the fabric bends more easily under the presser foot. Structured snapbacks, however, can become wrestling matches under a regular machine. If using a machine, shorten stitch length slightly and sew slowly to maintain control around curves. Industry embroidery guides consistently recommend slower speeds and shorter stitches for hat work because curves amplify alignment mistakes quickly.
Keeping the Patch Centered While Stitching
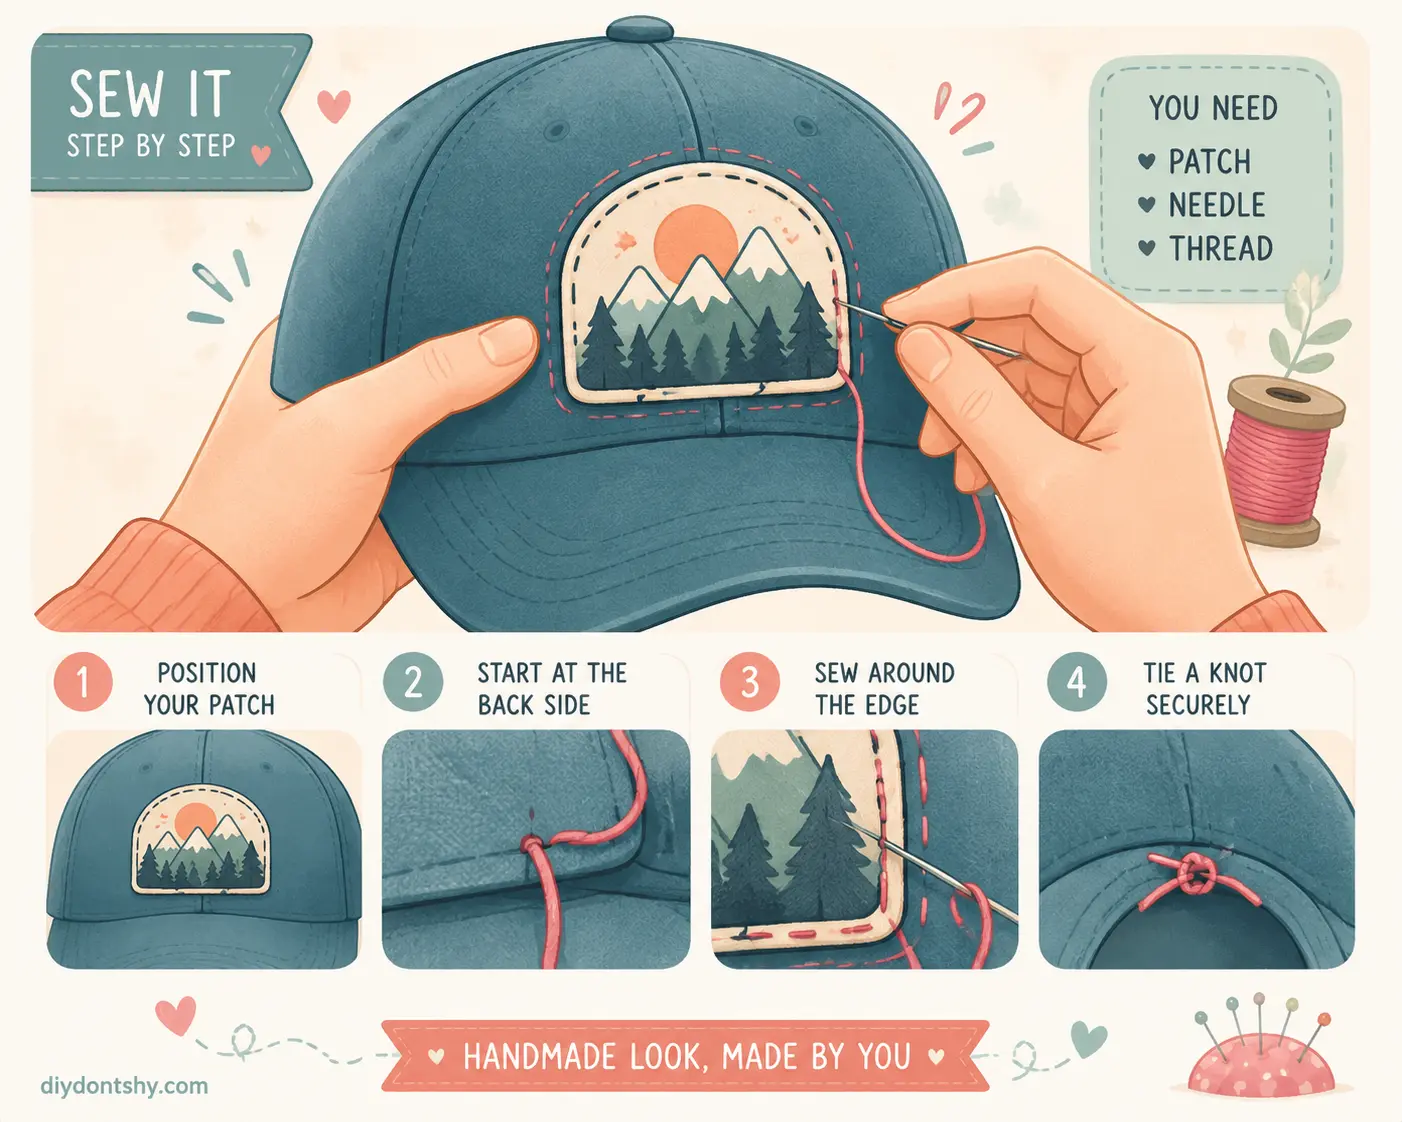
Centering the patch sounds simple until you actually start sewing. The moment thread tension pulls unevenly or the fabric shifts slightly, the patch can drift off balance. Since hats curve around the head, even tiny misalignments become visually exaggerated. That is why careful stabilization matters so much.
Start by identifying the hat’s vertical center seam. Most baseball caps include visible stitching lines that naturally divide the front panel. Use these seams as reference guides instead of relying purely on visual judgment. Measuring equal distances from both sides helps create symmetry. Tailor’s chalk marks can act like temporary road signs guiding your stitch path.
Temporary adhesives are incredibly valuable during this phase. Fabric glue or double-sided tape minimizes shifting while the needle moves through thick patch borders. Multiple professional tutorials specifically recommend adhesive positioning before sewing because curved surfaces naturally encourage movement. Without stabilization, patches can slowly rotate during stitching like a car tire drifting out of alignment.
One highly effective technique involves stitching opposite sides incrementally rather than sewing fully around in one direction. Sew a few stitches on the top, then move to the bottom, then alternate left and right. This distributes tension evenly and keeps the patch balanced. Think of tightening lug nuts on a car wheel; balanced pressure prevents distortion.
Curved hats create additional visual illusions. A patch that appears centered on a flat table may look crooked once worn because the crown bends around the forehead. Always test the appearance by placing the hat on your head or a rounded object during alignment. Professional patch guides emphasize checking visual balance from multiple angles before final stitching.
If the patch begins drifting mid-process, stop immediately instead of hoping it corrects itself later. Removing a few stitches early is far easier than restarting the entire project after completion. Sewing rewards patience far more than stubbornness.
Working Around Curved and Structured Hat Panels
Structured hats are the final boss of patch sewing. Those stiff front panels look clean and professional, but they resist needles, distort patches, and limit movement while stitching. The internal buckram reinforcement found in many baseball caps creates resistance that surprises beginners immediately.
The first rule for structured hats is simple: never force the needle aggressively. Excessive pressure bends needles, weakens thread, and creates uneven stitch spacing. Sharp needles designed for thicker materials perform much better because they pierce the stiff layers cleanly. Embroidery professionals specifically recommend sharp-point needles for structured caps to reduce snagging and skipped stitches.
Working slowly around curves is essential. Instead of trying to flatten the entire hat, rotate the hat gradually as you sew. This approach maintains natural fabric tension and prevents puckering around the patch edge. Curved surfaces behave a little like wrapping gift paper around a basketball; tension must remain balanced to avoid wrinkles.
Patch shape also influences difficulty. Circular and oval patches naturally follow curved panels more easily than square or rectangular designs. Sharp corners resist bending and may lift slightly if not stitched carefully. Industry patch experts frequently note that simple bold patch shapes perform better visually on hats because complex edges distort more easily on curved surfaces.
Soft hats create fewer structural challenges but introduce stretch-related issues instead. Beanies and lightweight bucket hats flex constantly, meaning overly tight stitching can cause rippling or puckering. Slightly looser stitch tension helps maintain the hat’s natural flexibility. Some experienced sewists even recommend longer stitches on thinner hats to reduce fabric stress.
One of the smartest tricks involves partially turning the sweatband outward during sewing. This creates better hand access inside the crown and improves visibility while tying off threads neatly. Small ergonomic adjustments like this can transform an awkward project into a manageable one.
Clean Finishing Techniques for a Professional Look
Finishing separates amateur-looking projects from polished professional work. You can have perfect placement and strong stitching, but loose threads and uneven borders instantly cheapen the appearance. Clean finishing requires discipline more than advanced skill.
Consistency matters first. Keep stitch spacing uniform throughout the patch perimeter.
Small tight stitches usually look cleaner than large widely spaced ones because they blend naturally into embroidered patch borders.
Loose edge prevention starts before sewing even begins. Many high-quality patches include merrowed borders specifically designed to resist fraying and conceal stitch lines. When stitching around the edge, aim for the border itself rather than piercing too far inward. This hides thread more effectively while reinforcing the patch edge simultaneously.
Backstitching or knot security matters tremendously for durability. Machine sewing guides consistently recommend backstitching at both the beginning and end of the seam to prevent unraveling. Hand sewers should tie secure interior knots and trim thread closely without cutting too aggressively. Long dangling threads inside the hat not only look messy but can catch during wear and gradually loosen the stitching.
Inspect the finished patch under good lighting from multiple angles. Tiny gaps or loose corners become much easier to notice before the hat enters regular use. Pressing the patch gently with your fingers helps reveal weak attachment points that may need reinforcement stitches.
Long-term maintenance also affects appearance. Even strong polyester thread eventually weakens under harsh conditions like repeated soaking, heavy sweat exposure, or aggressive machine washing. Spot cleaning usually preserves patch hats better than full washer cycles. Embroidery professionals consistently favor polyester thread because it holds color and strength better during prolonged wear.
A professionally finished patch should look intentional, balanced, and integrated into the hat design rather than awkwardly glued on as an afterthought. That polished appearance comes from attention to tiny details most people rush through.
Conclusion
Learning how to sew a patch onto a hat combines creativity with craftsmanship. It is one of those satisfying DIY projects where patience truly pays off. A carefully sewn patch transforms a simple hat into something personal, expressive, and visually striking. The key is understanding that hats behave differently than flat fabrics. Their curves, structure, and tension require slower movements, smarter placement decisions, and stronger materials.
Choosing the right patch location creates visual balance, while proper preparation prevents frustrating alignment problems later. Sharp needles, durable polyester thread, and temporary adhesives dramatically improve both durability and ease of sewing. Hand sewing offers greater control for beginners, while machine sewing can provide stronger reinforcement when handled carefully. Most importantly, maintaining even tension and clean finishing techniques ensures the final result looks polished rather than homemade in a rushed way.
The beauty of patch sewing lies in its versatility. You can customize sports caps, vintage trucker hats, outdoor beanies, tactical hats, or fashion-forward bucket hats with completely different aesthetics and personalities. Every patch tells a story, and every stitch contributes to that story lasting through years of wear. Once you master the fundamentals, sewing patches onto hats becomes less intimidating and far more enjoyable; almost like learning the rhythm of a craft that rewards patience with wearable art.
FAQs
1. What is the best thread for sewing patches onto hats?
Polyester thread is generally considered the best option because it is durable, colorfast, and resistant to moisture, sunlight, and wear. Many embroidery professionals recommend polyester over cotton for long-lasting patch attachment.
2. Can I sew a patch onto a structured baseball cap by hand?
Yes, hand sewing is often easier for structured caps because it gives better control over curved surfaces and stiff front panels. Use a sharp heavy-duty needle and work slowly around the patch edge.
3. How do I stop a patch from moving while sewing?
Fabric glue, double-sided sewing tape, or temporary adhesive spray can help hold the patch securely in place. Many sewing guides recommend securing the patch before stitching to avoid shifting.
4. Is machine sewing stronger than hand sewing for hat patches?
Machine sewing can create very strong and uniform stitches, especially when using zigzag reinforcement. However, hand sewing often provides better precision on curved hats and works well when done carefully.
5. What patch shape works best on curved hats?
Circular, oval, and shield-shaped patches usually adapt better to curved hat panels than square patches. Sharp corners can lift or distort more easily on structured caps.

Ahmed Elhor is an Egyptian SEO specialist, pharmacist, and copywriter based in Canada. He combines strong research skills with search focused writing to create clear, helpful content that answers real questions and ranks effectively in search engines.
With a passion for practical DIY ideas, homemade solutions, and creative projects, Ahmed focuses on producing easy to follow guides that are simple, affordable, and useful for everyday life. His work blends creativity with structure, helping readers turn basic materials into meaningful results.