How To Knit A Sweater Step By Step for Beginners
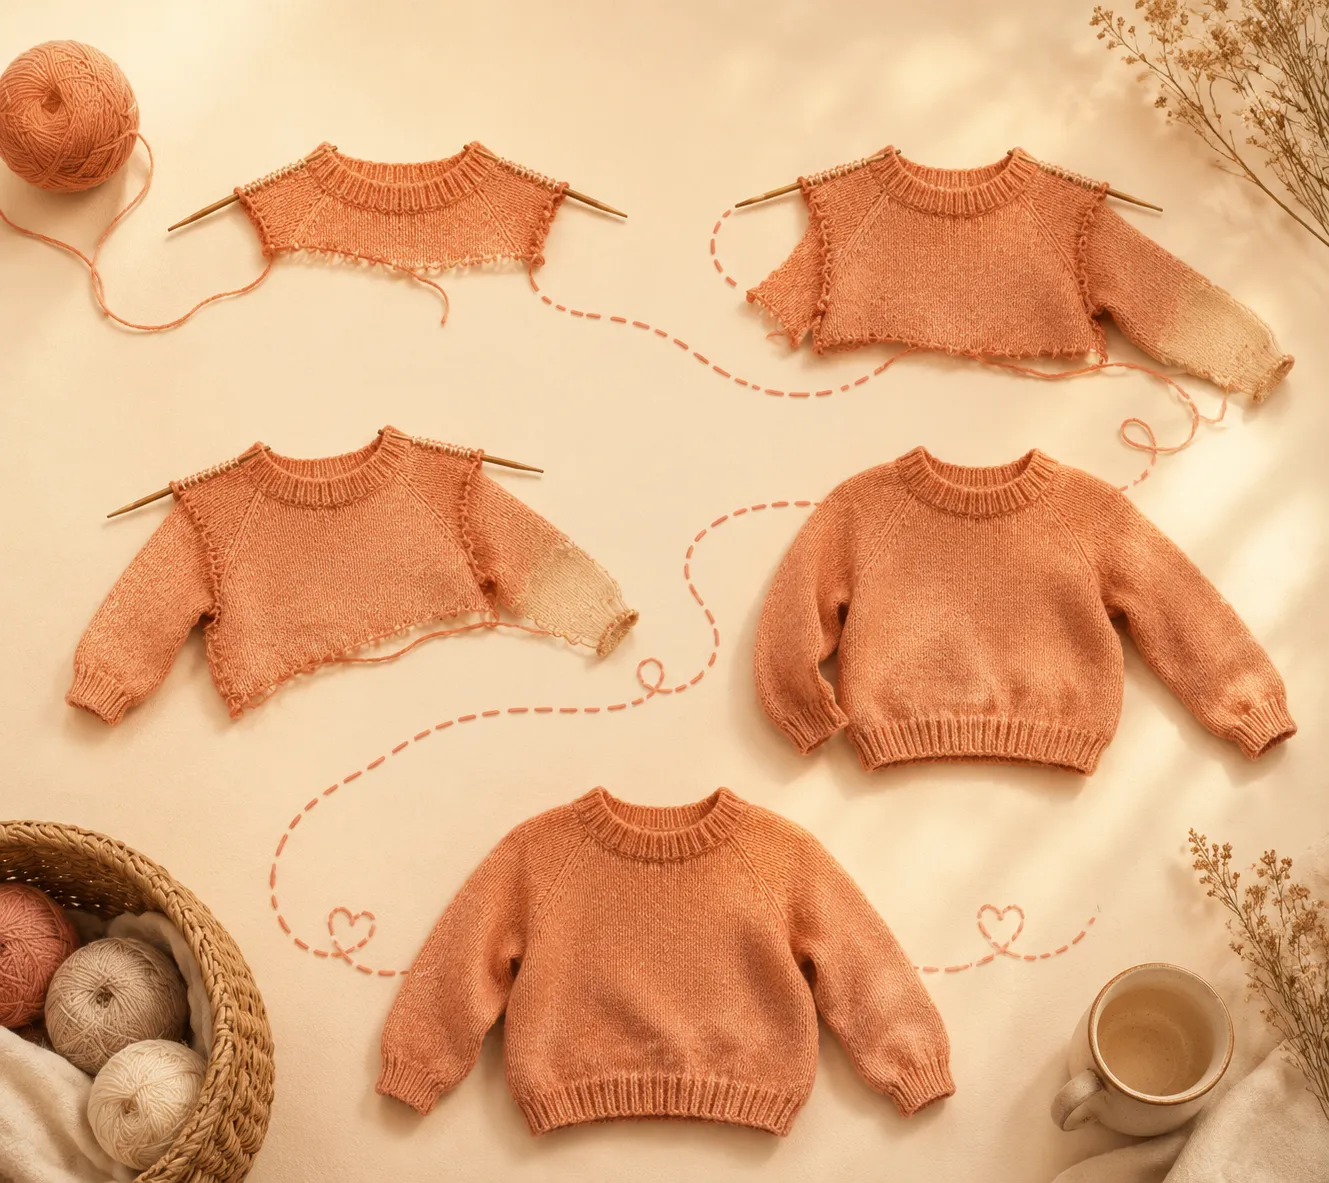
Knitting your very first sweater can feel like standing at the bottom of a mountain with a pair of needles in your hands and no map in sight. You see beautiful handmade sweaters online, scroll through endless yarn choices, and suddenly words like “gauge,” “raglan,” and “positive ease” sound like a foreign language. The truth is, sweater knitting is far less intimidating once you break it into manageable steps. Thousands of beginners are learning sweater knitting in 2026 through simple top-down patterns, chunky yarns, and beginner-friendly tutorials that focus on progress instead of perfection.
What makes sweater knitting special is that every stitch slowly transforms into something wearable, personal, and surprisingly emotional. A scarf is nice, sure. But a sweater? That feels like building your own little piece of armor against cold weather. It becomes part craft project, part engineering puzzle, and part cozy achievement you can actually wear outside.
Before diving into stitches and sleeves, it helps to understand how sweaters are constructed, why yarn choice matters so much, and how a tiny square called a gauge swatch can save you from heartbreak later. Once those basics click into place, the rest becomes a series of logical steps instead of overwhelming mysteries.
Contents
Why Sweater Knitting Feels Easier Than Most Beginners Expect
A lot of new knitters assume sweaters belong in the “advanced” category alongside intricate lace shawls and impossible cable charts. That fear usually comes from seeing finished sweaters rather than understanding how they are built. At its core, a sweater is really just a collection of simple shapes connected together. Most beginner sweaters rely heavily on basic knit stitches, repetitive rows, and gradual shaping. Once you realize that, the entire process feels less like rocket science and more like assembling furniture one panel at a time.
One reason beginner-friendly sweater patterns exploded in popularity recently is because modern designers simplified the learning curve dramatically. In 2026, top-down raglan sweaters and oversized pullovers remain especially popular because they allow knitters to try on the garment as they work. That flexibility removes much of the anxiety around sizing mistakes. Instead of blindly knitting separate pieces and praying they fit later, you can adjust length, sleeves, and body shape while the project is still on your needles.
Another thing beginners often misunderstand is how forgiving knitting can be. Mistakes are normal. Even experienced knitters rip back rows and redo sections regularly. Think of knitting like sketching with yarn rather than carving stone. If something looks wrong, you can fix it. That mindset alone changes everything because it replaces perfectionism with experimentation.
The internet also transformed sweater knitting into a much friendlier experience. Video tutorials, knitting communities, and online pattern platforms now guide beginners through every tiny step. Reddit knitting communities in 2026 repeatedly encourage first-time sweater knitters to start simple instead of waiting until they feel “ready.” Ironically, many knitters learn faster by jumping into a straightforward sweater project than by endlessly practicing scarves.
Choosing a Beginner-Friendly Sweater Pattern
The right pattern can make your first sweater feel manageable instead of overwhelming. Look for a design with simple construction, predictable stitch patterns, clear instructions, and flexible sizing. A good beginner pattern should help you learn garment construction without requiring several advanced techniques at once.
Start With a Simple Sweater Construction
Top-down raglan and drop-shoulder sweaters are particularly approachable because you can monitor the fit as the garment grows. Top-down designs let you try on the sweater before committing to the full length, while drop-shoulder styles often use straightforward shaping and minimal seaming. Both approaches reduce the number of complicated decisions beginners face.
Stockinette stitch is another practical choice for a first sweater. Its repeating structure lets you concentrate on important skills such as maintaining tension, following increases and decreases, checking measurements, and recognizing pattern instructions without constantly switching stitch techniques.
Features to Look For in Your First Pattern
- Clear sizing information and finished garment measurements
- A straightforward construction method such as top-down raglan or drop shoulder
- Basic knit, purl, ribbing, and simple shaping techniques
- Detailed instructions for sleeves, neckline, and finishing
- Notes about gauge, yarn requirements, and possible fit adjustments
For a first project, avoid patterns dominated by intricate cables, complex lace, intensive colorwork, or highly fitted shaping. These techniques are valuable skills to learn later, but combining several of them with your first sweater can make troubleshooting unnecessarily difficult.
A useful beginner pattern should also explain the parts that are easy to misunderstand, such as joining in the round, placing markers, separating sleeves, and picking up stitches. Strong pattern notes can save hours of guesswork and make the learning process much more enjoyable.
Here’s a simple comparison of beginner sweater styles:
- Top-down raglan: Easy to adjust during knitting and convenient for checking fit as you go.
- Drop shoulder: Simple shaping and construction make this a forgiving choice for beginners.
- Basic pullover: A straightforward silhouette lets you focus on knitting technique rather than complicated garment design.
| Sweater Type | Difficulty | Best For Beginners | Fit Flexibility |
|---|---|---|---|
| Top-Down Raglan | Easy | Yes | Excellent |
| Drop Shoulder Sweater | Easy | Yes | Very Good |
| Bottom-Up Sweater | Medium | Sometimes | Moderate |
| Cabled Sweater | Hard | No | Limited |
| Colorwork Sweater | Hard | No | Moderate |
Modern beginner patterns also tend to include extensive notes, tutorials, and troubleshooting advice. Some even link directly to video demonstrations for techniques like picking up sleeves or joining underarms. That extra support makes a massive difference for nervous first-time knitters.
Related Articles: How to Transfer Embroidery Pattern to Fabric
Understanding Yarn and Needle Sizes
Yarn choice affects nearly every part of a sweater, including its weight, warmth, drape, stitch definition, and finished size. For a first project, choosing a yarn that is easy to handle can make the learning process considerably smoother. The goal is not simply to find the prettiest color, but to choose a fiber and weight that work well with the pattern and the fabric you want to create.
Which Yarn Weight Is Best for Beginners?
Worsted and DK weight yarns are practical starting points because the stitches are easy to see without making the sweater excessively slow to knit. Bulky yarn can produce quick results, but the finished fabric may become heavy or overly thick. Very fine yarn creates lightweight garments but requires more stitches and considerably more knitting time.
When comparing yarns, pay attention to the pattern’s recommended weight, fiber content, yardage, and gauge. If you substitute another yarn, matching the original yarn’s gauge and general characteristics is more important than choosing the same brand. A yarn with very different elasticity or drape can change both the fit and appearance of the finished sweater.
Choosing the Right Needles
Needle size controls how tightly the yarn is worked. Larger needles generally create a looser, more flexible fabric, while smaller needles create denser stitches. However, the correct needle size is the one that helps you achieve the pattern’s required gauge while still producing fabric that feels comfortable and looks appropriate for the sweater.
- Worsted weight: A versatile choice with clear stitch definition and a manageable knitting speed.
- DK weight: Creates a lighter sweater while remaining relatively easy for beginners to handle.
- Bulky weight: Works up quickly but can produce a heavier, warmer garment.
- Acrylic blends: Affordable, durable, and generally easy to care for.
- Wool blends: Offer warmth and elasticity that can help sweaters hold their shape.
- Cotton: Provides breathability but can produce a heavier fabric with less natural stretch.
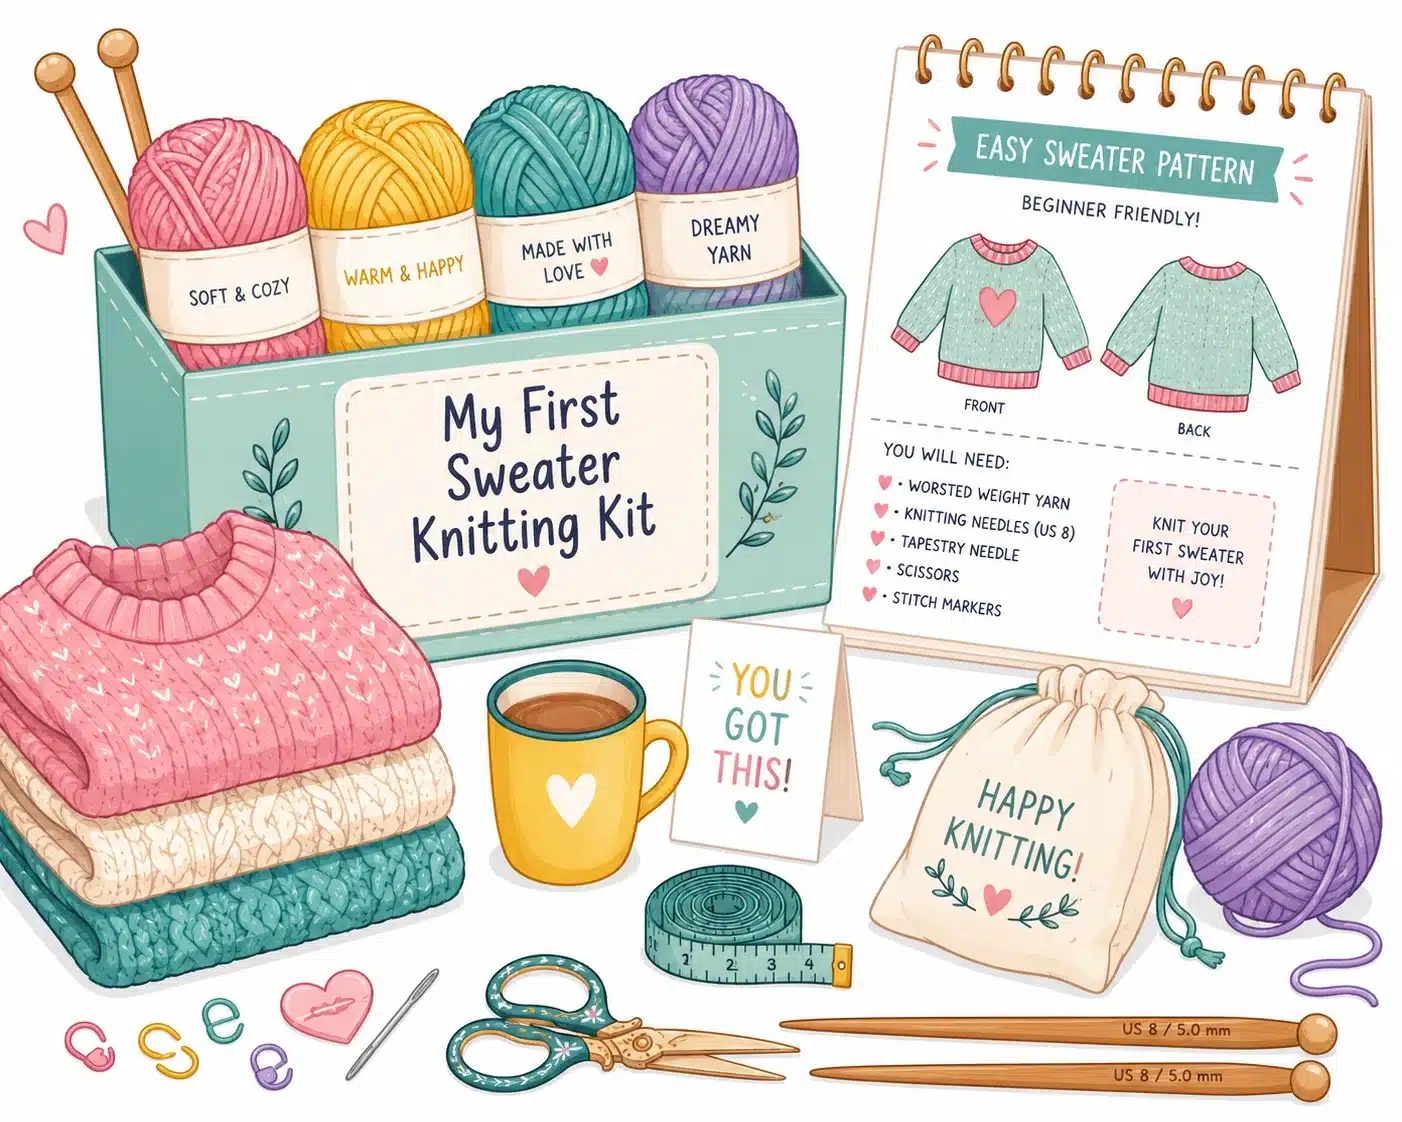
Before buying enough yarn for the entire sweater, check the pattern requirements and make a gauge swatch with the yarn and needles you plan to use. This simple step gives you a much better indication of whether the combination will produce the intended fabric and fit.
Understanding Gauge Before You Start Knitting
Gauge is one of the most important concepts in sweater knitting because it determines whether the finished garment will match the measurements in the pattern. It describes how many stitches and rows you produce within a specific measurement, commonly 4 inches or 10 centimeters. Even knitters using the same yarn and needles can produce different results because their natural tension varies.
Why a Gauge Swatch Matters
A sweater can require hundreds or thousands of stitches, so a small difference in gauge can become a major difference in finished size. If you knit more stitches per 4 inches than the pattern specifies, your fabric is tighter and the sweater will generally come out smaller. If you knit fewer stitches, the fabric is looser and the garment will generally become larger.
For example, if a pattern calls for 20 stitches per 4 inches and your swatch produces 22 stitches, you are knitting more tightly than required. Moving to a larger needle can loosen your stitches and bring the gauge closer to the pattern specification. If you get too few stitches, a smaller needle may help.
How to Make and Measure a Swatch
- Cast on enough stitches to create a swatch larger than the measurement area specified by the pattern.
- Knit using the same stitch pattern you will use for the sweater.
- Wash and dry the swatch according to the intended care method for the finished garment.
- Lay the swatch flat without stretching it.
- Measure the center area and count stitches and rows within the required distance.
- Change needle size and repeat the swatch if your gauge does not match.
Washing the swatch before measuring is especially useful with natural fibers because yarn can relax, bloom, or change dimensions after washing. The goal is not merely to match the numerical gauge. Your swatch should also create fabric that feels comfortable and behaves appropriately for the sweater.
When Gauge and Fabric Feel Conflict
Sometimes a particular needle size produces the correct stitch count but an unpleasant fabric. If the fabric feels stiff, overly loose, or too heavy, consider changing the yarn or choosing another pattern rather than forcing the combination to work. A successful sweater needs both accurate gauge and suitable fabric quality.
Once gauge becomes familiar, it stops feeling like an unnecessary extra step. Instead, it becomes a practical tool for controlling size, fit, and fabric before investing weeks of work in the sweater.
Building the Main Sections One Step at a Time
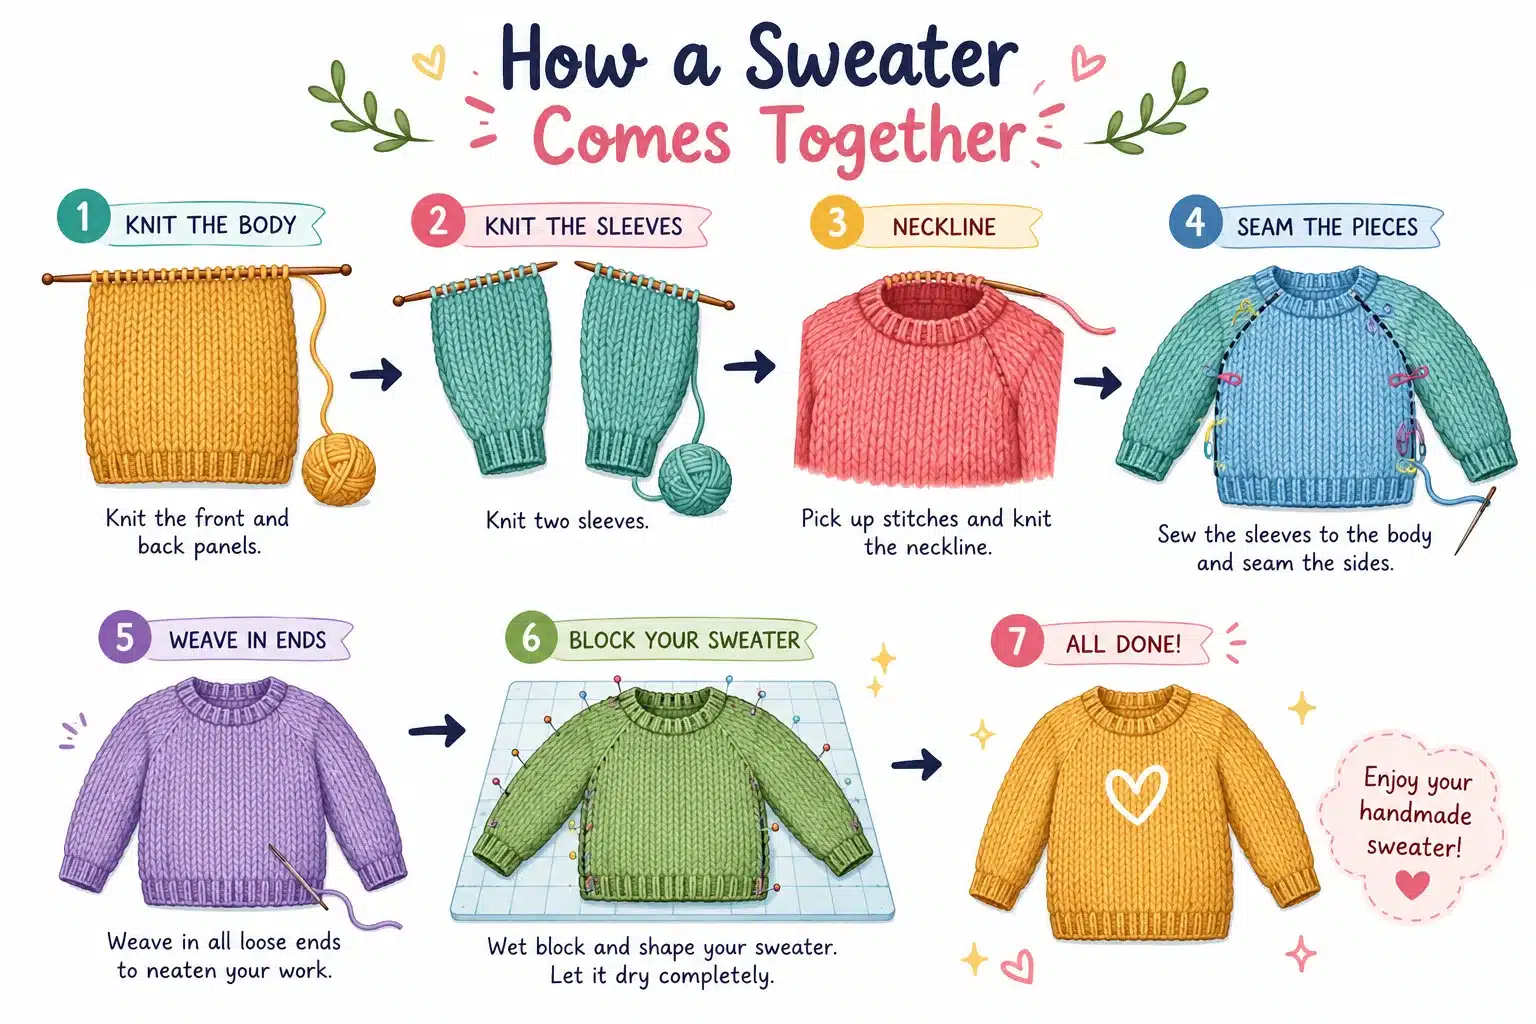
Sweaters become far less intimidating once you understand they are built in sections. Instead of viewing the project as one enormous object, think of it as several smaller missions connected together. Most sweaters include the body, sleeves, neckline, and finishing work. Tackling them one at a time keeps the process manageable and surprisingly enjoyable.
The sweater body usually comes first. In top-down sweaters, you begin at the neckline and gradually increase stitches to form the shoulders and chest. In bottom-up sweaters, you start from the hem and work upward. Either way, much of the body knitting is repetitive stockinette or ribbing. This repetitive rhythm becomes oddly calming after a while. Many knitters describe sweater knitting as meditative because the hands settle into a steady flow while the fabric slowly grows row by row.
Sleeves often scare beginners more than any other section, but they’re basically smaller tubes attached to the body. The challenge comes from shaping. Sleeve decreases create a tapered fit toward the wrists, while increases expand the fabric toward the upper arm. Once you understand why the stitch count changes, sleeve shaping stops feeling random. It’s simply architecture with yarn.
Modern beginner sweater patterns frequently use seamless sleeve construction because it reduces complicated sewing later. You place sleeve stitches on hold, complete the body, then return to the sleeves afterward. This method keeps everything connected and easier to visualize.
Necklines and shoulders add another layer of shaping logic. Crew necks are easiest for beginners because they rely on simple curves and ribbing. V-necks and structured collars require more advanced decreases and finishing techniques. Think of neck shaping like sculpting the opening frame of the sweater. Too tight, and the sweater feels uncomfortable. Too loose, and it loses structure.
One helpful mental trick is to stop obsessing over the entire project timeline. Sweaters can take weeks or months depending on yarn weight and knitting speed. That’s normal. Many successful knitters simply focus on completing one section at a time rather than constantly measuring how far remains.
Current knitting trends also encourage relaxed sweater silhouettes, textured fabrics, and oversized fits, which makes beginner mistakes less noticeable and more wearable. A tiny uneven tension spot often disappears entirely once the sweater is blocked and worn naturally.
Joining the Pieces for a Clean Finish
Finishing work is where a handmade sweater either transforms into something polished or remains looking obviously homemade. This stage includes seaming, weaving in ends, blocking, and smoothing transitions between sections. Beginners sometimes rush through finishing because they’re eager to wear the sweater immediately, but these details dramatically affect the final appearance.
Seaming sounds intimidating, yet it’s mostly about alignment and patience. Mattress stitch is one of the most popular seaming methods because it creates nearly invisible joins between knitted sections. Instead of bulky ridges, the seams appear smooth and professional. Good seams are like good movie editing; you barely notice them when done correctly.
Seamless sweater construction became increasingly popular because it reduces finishing labor substantially. Even seamless sweaters still require careful underarm joining and yarn-end weaving, though. Loose ends left dangling inside the sweater eventually work themselves free over time, so secure finishing really matters.
Blocking is another magical step many beginners underestimate. Blocking means washing or steaming the sweater and shaping it carefully while it dries. This process evens stitches, softens fabric, and improves drape dramatically. A sweater before blocking can look crumpled and uneven. After blocking, the same sweater suddenly appears refined and balanced. It’s almost like ironing a wrinkled shirt before an important meeting.
Different fibers react differently during blocking:
| Fiber Type | Blocking Result |
|---|---|
| Wool | Excellent shape memory |
| Acrylic | Limited reshaping |
| Cotton | Can stretch heavily |
| Alpaca | Softens significantly |
Blocking also reveals why gauge swatches matter so much. Many yarns change noticeably after washing. Some bloom and expand, while others relax downward due to weight. Understanding this transformation helps knitters predict final fit more accurately.
A polished sweater isn’t about flawless stitches. Even experienced knitters have small inconsistencies hidden throughout their garments. The difference is that good finishing techniques smooth those imperfections into a cohesive final piece.
Final Touches That Make the Sweater Look Polished
The smallest finishing details often separate a “first sweater” from a sweater people genuinely assume came from a boutique. Ribbing, collars, cuffs, hems, and careful yarn weaving all contribute to that finished appearance. These details frame the garment much like a picture frame enhances artwork.
Ribbing plays an especially important role because it helps sweater edges maintain elasticity and structure. Without ribbing, cuffs and hems can flare outward awkwardly over time. The classic knit-two, purl-two rib remains popular because it balances stretch with visual texture. Ribbed necklines also help sweaters sit comfortably against the body rather than sagging.
Weaving in ends neatly is another underrated skill. Beginners often leave bulky knots or short tails hidden inside garments, but those shortcuts eventually create problems. Proper weaving distributes tension across stitches invisibly. It’s similar to hiding electrical wiring inside walls instead of letting cords dangle everywhere.
Care instructions matter too. Hand-knitted sweaters require gentler treatment than most store-bought clothing. Wool sweaters especially benefit from hand washing or delicate cycles followed by flat drying. Hanging wet sweaters can stretch them permanently because knitted fabric behaves differently than woven fabric.
Current sweater trends in 2026 also emphasize texture, softness, and minimalist silhouettes. Neutral shades, oversized fits, and tactile yarns dominate many handmade knitting communities. That trend works beautifully for beginners because simple shapes paired with quality yarn often look elegant without requiring complicated stitch techniques.
One of the best things about knitting your own sweater is the emotional connection it creates. Store-bought clothing rarely carries memories. Handmade sweaters remember every evening spent knitting on the couch, every corrected mistake, every moment of progress. Even imperfect stitches become part of the garment’s personality.
Many first-time sweater knitters are shocked by how wearable their finished project becomes. Sure, the first sweater may contain uneven rows or slightly crooked decreases. But once worn, those tiny flaws usually disappear into the overall texture. Handmade sweaters carry warmth beyond temperature; they carry evidence of patience, creativity, and persistence.
Conclusion
Knitting a sweater step by step becomes much more approachable once you stop seeing it as one giant impossible project. Every sweater is simply a series of manageable stages: choosing a beginner-friendly pattern, understanding yarn and needles, checking gauge carefully, building sections gradually, and finishing everything with patience. The magic happens when those small repeated actions slowly transform loose yarn into a wearable garment.
The biggest lesson beginner knitters learn is that mistakes are not proof of failure. They are part of the process. Every experienced sweater knitter has ripped back rows, adjusted sleeves, misread instructions, or struggled with gauge. The difference is that they kept going anyway. Sweater knitting rewards persistence far more than perfection.
Starting with simple patterns, comfortable yarns, and realistic expectations makes the journey dramatically more enjoyable. Once your first sweater is finished, future projects suddenly feel less mysterious because you understand how garment construction works. That confidence opens the door to cables, colorwork, fitted silhouettes, and more advanced techniques later on.
A handmade sweater is more than clothing. It’s a physical reminder that complex things become achievable when broken into smaller steps. One stitch at a time eventually becomes an entire sweater hanging in your closet.
FAQs
1. What is the easiest sweater pattern for beginners?
Top-down raglan sweaters and drop-shoulder pullovers are usually the easiest options for beginners. They involve simple construction, repetitive stitches, and flexible sizing adjustments.
2. How long does it take to knit a sweater?
The timeline depends on yarn weight, sweater size, and knitting speed. A beginner using worsted or bulky yarn may finish a simple sweater in several weeks to a few months.
3. What yarn is best for a beginner sweater?
Worsted-weight acrylic or wool-blend yarn is often recommended because it’s easy to handle, shows stitches clearly, and works up relatively quickly.
4. Do I really need to knit a gauge swatch?
Yes. Gauge determines sweater size and fit. Skipping the swatch can result in a sweater that ends up far too large or too small.
5. Is knitting a sweater harder than knitting scarves or hats?
Sweaters involve more construction techniques, but many beginners successfully knit sweaters early in their knitting journey. Modern beginner patterns simplify the process significantly.

Kareem Sallam is an Egyptian special writer based in Australia, with a strong interest in practical ideas and creative content that focuses on everyday solutions. He writes clear, engaging articles designed to be easy to follow and useful for a wide range of readers.
His work centers on DIY projects, handmade ideas, simple crafts, and home based creativity. Kareem aims to deliver content that is practical, inspiring, and accessible, helping readers turn simple materials into smart and enjoyable projects.