How To Knit A Scarf With Two Needles for Beginners

Learning how to knit a scarf with two needles is one of the easiest and most satisfying ways to enter the world of knitting. Think about it for a second. A scarf is basically a long rectangle. No sleeves, no complicated shaping, no weird curves that make you question your life choices halfway through the project. You cast on stitches, repeat simple movements, and slowly watch a useful item come to life right in your hands. That simplicity is exactly why experienced knitters almost always recommend scarves to beginners. Recent beginner knitting guides published in 2025 continue to rank scarves as the top starter project because they teach the foundation skills used in almost every knitting pattern later on.
Another reason scarves work so well for beginners is the low-pressure nature of the project. If your tension changes slightly or your stitches look uneven at first, it usually doesn’t ruin the final result. In fact, many handmade scarves carry those little imperfections like fingerprints, proof that something real and personal was created. It’s almost like learning to ride a bike. You wobble a little in the beginning, but eventually your hands develop muscle memory and everything starts flowing naturally.
Knitting a scarf also teaches patience in a surprisingly rewarding way. Every row adds visible progress, which keeps motivation high. You’re not spending weeks before seeing results. After just an hour or two, you can physically wrap your knitting around your neck and imagine the finished product. That psychological reward matters more than people realize. It transforms knitting from a difficult craft into something relaxing and addictive.
The best part? You only need two needles, yarn, and a little determination. No fancy machines. No expensive setup. Just simple tools creating something warm and practical from a single strand of yarn. That’s part of the magic that keeps knitting timeless generation after generation.
Contents
Choosing Beginner-Friendly Yarn and Needle Sizes
One of the biggest mistakes beginners make is choosing beautiful yarn that’s secretly difficult to work with. Soft fuzzy yarn may look luxurious in the store, but it can hide stitches so badly that beginners end up frustrated before they finish the first few rows. Most modern beginner knitting guides recommend using light-colored worsted-weight yarn because it clearly shows stitch structure and makes mistakes easier to spot.
Worsted-weight yarn is basically the “goldilocks” option of knitting. It’s not too thin, not too chunky, and it works well with medium-sized needles that are comfortable for beginners. Acrylic or wool-blend yarns are especially beginner-friendly because they stretch slightly and forgive uneven tension. Cotton yarn, on the other hand, can feel stiff and less forgiving when you’re still learning how tightly to hold the yarn. Some knitters on Reddit even mentioned that non-stretchy yarn caused hand strain during early projects.
Needle choice matters just as much as yarn choice. Current knitting guides strongly recommend bamboo or wooden needles for beginners because they create friction that prevents stitches from sliding off accidentally. Metal needles may be faster later on, but beginners often feel like their stitches are ice skating off the ends. Bamboo needles give you more control, almost like training wheels for your hands.
Here’s a quick comparison table for beginner knitting supplies:
| Item | Best Beginner Choice | Why It Helps |
|---|---|---|
| Yarn Weight | Worsted Weight | Easy to see and handle |
| Yarn Color | Light Solid Colors | Makes stitches visible |
| Needle Material | Bamboo or Wood | Prevents slipping |
| Needle Size | US 8 (5mm) | Comfortable stitch size |
| Scarf Length Goal | 60–70 inches | Standard adult scarf |
Most modern knitting resources recommend needle sizes between US 7 and US 9 (4.5mm–5.5mm) for beginner scarves. These sizes create stitches large enough to see clearly without making the fabric too loose. Imagine trying to learn handwriting using a pen with microscopic ink. That’s what tiny knitting needles feel like to beginners. Medium-sized needles let your hands relax and learn naturally.
Essential Supplies You Need Before Starting
The good news about knitting is that you don’t need an entire craft store worth of equipment to begin. In fact, part of knitting’s charm is its simplicity. You can fit everything needed for your first scarf into a small tote bag and carry it almost anywhere. That portability is one reason knitting has exploded again among younger generations looking for relaxing offline hobbies.
At the absolute minimum, you need yarn, knitting needles, scissors, and a yarn needle for weaving in ends. That’s it. Still, a few additional tools can make the process dramatically smoother. Stitch markers, measuring tape, and row counters are especially useful for beginners trying to stay organized. According to recent beginner knitting tutorials, even simple tools like row counters reduce beginner frustration because they eliminate the constant “Wait… did I already knit this row?” confusion.
Comfort also matters more than people expect. Knitting involves repetitive hand movements, so creating a comfortable setup prevents unnecessary strain. Many beginners grip their needles too tightly at first, almost like they’re wrestling the yarn into submission. Relaxed hands actually create smoother stitches and more even tension. Some experienced knitters compare knitting tension to holding a bird. Too loose and it escapes, too tight and you hurt it.
Lighting matters too. Natural light or bright lamps help you clearly see stitches, especially while learning how loops should look on the needle. Dark rooms and dark yarn are a terrible combination for beginners. That’s basically the knitting version of trying to solve a puzzle blindfolded.
Keeping supplies organized can also improve consistency. Using a project bag prevents tangled yarn disasters and protects unfinished work. Once beginners create a comfortable knitting environment, the hobby feels less intimidating and far more relaxing. The repetitive motion starts becoming meditative instead of stressful, which is exactly why millions of people turn to knitting for stress relief and mindfulness.
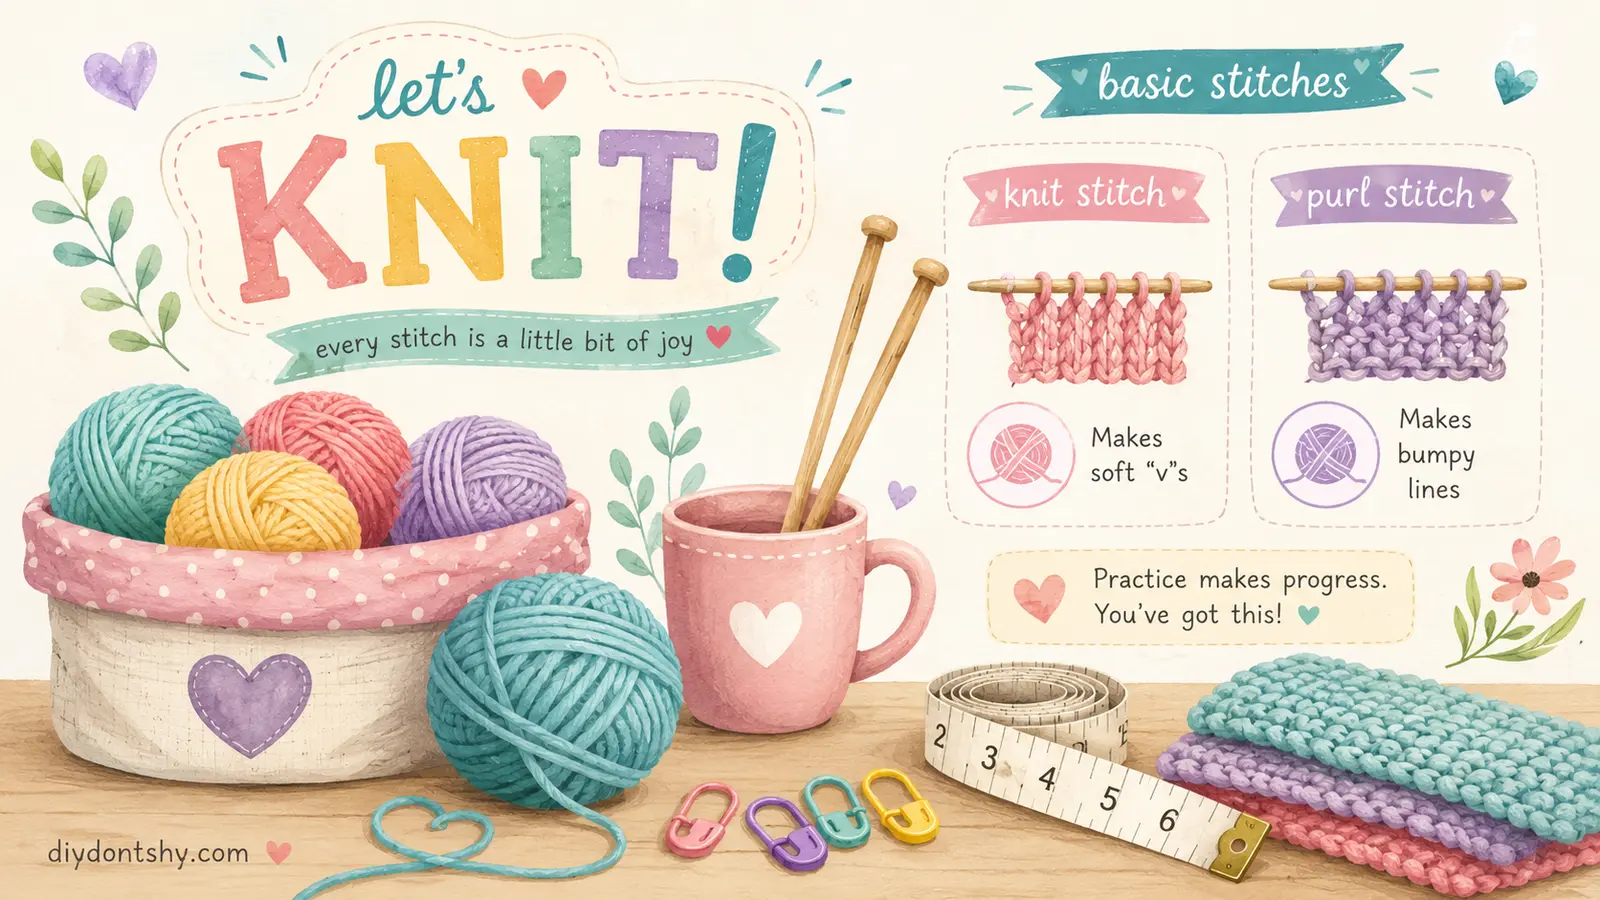
Understanding Basic Knitting Terms
Knitting has its own little language, and at first it can sound strangely confusing. Cast on? Bind off? Gauge? Frogging? It almost feels like joining a secret club where everyone speaks in yarn riddles. The good news is that beginners only need to learn a few essential terms before starting a scarf.
The first term is cast on, which simply means creating the first row of loops on your needle. Think of it as laying the foundation of a building. If the foundation is too tight or uneven, everything built on top becomes harder to manage. The second important term is the knit stitch, the basic movement that forms most beginner scarves. This stitch creates the familiar V-shaped texture seen in classic knitting projects. Finally, bind off means finishing the project so stitches don’t unravel when removed from the needle.
Understanding stitch count is another major beginner breakthrough. Every loop on your needle counts as one stitch, and maintaining the same number across rows keeps your scarf edges straight. Beginners commonly add accidental stitches at the row edges without realizing it. Suddenly the scarf starts narrow, grows wider in the middle, and looks like a strange geometric experiment by the end.
Gauge is another term beginners hear constantly. Gauge refers to how many stitches fit within a certain measurement. Scarves are forgiving compared to sweaters, so exact gauge matters less. Still, understanding gauge helps you control scarf width and fabric density. Larger needles create looser fabric, while smaller needles create tighter stitches. Recent knitting guides emphasize experimenting with small swatches first to discover your preferred tension and texture.
Once beginners understand these core terms, knitting instructions suddenly feel far less intimidating. Instead of reading mysterious coded instructions, you start recognizing simple repeated actions. That’s usually the moment knitting begins feeling fun instead of overwhelming.
Casting On Without Making the Edge Too Tight
If beginners had a universal knitting struggle, tight cast-ons would probably win first place. Almost everyone does it at first. You’re worried the stitches might fall off, so you pull the yarn tight like you’re tying down cargo during a storm. Then you try knitting the first row and realize the stitches barely move. Suddenly every stitch feels like arm wrestling.
The trick to a good cast-on is controlled looseness. Your stitches should sit comfortably on the needle without squeezing it. One popular beginner strategy is using needles one size larger for casting on, then switching to the intended size for knitting. This creates flexible edges that are easier to work into later. Another trick is consciously spacing stitches slightly apart instead of cramming them tightly together.
Long-tail cast-on is one of the most recommended beginner methods because it creates a neat, stretchy edge. It looks polished while remaining relatively easy to learn. Many beginner knitting patterns and modern tutorials still recommend it as the go-to starting technique in 2025.
Tension awareness is everything here. Imagine squeezing toothpaste from a tube. Gentle pressure works perfectly, while excessive force creates a giant mess. Knitting tension works the same way. Tightness doesn’t improve quality. Relaxed consistency does.
Beginners also tend to twist stitches during casting on, which creates awkward-looking loops and uneven edges. Slowing down helps tremendously. Speed comes naturally later. Right now the goal is clarity and comfort. Watching how the yarn wraps around the needle teaches your hands the mechanics needed for every future project.
The beautiful thing about knitting is that mistakes are rarely permanent disasters. If the cast-on edge looks messy or feels impossibly tight, simply unravel it and start again. Even experienced knitters restart projects constantly. That’s not failure. That’s part of the craft.
Easy Knit Stitch Patterns That Build Confidence
Once you master the basic knit stitch, entire worlds of texture suddenly open up. The amazing thing is that many beautiful scarf patterns rely on extremely simple stitch combinations. Beginners often assume impressive scarves require advanced skills, but some of the most stylish designs come from repeating basic stitches consistently.
Garter Stitch for Total Beginners
Garter stitch is the ultimate beginner-friendly pattern because you knit every single row the same way. That’s it. No complicated memorization. No switching between stitches. Just steady repetition creating soft ridges across the scarf. It’s simple, relaxing, and surprisingly elegant.
Many beginner knitting communities strongly recommend garter stitch scarves because they naturally lie flat without curling. That means fewer frustrations and a cleaner finished project. Garter stitch also hides uneven tension better than smoother stitch patterns, making it ideal for learning.
Rib Stitch for Stretch and Texture
Rib stitch alternates knit and purl stitches, creating stretchy vertical columns. A simple K1, P1 pattern already looks more advanced while remaining beginner-friendly. Ribbed scarves feel cozy and elastic, which makes them especially warm around the neck.
This pattern also teaches stitch recognition. Beginners slowly learn how knit and purl stitches visually differ, building confidence for future projects. That visual understanding becomes incredibly important later when fixing mistakes.
Seed Stitch for a Stylish Look
Seed stitch creates a textured, pebbled appearance by alternating knit and purl stitches every row. It looks complex but actually follows a simple rhythm. The texture adds personality and sophistication without overwhelming beginners.
Texture patterns are exciting because they transform repetitive knitting into something artistic. It’s like adding spices while cooking. The ingredients stay simple, but the final result feels far richer and more interesting.
Keeping the Width Even from Start to Finish
One classic beginner problem is the accidental triangle scarf. You start with twenty stitches, somehow end up with twenty-seven halfway through, then mysteriously drop back to nineteen near the end. Uneven edges happen because beginners accidentally add or lose stitches during row transitions.
The most common culprit is forgetting that the loop already on the needle counts as a stitch. Beginners sometimes knit into the same edge stitch twice, unintentionally increasing stitch count. Other times they skip edge stitches entirely, causing narrowing. Recent beginner knitting discussions repeatedly highlight edge awareness as one of the hardest early skills to develop.
Counting stitches regularly solves most width problems immediately. It may feel tedious at first, but it prevents massive headaches later. Stitch markers can also help identify scarf edges more clearly. Think of them like road signs preventing wrong turns.
Consistent tension matters too. Beginners naturally tighten or loosen stitches depending on mood, energy, or even stress levels. That’s completely normal. Over time your muscle memory stabilizes. Your hands eventually develop rhythm almost like playing music.
Some knitters notice their first rows look tighter than later sections because they begin nervously and gradually relax. Others do the opposite and loosen tension as fatigue sets in. Neither issue means you’re bad at knitting. They simply reflect the learning process.
The good news is that scarves are incredibly forgiving. Minor width variations often disappear visually once the scarf is worn. Handmade items carry character, and perfection isn’t the goal. Consistency improves naturally with practice.
Fixing Dropped Stitches Without Unraveling Everything
Few things scare beginners more than noticing a dropped stitch several rows below the needle. Suddenly there’s a tiny ladder running down the scarf, and panic sets in immediately. The first instinct is usually catastrophic thinking: “I ruined everything.”
Thankfully, dropped stitches are incredibly fixable.
A crochet hook is often the easiest rescue tool. You simply catch the dropped loop and pull it back through the horizontal strands above it one row at a time. It’s basically rebuilding the ladder rung by rung. Once you understand the structure, fixing dropped stitches becomes surprisingly satisfying instead of terrifying.
Many experienced knitters recommend stopping immediately once a dropped stitch is spotted. The farther knitting continues, the larger the unraveling becomes. Think of it like spotting a loose thread on clothing. Handling it early prevents a much bigger mess later.
Learning stitch anatomy also helps enormously. Knit stitches form little V-shapes, and recognizing those shapes makes repairs easier. Beginners gradually stop seeing knitting as random loops and start understanding the structure underneath.
Mistakes themselves are valuable teachers. Some knitters even intentionally create practice swatches just to learn fixing errors safely. That experimentation removes fear and builds confidence. Once beginners realize most knitting problems are repairable, the hobby becomes much more relaxing.
One Reddit knitter described beginner tension and mistakes as “finding your groove,” which perfectly captures the learning journey. Knitting isn’t about immediate perfection. It’s about developing familiarity with the fabric, the yarn, and your own rhythm.
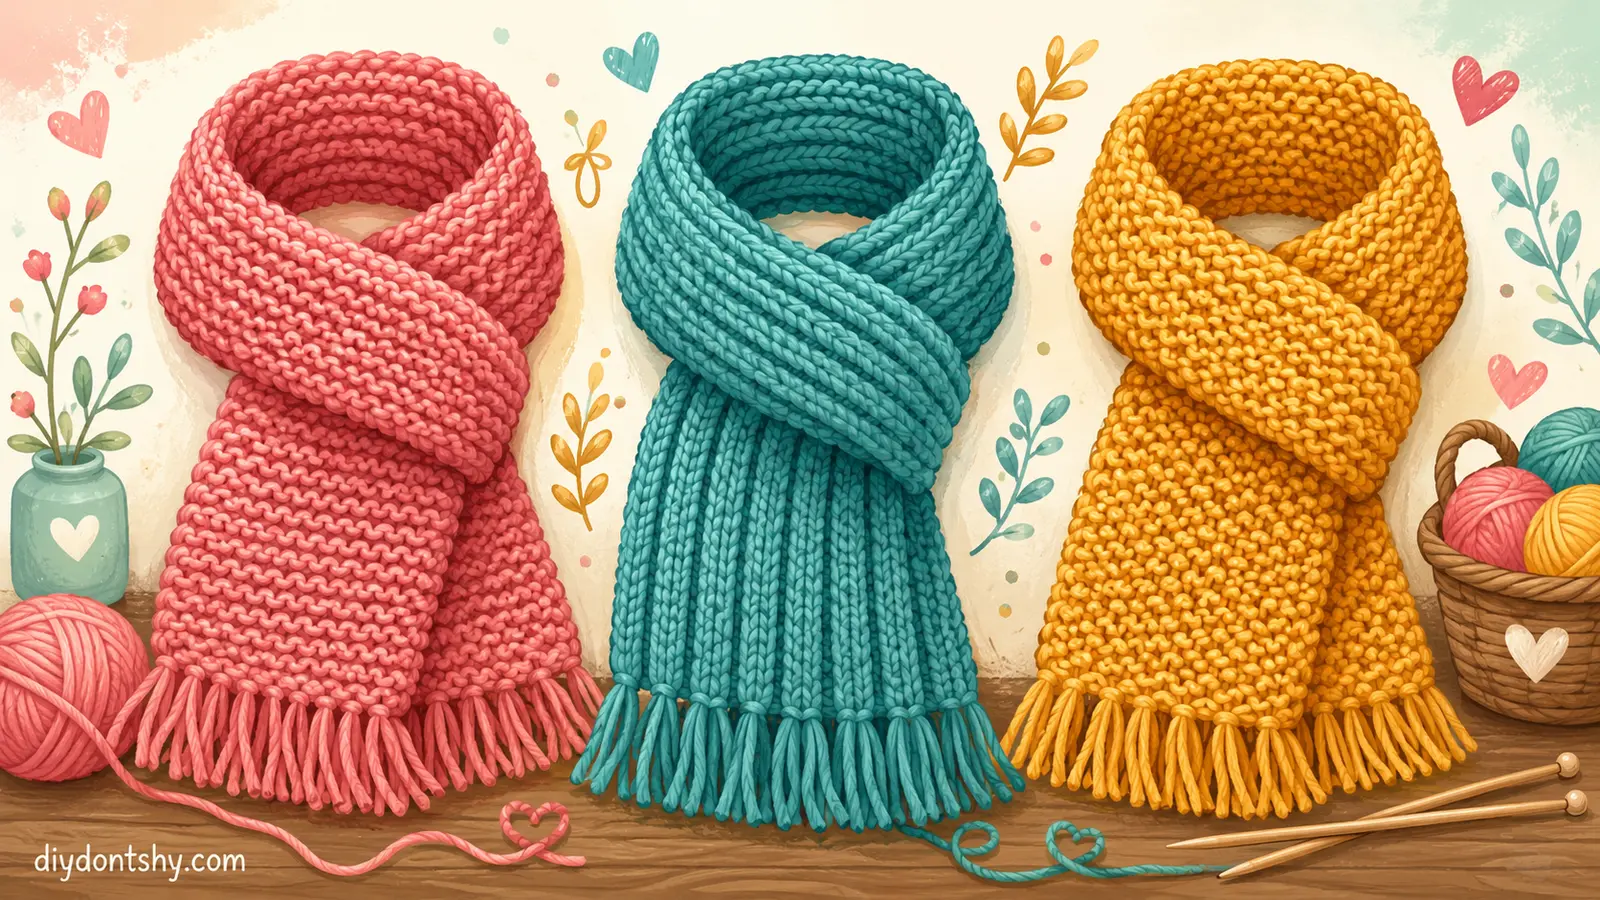
Adding Texture and Color for a More Interesting Design
After mastering the basics, beginners often feel excited to personalize their scarves. This is where knitting becomes especially creative. Texture, stripes, color blocking, and decorative edges can completely transform a simple rectangle into something unique.
Changing yarn colors is much easier than beginners expect. You simply join a new yarn at the edge of the work and continue knitting. The loose ends can later be woven into the fabric for a neat finish. Simple stripes are one of the easiest ways to add visual interest without increasing technical difficulty.
Texture changes also create beautiful effects. Combining garter stitch sections with ribbing or seed stitch adds dimension and keeps knitting engaging. It’s similar to adding layers in painting or music. Variation creates personality.
Chunky yarn combined with large needles creates dramatic oversized scarves that knit up quickly. According to recent knitting patterns published in 2025, oversized beginner scarves remain one of the most popular starter projects because they feel cozy, modern, and visually impressive despite simple construction.
Beginners should avoid overwhelming themselves with too many complicated elements at once, though. A scarf overloaded with constant stitch changes can become confusing fast. Simplicity usually looks more elegant anyway.
Color psychology matters too. Neutral scarves feel timeless and versatile, while bold colors make stronger fashion statements. Handmade scarves often become sentimental pieces because they reflect personal taste and effort simultaneously.
The wonderful thing about knitting is that every design choice leaves visible fingerprints of creativity. Even simple beginner scarves become one-of-a-kind pieces impossible to duplicate exactly.
Knowing When the Scarf Is Long Enough
At some point during scarf knitting, every beginner asks the exact same question: “Okay… but how long should this thing actually be?”
The honest answer is surprisingly flexible.
Standard adult scarves usually measure around 60 to 70 inches long, according to modern beginner knitting resources. That length wraps comfortably around the neck while leaving enough fabric hanging naturally. Oversized scarves may stretch beyond 80 inches for dramatic styling.
The easiest measuring trick is using your own height as a guideline. Many knitters prefer scarves roughly matching the wearer’s height. Others simply knit until the scarf wraps comfortably around the neck once with extra length remaining.
Fabric drape also influences ideal length. Bulky chunky scarves feel visually complete sooner because they occupy more space. Thin lightweight scarves usually need additional length for balance.
Trying the scarf on periodically helps tremendously. Wrap it around your neck, adjust it naturally, and see how it feels. Knitting is wonderfully tactile, so physical testing matters more than strict measurements alone.
Beginners sometimes rush to finish projects once excitement fades slightly. Resist that temptation. A slightly longer scarf usually feels more luxurious and wearable than one ending awkwardly short. Think of scarves like blankets. Nobody complains about having a little extra coziness.
Finishing the Edges for a Cleaner Look
The final steps of knitting often determine whether a scarf looks polished or unfinished. Even beautifully knitted scarves can appear messy if the edges curl awkwardly or loose yarn tails dangle visibly.
Binding off carefully creates a clean top edge matching the cast-on side. Beginners commonly bind off too tightly, creating stiff edges that pull inward. Using relaxed tension during bind off keeps the scarf flexible and balanced.
Weaving in yarn tails properly is another important finishing skill. Instead of simply tying knots, use a tapestry needle to thread yarn through nearby stitches invisibly. This secures the yarn while preserving stretch and comfort.
Blocking is the secret finishing technique many beginners overlook. Blocking means gently washing or steaming the scarf and shaping it flat while drying. This process evens stitches, softens fabric, and dramatically improves appearance. It’s almost like ironing wrinkled clothing. Suddenly everything looks cleaner and more professional.
Decorative finishing options can also elevate simple scarves beautifully. Fringe, tassels, or braided edges add personality without requiring advanced knitting skills. Minimalist scarves may look best with plain clean edges, while cozy rustic styles often benefit from textured finishes.
The first completed scarf feels genuinely special regardless of imperfections. It represents patience, learning, creativity, and persistence woven together stitch by stitch. That emotional value is something machine-made accessories simply cannot replicate.
Conclusion
Learning how to knit a scarf with two needles is one of the most rewarding beginner crafts because it combines creativity, relaxation, and practical skill-building in a simple project. From choosing beginner-friendly yarn and needle sizes to mastering cast-on techniques, fixing dropped stitches, and finishing clean edges, every step teaches valuable knitting fundamentals that apply to future projects.
The beauty of knitting lies in progress rather than perfection. Uneven stitches, accidental mistakes, and restarted rows are all part of the journey. Over time, your hands learn rhythm, your tension becomes more consistent, and the once-confusing loops start making complete sense. What begins as awkward movements slowly transforms into calming muscle memory.
A handmade scarf carries more than warmth. It carries time, focus, personality, and effort woven into every row. That’s what makes knitting such a timeless and deeply satisfying craft.
FAQs
1. What is the best yarn for beginner scarf knitting?
Worsted-weight yarn in a light solid color is usually the best choice for beginners because it’s easy to see and handle. Acrylic or wool-blend yarns are especially forgiving for learning tension control.
2. What size needles should beginners use for a scarf?
Most beginner knitting guides recommend US size 7–9 needles (4.5mm–5.5mm), with US size 8 (5mm) being the most popular beginner option.
3. Why does my scarf keep getting wider?
This usually happens because accidental stitches are added at row edges. Counting stitches regularly helps maintain consistent scarf width.
4. Can I fix a dropped stitch without undoing rows?
Yes. A crochet hook can lift the dropped stitch back through the rows above it, repairing the problem without unraveling the entire scarf.
5. How long should a knitted scarf be?
Most adult scarves range between 60 and 70 inches long, though oversized scarves may be longer depending on personal style preferences.

Kareem Sallam is an Egyptian special writer based in Australia, with a strong interest in practical ideas and creative content that focuses on everyday solutions. He writes clear, engaging articles designed to be easy to follow and useful for a wide range of readers.
His work centers on DIY projects, handmade ideas, simple crafts, and home based creativity. Kareem aims to deliver content that is practical, inspiring, and accessible, helping readers turn simple materials into smart and enjoyable projects.


