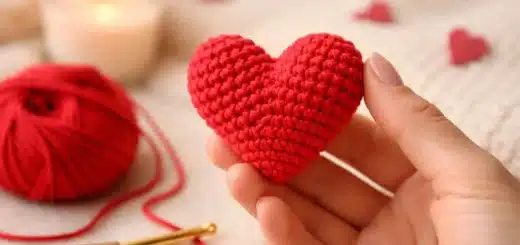
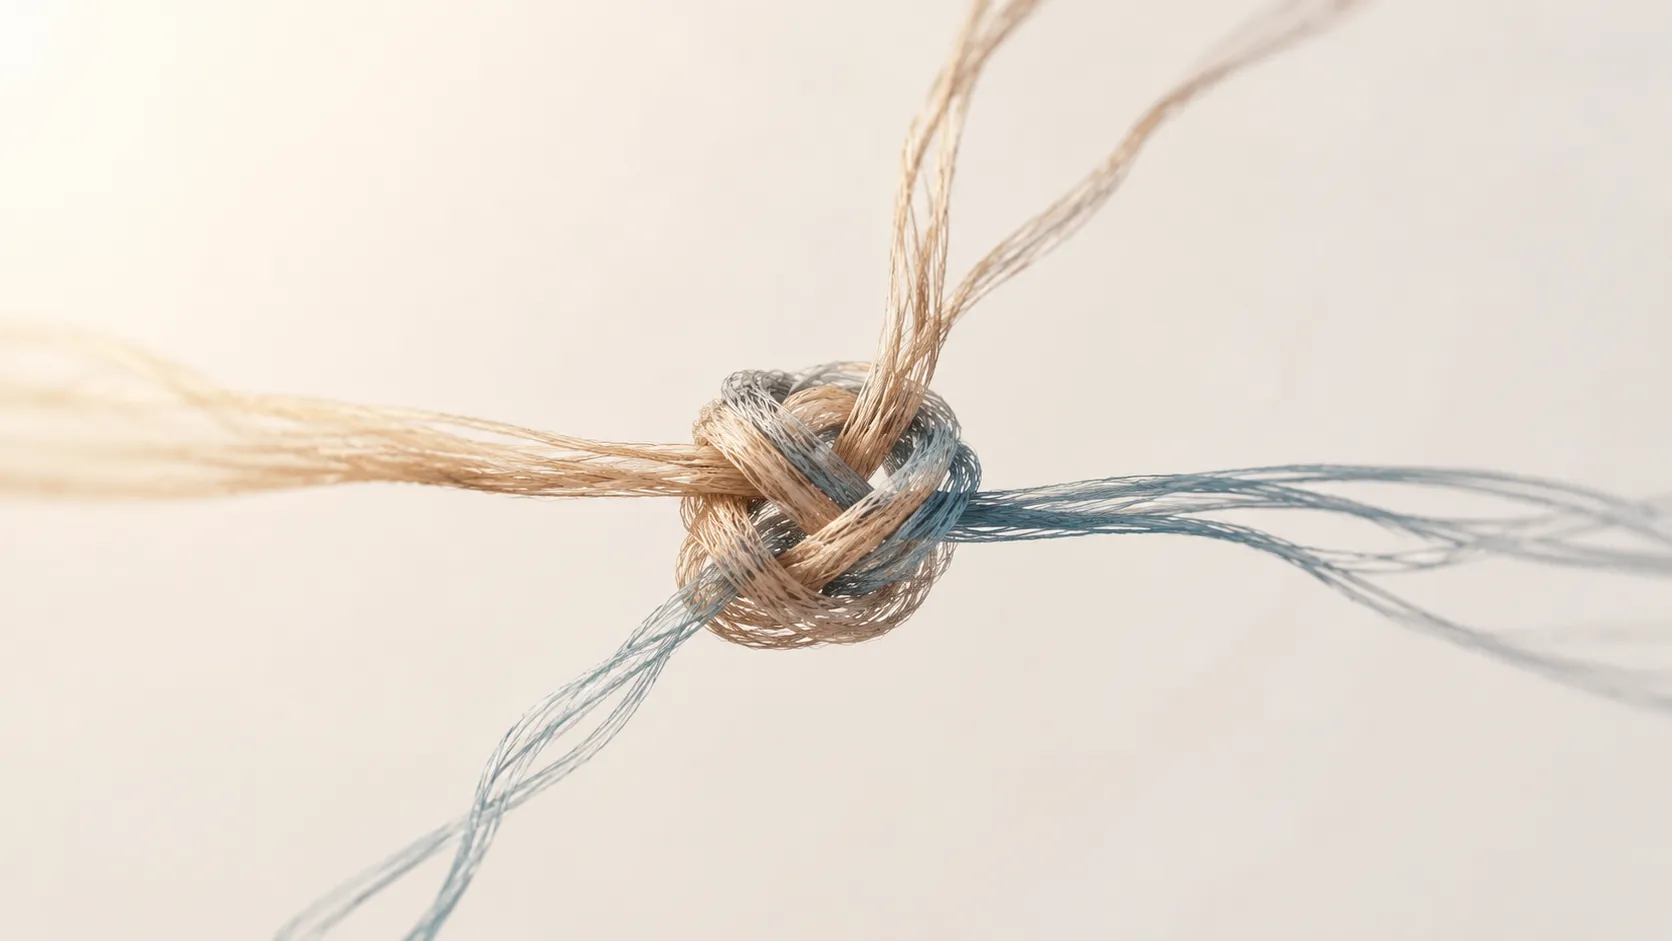
How to Tie a Knot for Embroidery That Holds Securely
Embroidery looks delicate and artistic on the surface, but behind every beautiful design sits one tiny detail that quietly holds everything together: the knot. A weak knot can ruin hours of work. A bulky knot can make elegant stitching look uneven. And a poorly hidden finishing knot? That’s the embroidery equivalent of leaving price tags on new clothes.
Many beginners jump straight into learning satin stitch, chain stitch, or French knots while ignoring the foundation that keeps every thread secure. The reality is simple: good embroidery begins with good thread control. That includes how you start your thread, how you finish it, and how you manage tension while stitching.
Modern embroidery experts increasingly recommend cleaner anchoring methods instead of large visible knots because bulky thread build-up can distort fabric and create uneven texture. At the same time, experienced stitchers still use small practical knots for projects exposed to heavy wear, washing, or dense stitching.
If embroidery is like painting with thread, knots are the frame holding the canvas together. Ignore them, and the masterpiece slowly falls apart.
Contents
Why Secure Knots Matter in Embroidery
Embroidery thread may look harmless, but once tension, friction, and repeated movement enter the picture, unsecured stitches can unravel surprisingly fast. Imagine building a brick wall without mortar. Everything might appear stable at first, but one small shake sends pieces tumbling down. That’s exactly what happens when embroidery knots are weak or inconsistent. Every stitch relies on the thread before it, meaning a loose starting point creates a chain reaction that weakens the entire design.
Professional embroiderers often avoid oversized knots because they create bumps beneath the fabric surface. Those bumps become especially visible on lightweight materials like linen or thin cotton. Decorative hoop art might survive with simple starter knots, but wearable embroidery experiences friction, stretching, and washing. That means stronger anchoring methods become essential.
There’s also the issue of thread tension. When a knot slips unexpectedly, many beginners instinctively pull harder to compensate. That extra force distorts the fabric and makes stitches uneven. Suddenly, smooth satin stitches begin looking jagged and raised. The entire embroidery loses its clean finish.
Secure knots also save time. Anyone who has watched a nearly completed section unravel knows how frustrating it feels. Re-stitching embroidery is like trying to rebuild a sandcastle after a wave crashes through it. Tiny preventative habits at the beginning stop major problems later.
Experienced stitchers frequently use hidden anchor stitches, loop starts, or weaving methods instead of bulky knots because these techniques distribute tension more evenly throughout the design. That creates flatter, cleaner embroidery with fewer visible imperfections on both sides of the fabric.
Basic Tools and Materials Needed Before Knotting
Before learning embroidery knots, it helps to understand how thread, needles, and fabric interact together. Not every knot works the same on every material. A knot that stays hidden beautifully on denim may show right through silk like a pebble under wrapping paper. Choosing the correct setup matters just as much as learning the actual knotting method.
The most important factor is thread type. Cotton embroidery floss remains the most beginner-friendly option because it grips fabric well and untwists easily. Metallic threads, meanwhile, are notoriously slippery and tend to fray under tension. According to recent embroidery guidance, metallic and variegated threads are especially prone to tangling because of their irregular surfaces and increased friction.
Needle size matters too. A needle that’s too large creates oversized holes around knots, while a needle that’s too small increases thread friction and twisting. Think of it like traffic on a narrow road. If too many strands squeeze through a tiny opening, congestion builds quickly.
Fabric thickness changes everything about knot visibility. Lightweight fabrics like muslin or linen reveal every bump underneath. Thick canvas or denim can hide larger anchor knots much more effectively. Stretch fabrics introduce another challenge because tight knots can distort the material and create puckering around stitches.
Here’s a quick comparison of how different fabrics respond to embroidery knots:
| Fabric Type | Knot Visibility | Recommended Knot Style | Difficulty Level |
|---|---|---|---|
| Linen | High | Waste knot or loop start | Moderate |
| Cotton | Medium | Small overhand knot | Easy |
| Denim | Low | Anchor knot | Easy |
| Silk | Very High | Knotless start | Advanced |
| Stretch Knit | Medium | Tiny woven finish | Moderate |
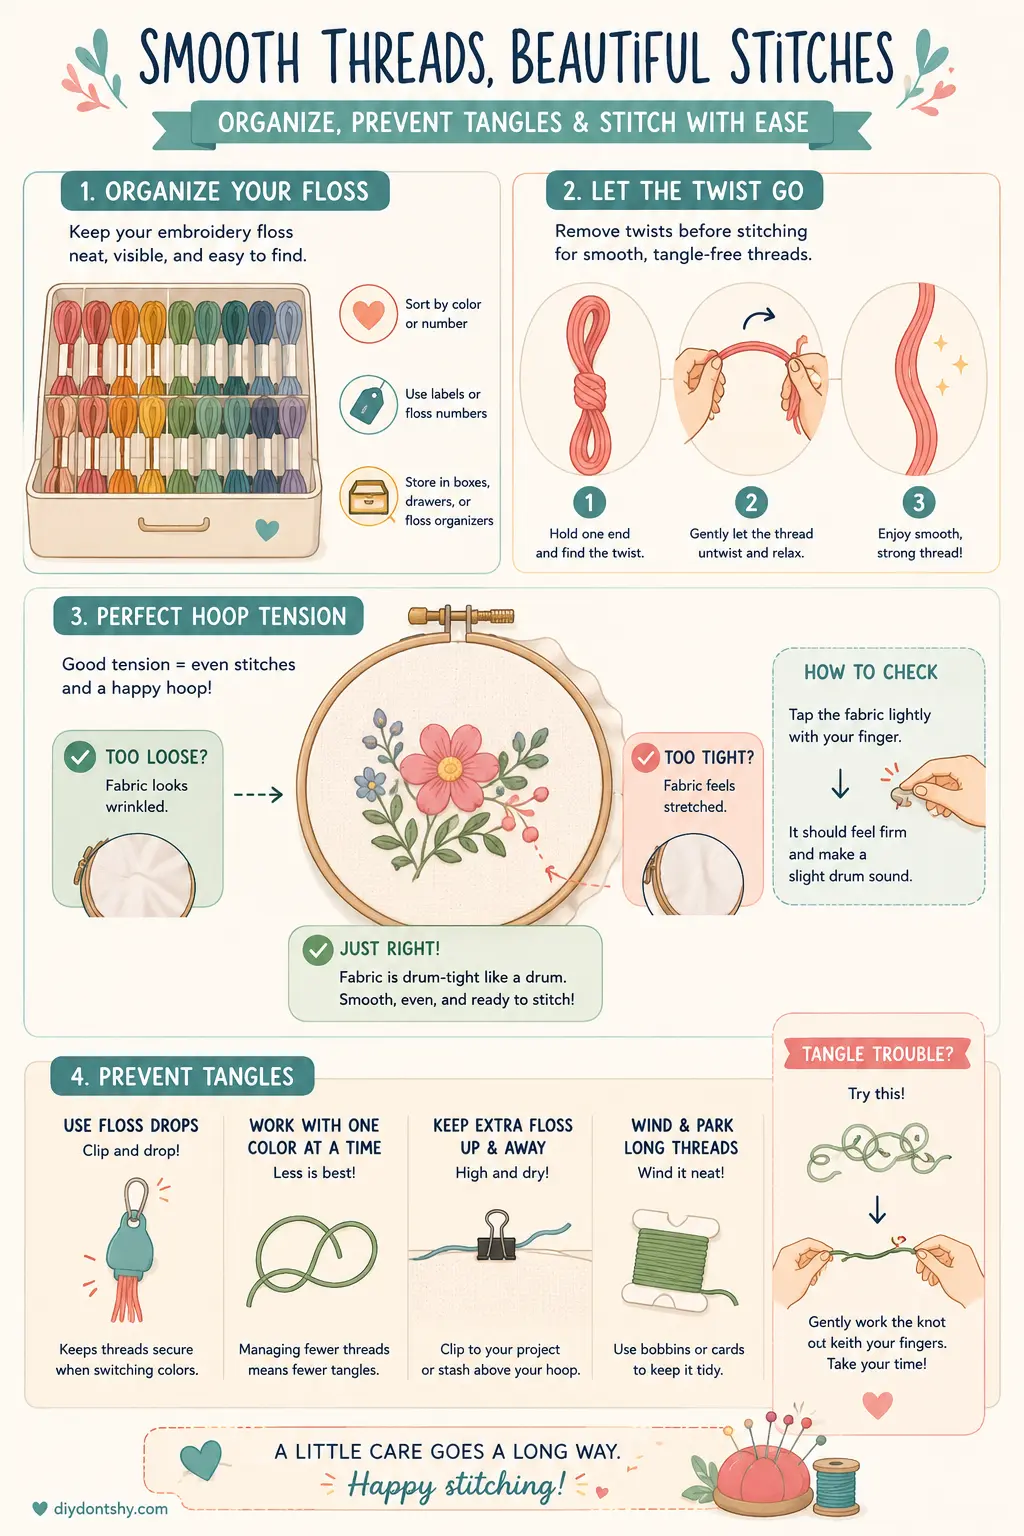
Preparation also plays a huge role in preventing future problems. Clean thread storage reduces static and twisting. Experts recommend keeping floss organized and dry because humidity and static electricity directly contribute to thread tangling. Small habits like cutting shorter thread lengths and separating strands carefully make stitching dramatically smoother.
Simple Starting Knots for Embroidery
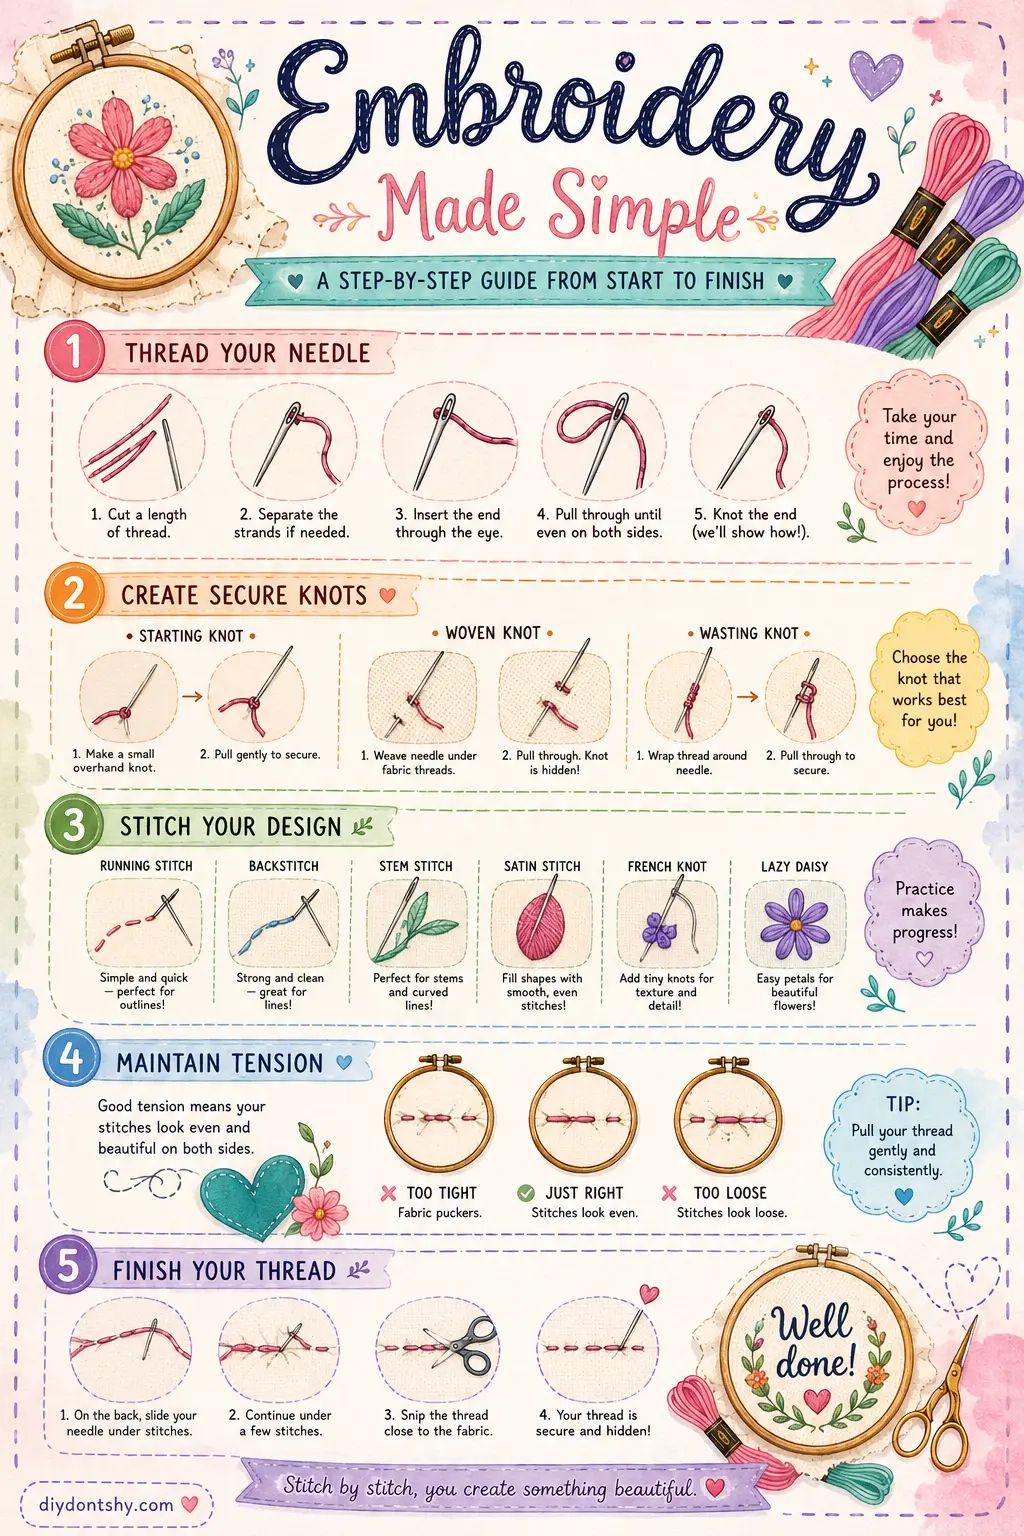
Starting embroidery correctly feels a little like laying a foundation before building a house. If the beginning isn’t stable, nothing above it stays secure for long. Thankfully, embroidery doesn’t require complicated sailor knots or advanced weaving techniques to get started. A few reliable methods handle almost every project beautifully.
The classic overhand knot remains the simplest approach for beginners. You wrap the thread around your finger, roll it gently, and tighten the knot near the thread end. This method works especially well for thicker fabrics or decorative embroidery hoops where the back remains hidden. Still, many experienced embroiderers avoid large overhand knots because they create noticeable bumps underneath lightweight materials.
One of the cleanest alternatives is the waste knot technique. Instead of anchoring directly at the stitch starting point, you place a temporary knot several inches away on the front side of the fabric. As you stitch, the thread tail becomes trapped beneath later stitches. Once secure, you trim away the temporary knot. This technique creates a much smoother surface and reduces bulk dramatically. DMC specifically recommends this method for cleaner “bump-free” embroidery.
Another favorite among embroidery enthusiasts is the loop start method. This works best with an even number of floss strands. Instead of knotting, you fold the thread in half and pass the needle through the loop during the first stitch. The result is incredibly secure without adding bulk.
Some embroiderers even prefer tiny anchoring stitches over traditional knots altogether. Online embroidery communities often recommend making several tiny backstitches hidden beneath future embroidery instead of tying large knots. These miniature anchor stitches distribute tension more naturally and prevent lumps from forming under satin stitching.
The truth is, there’s no single “perfect” embroidery knot. The best choice depends on your fabric, thread type, and project purpose. Decorative wall art allows more flexibility, while wearable garments require stronger anchoring to survive repeated washing and movement.

Best Knot Methods for Different Fabric Types
Fabric behaves almost like personality types in embroidery. Some materials cooperate beautifully, while others resist every stitch unless handled carefully. Using the wrong knot on the wrong fabric can create puckering, visible bumps, or loose threads that slowly work themselves free over time.
Lightweight cotton and linen demand finesse. These fabrics reveal almost everything underneath the stitching surface. Large knots become visible shadows, especially under satin stitches or delicate floral work. For these materials, waste knots or knotless anchor stitches work best because they spread tension evenly without creating raised areas. Many embroidery experts specifically discourage bulky knots on fine fabrics for this exact reason.
Thicker fabrics like denim and canvas are much more forgiving. Their dense weave hides knots more effectively, making small overhand knots practical and secure. This is especially useful for embroidered jackets, tote bags, or patches that experience constant friction. Functional durability matters more here than maintaining a perfectly smooth backside.
Stretch fabrics create unique challenges because tight knots can distort the material. Imagine pulling one corner of a trampoline too tightly. The surrounding area wrinkles and shifts unevenly. The same thing happens with embroidery on knit fabrics. Tiny woven anchor finishes work far better because they allow slight movement without pulling the fabric out of shape.
Silk and delicate materials require even more care. Heavy knots can damage fibers permanently or show through translucent surfaces. In these cases, loop starts and woven thread finishes become essential. The goal shifts from brute security to subtle tension control.
Here’s where many beginners make mistakes: they use the exact same knot for every project. That’s like wearing hiking boots to a wedding and flip-flops on a mountain trail. Technically possible, but completely mismatched for the situation.
Even the direction of stitching matters. Some embroiderers secure thread differently depending on whether they’re doing dense fill stitches, outlines, or open decorative patterns. Dense embroidery naturally traps loose thread tails more effectively, while open line work requires stronger finishing techniques to prevent unraveling.
Ending Knots That Stay Hidden Under Stitches
Starting embroidery correctly matters, but finishing it properly is what keeps designs intact years later. Ending knots often determine whether embroidery survives repeated handling, washing, and stretching. The challenge is creating enough security without leaving bulky thread piles behind the fabric.
One of the cleanest methods involves weaving thread beneath existing stitches. Instead of tying a visible knot immediately, you pass the needle under several completed stitches on the back side. This creates friction that locks the thread in place naturally. Many experienced embroiderers prefer this method because it avoids thick bumps while still providing excellent durability.
Another effective technique uses tiny hidden anchor knots tucked beneath dense embroidered areas. Rather than tying large loops, you create a miniature securing stitch close to existing thread clusters. Because the knot sits underneath thick stitching, it becomes practically invisible from the front.
Some embroiderers use directional weaving techniques when finishing threads. Instead of pulling thread in one straight line, they change direction slightly while weaving under stitches. This increases friction and reduces the chance of the thread slipping loose later. Think of it like threading vines through a fence rather than laying them loosely across the top.
Recent embroidery discussions also highlight the importance of avoiding oversized finishing knots because needles can accidentally snag them during later stitching. That creates frustrating tangles and sometimes loosens earlier work.
Projects exposed to regular washing deserve extra reinforcement. Clothing, bags, and table linens benefit from additional woven passes beneath stitches because repeated movement gradually weakens thread tension. Decorative hoop embroidery faces much less stress and can usually rely on simpler finishes.
A common beginner mistake is trimming thread too close after finishing. Leaving an extremely tiny tail may seem cleaner initially, but threads can sometimes work themselves free under tension. A small hidden tail woven securely beneath stitches offers much better long-term stability.
The best finishing methods balance three things carefully:
- Security
- Smoothness
- Flexibility
Too much focus on one often harms the others. Perfect embroidery finishes feel almost invisible while quietly holding everything together behind the scenes.
Avoiding Bulky Knots in Embroidery
Bulky knots are the hidden potholes of embroidery. You may not notice them immediately, but eventually they distort stitches, create uneven texture, and make smooth fabric surfaces look lumpy. Thin fabrics suffer the most because every raised thread underneath becomes visible from the front.
The biggest culprit is oversized starter knots. Beginners often tie large knots “just to be safe,” but those bulky anchors create more problems than protection. Embroidery specialists repeatedly emphasize that traditional knots should remain as small as possible, especially on fine materials.
Thread thickness also plays a role. Six-strand floss tied into a tight overhand knot creates far more bulk than a single-strand anchor stitch. That’s why many advanced embroiderers separate strands individually before stitching. According to recent embroidery guidance, properly separating floss strands helps reduce tangling and uneven buildup during stitching.
One easy solution involves using shorter thread tails. Long loose tails tend to fold, bunch, and catch beneath stitches. Smaller tails woven neatly under embroidery stay flatter and distribute pressure more evenly.
Dense stitch patterns require special care too. Satin stitches, in particular, magnify underlying bumps because of their smooth reflective surface. A hidden knot beneath satin stitching behaves almost like a pebble trapped under a bedsheet. Even tiny imperfections suddenly become noticeable.
Here’s another overlooked factor: excessive thread layering. Crossing threads repeatedly across the backside of the fabric creates unnecessary thickness. Skilled embroiderers usually trim and restart threads instead of dragging long strands across empty spaces.
If you want embroidery that feels soft and professional, aim for a backside that looks organized rather than chaotic. It doesn’t need to be perfectly beautiful, but it should avoid heavy thread clumps and tangled knots.
A useful mindset is thinking of embroidery like architecture. Clean support structures create stronger, smoother results. Messy foundations eventually show through no matter how decorative the surface becomes.

What Causes Thread Tangling While Stitching
Few embroidery frustrations compare to thread tangling. One moment everything flows smoothly, and the next your floss resembles tangled headphone wires pulled from an old backpack. Surprisingly, thread knots rarely happen by random chance. Most tangles come from predictable causes that can be prevented with better stitching habits.
One of the biggest problems is using excessively long thread lengths. Recent embroidery guidance recommends keeping working thread around 18 to 24 inches because longer strands accumulate twists rapidly during stitching. Each stitch rotates the thread slightly, and over time those tiny rotations build into snarls and accidental knots.
Thread quality matters too. Cheap or frayed floss develops rough surfaces that catch against fabric fibers more easily. Metallic threads create additional challenges because they twist and snag faster than regular cotton embroidery floss.
Environmental conditions also affect stitching more than many people realize. Dry air increases static electricity, causing lightweight thread to cling and twist unpredictably. High humidity softens fibers and changes how thread feeds through the needle eye. It sounds dramatic, but embroidery thread behaves almost like hair during weather changes. Some days it cooperates beautifully, while other days it refuses to stay under control.
Another major issue is inconsistent tension. Pulling thread too aggressively introduces extra twisting force. Experts frequently recommend allowing the needle to dangle periodically so the thread can unwind naturally. This simple habit prevents accumulated twists from turning into knots.
Storage habits matter as well. Loose floss tossed into drawers collects static, kinks, and bends before stitching even begins. Organized storage keeps strands straighter and easier to manage.
Many embroiderers also overlook hand positioning. Repeatedly rotating the needle in the same direction while stitching gradually twists the floss tighter. Tiny pauses during stitching help release this buildup before it becomes problematic.
The good news? Most tangling problems disappear through small adjustments rather than dramatic changes. Shorter thread, smoother tension, and occasional untwisting solve the majority of embroidery frustrations.
Practicing Consistent Tension for Cleaner Embroidery
Embroidery tension works a little like seasoning in cooking. Too little and the results feel weak and unfinished. Too much and everything becomes distorted and unpleasant. Balanced tension creates stitches that lie smoothly without puckering fabric or loosening over time.
One common beginner mistake is pulling thread too tightly after every stitch. People often assume tighter stitching means stronger embroidery, but the opposite frequently happens. Excessive tension weakens thread fibers, distorts fabric shape, and causes visible puckering around dense stitched areas.
Embroidery professionals describe ideal tension as smooth and moderate rather than tight. The thread should settle naturally into the fabric instead of being forced aggressively through it. Think about tightening shoelaces. Pulling them excessively hard doesn’t make shoes more comfortable; it simply creates pressure and distortion.
Balanced embroidery tension keeps stitches even on both the front and backside of the fabric. Machine embroidery communities often describe proper tension as allowing slight visibility of the upper thread on the back without showing bobbin thread on the front. Hand embroidery follows similar principles even without machine settings.
Small habits dramatically improve consistency:
- Pull thread smoothly instead of jerking
- Pause periodically to release thread twists
- Keep the fabric taut in the hoop
- Avoid excessively long thread strands
- Maintain steady hand movement
Railroading is another useful technique. This involves guiding the needle between embroidery strands so they remain parallel and flat. Experts note that railroading improves stitch smoothness while reducing twisting and bulk.
Consistent tension also improves knot security. Loose stitches place uneven stress on anchoring points, while balanced stitching distributes force naturally across the design. That means fewer loose threads months or years later.
Many beginners expect perfect tension immediately, but embroidery muscle memory develops gradually. The more you stitch, the more naturally your hands learn the correct pulling pressure. Over time, maintaining smooth tension becomes automatic rather than something you consciously think about.
Small Fixes That Prevent Loose Threads Later
Embroidery problems rarely begin with catastrophic mistakes. Most failures come from tiny overlooked details that slowly build into bigger issues over time. Loose thread ends, skipped anchor stitches, or inconsistent tension may seem harmless initially, but months later they can cause unraveling and distortion.
One simple habit that prevents countless issues is checking thread direction regularly. Threads naturally twist while stitching, especially during repetitive motions. Letting the needle dangle periodically allows the floss to unwind and relax before tangles form. It takes only seconds but dramatically reduces accidental knotting.
Another smart practice involves securing thread ends before washing or framing embroidery. Decorative hoop art may remain untouched for years, but wearable embroidery faces constant friction and movement. Reinforcing loose thread ends beneath nearby stitches adds long-term durability without adding visible bulk.
Many experienced embroiderers also recommend avoiding thread jumps across open fabric spaces. Long floating strands catch easily and place uneven tension on finished sections. Restarting thread in new areas often creates cleaner results than dragging floss across the backside.
Needle condition matters more than people realize too. Bent or rough needles increase friction, causing thread fraying and inconsistent stitch tension. Replacing needles regularly keeps stitching smoother and reduces unnecessary wear on floss fibers.
Thread preparation helps tremendously. Separating floss strands carefully and allowing them to relax before stitching minimizes twisting and bunching. Some embroiderers even lightly condition metallic threads to reduce static and friction during stitching sessions.
The final fix is patience. Rushing embroidery almost always creates preventable mistakes. Knots tighten unevenly, stitches pull too hard, and thread begins tangling more frequently. Slow, controlled stitching produces cleaner embroidery not because the techniques are complicated, but because consistency improves naturally.
Embroidery rewards small disciplined habits. Tiny adjustments made early save enormous frustration later. A secure knot, balanced tension, and clean finishing methods may seem minor individually, but together they transform embroidery from fragile decoration into durable craftsmanship.
Conclusion
Learning how to tie a knot for embroidery is about far more than simply stopping thread from slipping through fabric. It shapes the entire quality, durability, and appearance of your work. Strong but discreet knots create embroidery that looks polished from every angle while staying secure through handling, washing, and time.
The best embroidery knots balance security with subtlety. Waste knots, loop starts, woven finishes, and tiny anchor stitches all help reduce bulk while maintaining durability. Different fabrics require different approaches, and understanding those differences separates clean professional embroidery from uneven beginner work.
Thread tangling, loose ends, and distorted stitches usually come from small preventable habits rather than major mistakes. Shorter thread lengths, balanced tension, proper storage, and regular untwisting make stitching smoother and more enjoyable.
Embroidery may seem delicate, but beneath every beautiful design sits careful structure and control. Tiny invisible decisions determine whether stitches stay crisp and secure years later or slowly unravel with time. Once you master knots and tension, every other embroidery technique becomes easier, cleaner, and far more satisfying.
FAQs
1. What is the best knot for beginner embroidery?
The classic overhand knot is usually the easiest starting point for beginners because it’s simple and quick. Still, many embroiderers eventually move toward waste knots or loop starts because they create smoother results with less bulk.
2. Why do embroidery experts avoid large knots?
Large knots create visible bumps beneath fabric and may distort delicate stitches. They can also snag needles during later stitching and make embroidery feel uneven on lightweight materials.
3. How long should embroidery thread be to avoid tangling?
Most embroidery experts recommend keeping thread between 18 and 24 inches long. Longer strands accumulate twists more quickly and increase the chances of tangling and knotting.
4. Can you embroider without using knots?
Yes. Many embroiderers use anchor stitches, loop starts, or woven thread finishes instead of traditional knots. These methods often create flatter and cleaner embroidery results.
5. How do you hide finishing knots in embroidery?
The best way is usually weaving thread beneath nearby stitches on the backside of the fabric. Tiny anchor knots hidden beneath dense stitched areas also work well without creating visible bumps.

Kareem Sallam is an Egyptian special writer based in Australia, with a strong interest in practical ideas and creative content that focuses on everyday solutions. He writes clear, engaging articles designed to be easy to follow and useful for a wide range of readers.
His work centers on DIY projects, handmade ideas, simple crafts, and home based creativity. Kareem aims to deliver content that is practical, inspiring, and accessible, helping readers turn simple materials into smart and enjoyable projects.