Easy Methods for How to Transfer Embroidery Pattern to Fabric
Embroidery might look like it starts with the needle, but the truth is the real foundation begins long before the first stitch is made. The transfer stage is what determines whether your finished piece looks polished or frustratingly uneven. Imagine trying to build a house on a crooked blueprint. Even the most beautiful stitches cannot completely rescue a poorly transferred design. Clean lines, proper placement, and stable fabric all work together to give embroidery its refined appearance. Many beginners rush this stage because they are eager to start stitching, but experienced embroiderers know that patience during transfer saves hours of correction later.
One of the biggest reasons transfer accuracy matters is because embroidery thread naturally follows the guide beneath it. If the transferred lines wobble, stretch, or fade halfway through the project, your stitches will likely do the same. According to multiple recent embroidery tutorials and community discussions, lightbox tracing and water-soluble stabilizers are among the most recommended modern methods because they reduce distortion and improve line visibility. Many embroidery experts also emphasize testing transfer tools on scrap fabric first because some inks can leave permanent ghost marks or bleed into fibers after washing. That tiny test can be the difference between a treasured handmade piece and a ruined project.
Professional-looking embroidery often comes down to invisible preparation work. Think of transfer lines like road markings for a driver. When the path is clear, smooth, and easy to follow, the journey becomes far less stressful. Good pattern transfer also helps maintain stitch spacing consistency, especially for beginners learning satin stitch, stem stitch, or French knots. Without visible guidelines, uneven spacing sneaks into the design surprisingly fast. Careful transfer work may feel slow at first, but it actually speeds up embroidery in the long run because fewer mistakes need fixing later.
Contents
Choosing the Best Transfer Method for the Fabric Type
Not every embroidery transfer method works equally well on every fabric. Choosing the wrong technique is like using a permanent marker on silk or trying to paint watercolor on cardboard. The fabric itself determines how visible the design will be, how stable the tracing remains, and how easy the marks are to remove after stitching. Lightweight cotton and linen are often the easiest materials for beginners because they allow light to pass through easily, making tracing straightforward with a window or lightbox. Recent embroidery guides continue recommending this approach because it is affordable, accurate, and requires minimal equipment.
Dark fabrics present a completely different challenge. Traditional tracing methods become nearly impossible because the pattern underneath cannot be seen clearly. This is where transfer paper, white chalk pencils, or printable water-soluble stabilizers become essential. Many embroiderers now prefer sticky water-soluble stabilizers such as Fabri-Solvy because they can be printed directly from a computer, attached to fabric, stitched through, and dissolved afterward. Reddit embroidery communities frequently mention these stabilizers as lifesavers for black denim, velvet, and heavy canvas projects. The ability to maintain sharp detail without relying on visibility through fabric dramatically improves precision.
Textured and stretchy fabrics require even more attention. Materials like jersey knit, velvet, or loosely woven linen tend to shift during tracing. Water-soluble stabilizers often work best here because they temporarily reinforce the fabric while acting as the transfer surface. Heat transfer methods can also become risky on delicate fabrics that react poorly to ironing temperatures. Embroidery experts consistently recommend matching the transfer method to both the fabric weight and fiber content rather than simply using whatever tool is closest at hand.
The following table compares common transfer methods by fabric compatibility:
| Transfer Method | Best Fabric Type | Main Advantage | Potential Drawback |
|---|---|---|---|
| Window/Lightbox Tracing | Light cotton, linen | Highly accurate | Not useful on dark fabrics |
| Water-Soluble Stabilizer | Stretchy or dark fabric | Excellent detail | Requires rinsing |
| Heat Transfer Pen | Natural fabrics | Long-lasting lines | Heat may damage delicate fabric |
| Transfer Paper | Thick or dark materials | Visible on heavy fabric | Can smudge if pressed too hard |
| Chalk Pencil | Dark fabric | Easy removal | Less precise for fine detail |
Choosing wisely at this stage prevents frustration later and helps embroidery feel smoother from beginning to end.
Tracing Techniques That Keep Designs Accurate
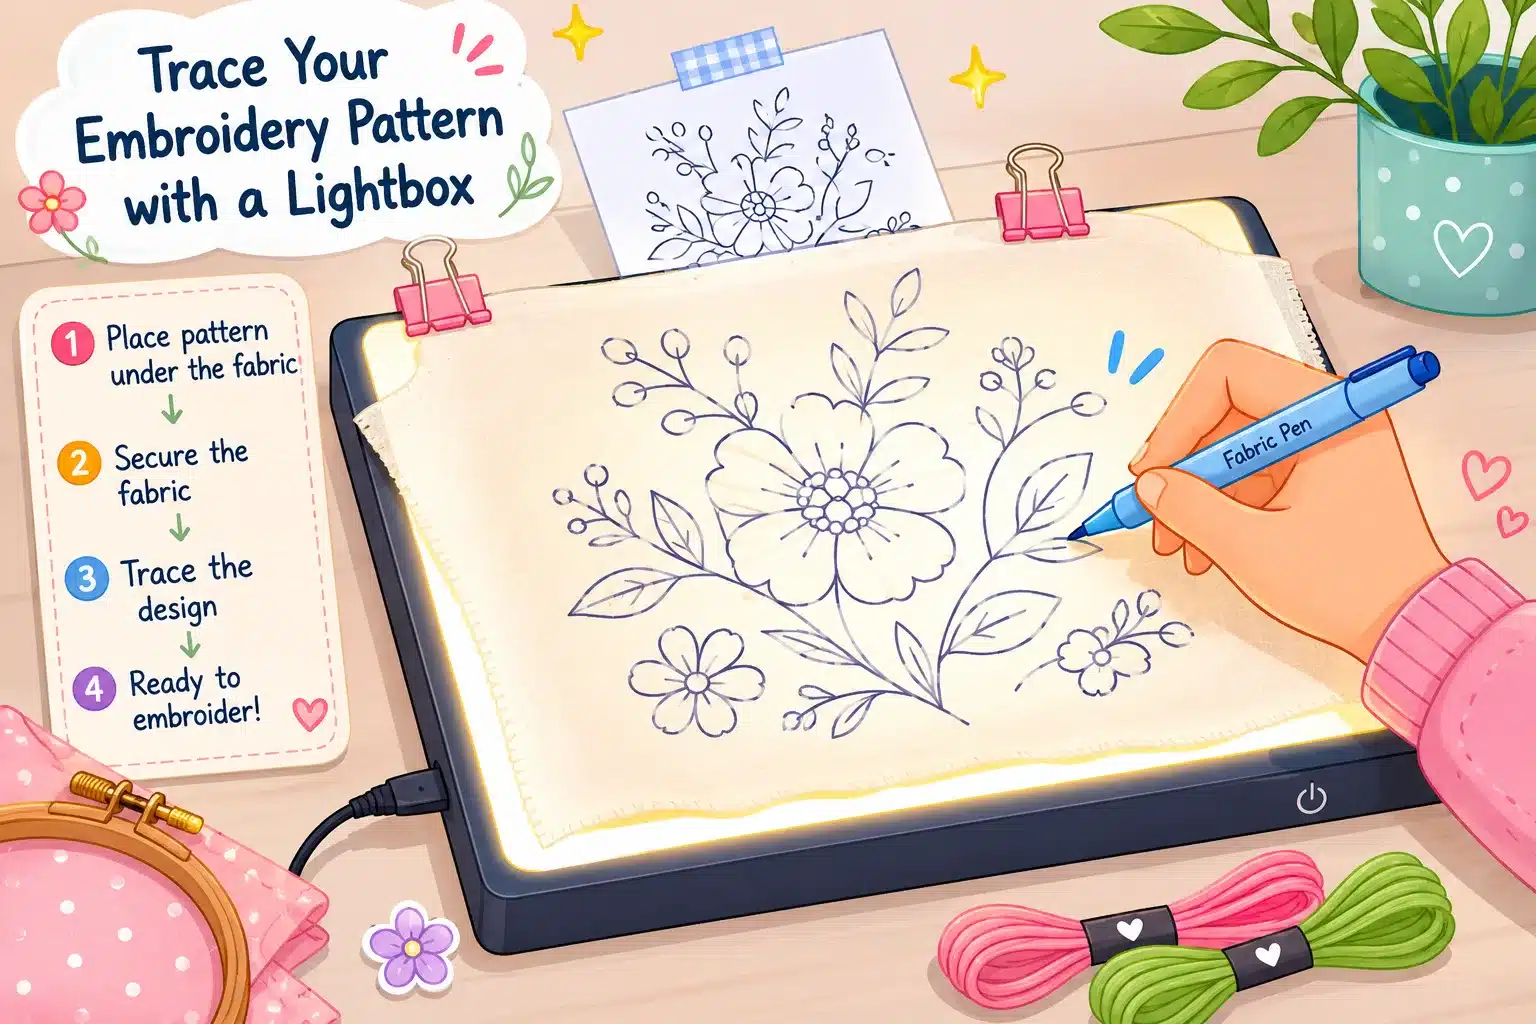
Tracing sounds simple until the lines suddenly shift, the fabric wrinkles, or the pattern becomes slightly stretched without you noticing. Accurate tracing is one of the hidden skills that separate crisp embroidery from uneven results. One of the easiest beginner-friendly methods is window tracing. A sunny window can function almost like a giant lightbox. By taping the design to the glass and layering fabric over it, the pattern becomes visible enough to trace directly. Recent embroidery tutorials still recommend this technique because it costs nothing while delivering surprisingly precise results on lightweight fabrics.
Dedicated lightboxes improve this process dramatically because they provide even illumination across the entire design. Unlike windows that depend on daylight, lightboxes maintain consistent brightness regardless of weather or time of day. This becomes especially useful for detailed floral patterns, lettering, or intricate line art where tiny inaccuracies become obvious after stitching. Many experienced embroiderers describe lightboxes as one of the most worthwhile upgrades for anyone planning to embroider regularly. The consistent visibility reduces eye strain while helping maintain cleaner curves and spacing.
Fabric tension is another detail beginners frequently underestimate. Loose fabric tends to shift while tracing, creating distorted shapes that only become noticeable once the embroidery hoop tightens the material later. Several embroidery guides specifically recommend hooping the fabric before tracing whenever possible because it keeps the surface taut and stable. Think of tracing on loose fabric like drawing on a balloon before inflating it. The proportions change unexpectedly once tension is applied. Using painter’s tape to secure both the pattern and fabric can also prevent slipping during tracing sessions.
The pressure used during tracing matters more than many people realize. Heavy-handed tracing can leave grooves in fabric fibers, especially on delicate cotton or linen. Light, smooth movements create cleaner guide lines without damaging the material underneath. Embroidery experts often recommend tracing slowly in sections instead of rushing through the entire pattern at once. Accuracy matters far more than speed during this stage. Once thread covers the lines, every tiny tracing decision becomes permanently woven into the finished artwork.
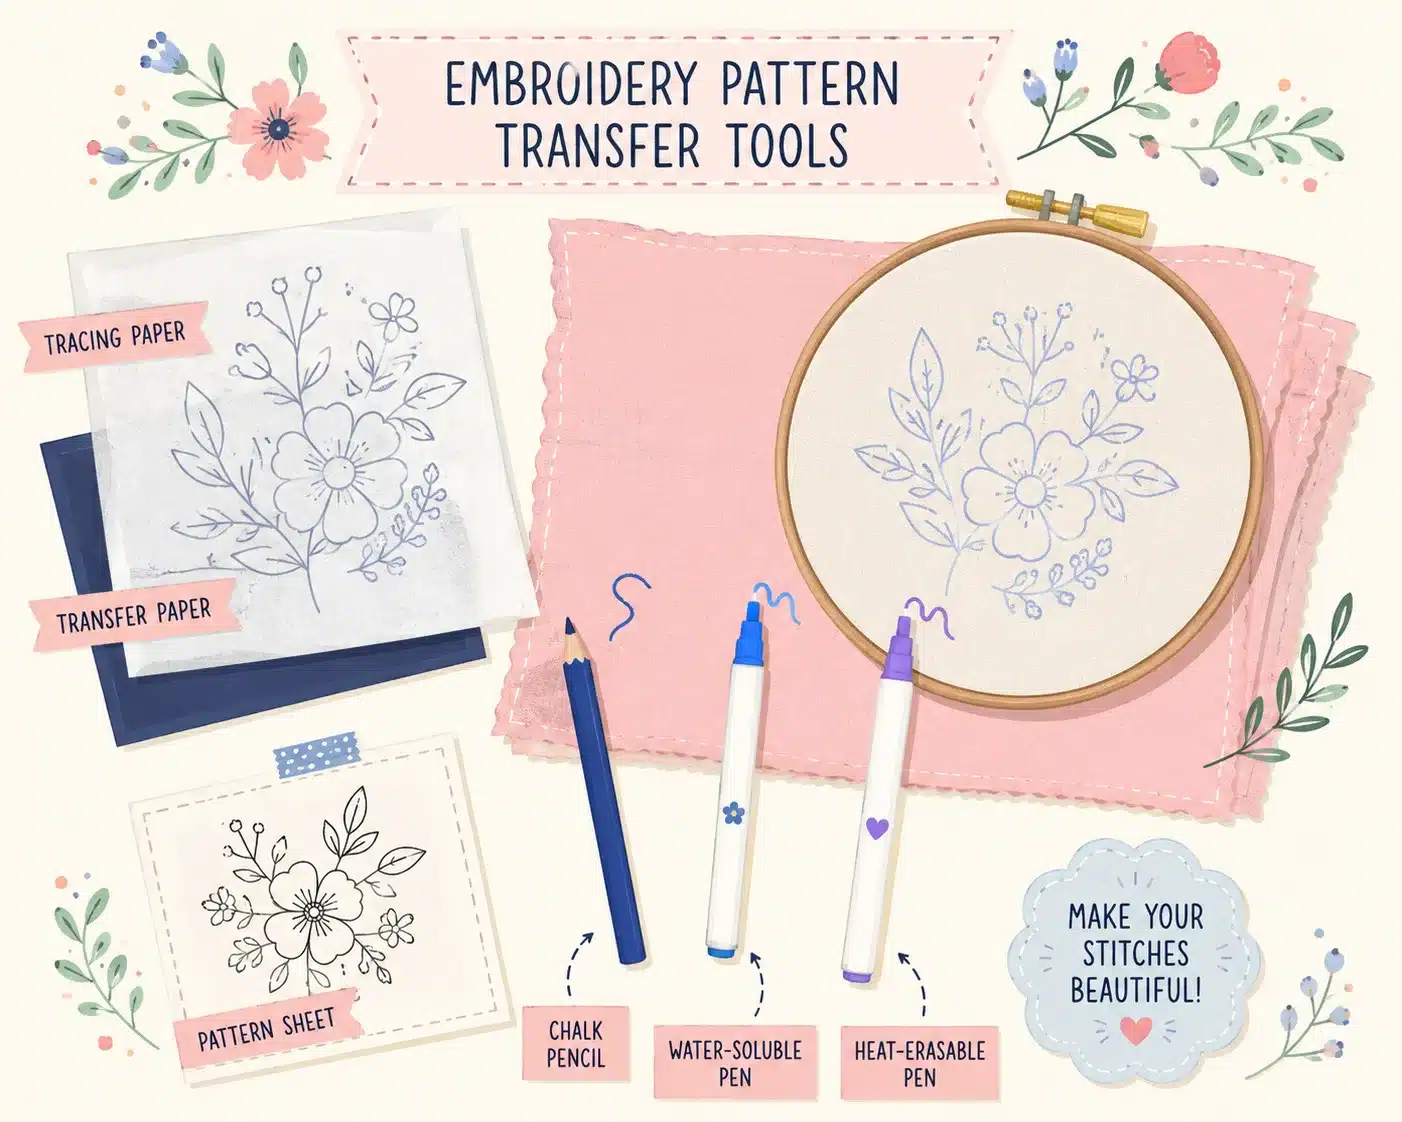
Water-Soluble and Heat-Erasable Marking Options Compared
Fabric marking tools have evolved significantly in recent years, giving embroiderers far more flexibility than the old chalk-and-carbon-paper days. Two of the most popular modern options are water-soluble pens and heat-erasable pens. Each has devoted fans, and each works best in different situations. Choosing between them depends on fabric type, project duration, and how visible the markings need to remain throughout stitching.
Water-soluble pens are favored because they create crisp, visible lines that disappear with water after the project is finished. They work especially well on light fabrics where accuracy matters. Recent embroidery resources recommend them for projects completed within a relatively short time because older marks may become harder to remove if left for weeks or months. The biggest advantage is reliability. Once rinsed properly, the marks are usually completely gone. The downside is that moisture from sweaty hands or accidental spills can smudge lines before stitching is complete.
Heat-erasable pens offer a different kind of convenience. Instead of washing the marks away, heat from an iron or hairdryer causes the ink to disappear. This feels almost magical the first time you try it. Many embroiderers love them because there is no need to soak finished embroidery afterward. Reddit discussions frequently mention Pilot Frixion pens as popular choices among hobbyists. However, there is an important catch: the ink does not technically vanish. It becomes transparent and may reappear in cold temperatures. Several experienced embroiderers warn beginners about this overlooked issue because projects stored in cold environments can unexpectedly reveal faint old markings later.
Testing remains absolutely essential regardless of which marking tool you choose. Different fabrics react differently to ink formulas. A pen that disappears perfectly on cotton may leave shadows on silk or synthetic blends. Experts consistently advise testing both removal and visibility on fabric scraps before transferring the final design. That small habit protects hours of embroidery work from preventable disasters.
Using Light Sources to Make Pattern Transfer Easier
Light is one of the simplest yet most powerful embroidery tools available. Good lighting transforms tracing from frustrating guesswork into a smooth and controlled process. Many beginners assume they need expensive equipment, but some of the most effective transfer setups are already sitting inside the average home. A bright window, tablet screen, or even a sunny glass door can become a surprisingly capable tracing station when used correctly.
Natural daylight remains one of the best free options. Window tracing continues to appear in modern embroidery tutorials because sunlight provides excellent contrast between paper patterns and light-colored fabrics. The trick is choosing the right time of day. Mid-morning or early afternoon light usually creates the strongest visibility without excessive glare. Taping the pattern securely to the window before attaching fabric helps maintain alignment while reducing hand strain during tracing.
Lightboxes provide more control and comfort for longer embroidery sessions. Unlike windows, they allow tracing at a table instead of standing upright. This ergonomic advantage becomes especially noticeable during large or highly detailed designs. Many embroiderers also use tablets with white screens turned to maximum brightness as DIY lightboxes. The smooth, adjustable illumination makes curves and lettering easier to trace accurately. It is a clever workaround that avoids purchasing specialized equipment immediately.
Proper lighting also reduces visual fatigue, which directly affects tracing precision. Eyestrain causes shaky lines, inconsistent pressure, and missed details. Embroidery communities frequently recommend combining strong lighting with fine-tip marking tools for maximum control. When the pattern becomes easy to see, tracing feels less like a chore and more like sketching. That relaxed confidence often leads to cleaner results overall.
Preventing Smudges and Distorted Design Lines
Nothing is more frustrating than finishing half an embroidery project only to notice smudged guide lines bleeding beyond the stitches. Smears, stretched outlines, and warped curves can turn careful preparation into unnecessary stress. Fortunately, most transfer problems are preventable with a few simple habits that many beginners overlook.
One major cause of smudging is using too much pressure while tracing. Heavy lines may seem safer because they are easier to see, but thick ink deposits are far more likely to spread into surrounding fibers. Water-soluble pens especially require a gentle touch because moisture can reactivate the ink unexpectedly. Several embroidery resources recommend using the lightest visible line possible. Fine-tip markers create cleaner edges and reduce the risk of staining finished fabric.
Fabric movement is another hidden culprit. Even slight shifting during tracing can distort proportions dramatically. Securing the material properly before transferring the design helps maintain accurate geometry. Painter’s tape, embroidery hoops, or clips can stabilize fabric while reducing wrinkles. Embroidery experts often compare unstable tracing to trying to write on a moving piece of paper inside a car. Tiny shifts quickly multiply into visible inaccuracies.
Hand oils and moisture also affect transferred patterns more than most beginners realize. Constant handling can blur markings or transfer dirt onto pale fabric. Washing hands before embroidery sessions and keeping drinks away from the workspace helps preserve clean transfer lines. Some embroiderers even place tissue paper beneath their drawing hand while tracing to reduce friction and smearing.
Environmental conditions matter too. Humidity, heat, and prolonged exposure to sunlight may fade or alter certain marking tools before stitching is complete. Water-soluble lines can disappear prematurely in humid climates, while heat-sensitive pens may react to ironing or warm rooms unexpectedly. Careful storage between stitching sessions keeps transferred designs crisp and easy to follow until the project is fully finished.
What Most Beginners Overlook About Fabric Stretch
Fabric stretch is one of embroidery’s sneakiest troublemakers because the distortion often appears gradually. Beginners usually focus on thread color, stitches, and transfer tools while ignoring the behavior of the fabric itself. Yet even perfectly traced patterns can become misshapen if the material stretches unevenly during hooping or stitching.
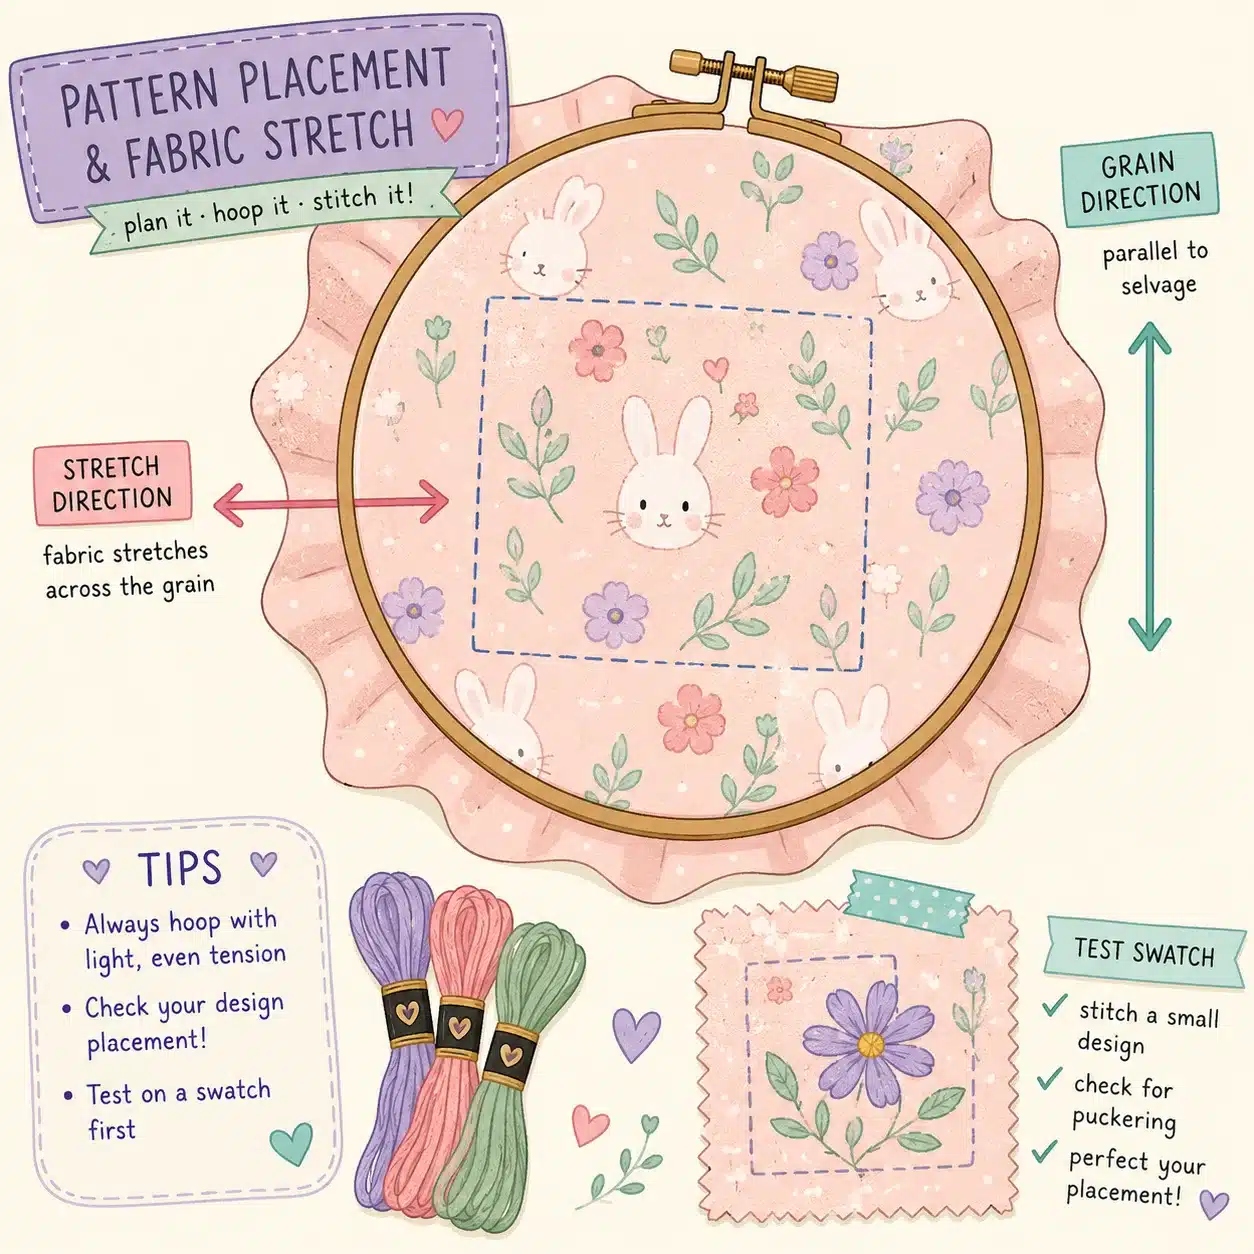
The grain direction of fabric plays a major role in stability. Woven fabrics have both warp and weft threads, and embroidery behaves differently depending on alignment. If the pattern sits crooked relative to the grain, circular designs may become oval, lettering may slant, and borders can ripple unexpectedly. Experienced embroiderers often recommend checking grain alignment before transferring any design because correcting distortion afterward is extremely difficult.
Stretchy fabrics such as jersey knits present even greater challenges. Pulling these materials too tightly in the hoop creates tension that snaps back later, causing puckering around stitches. Water-soluble stabilizers are frequently recommended for stretch fabrics because they temporarily reinforce the material while keeping the design stable. The stabilizer acts almost like scaffolding around a building under construction, holding everything in place until the stitching structure becomes secure.
Many beginners also overlook how hand tension affects distortion during embroidery. Pulling stitches too tightly gradually drags fabric inward, shrinking parts of the design unevenly. This is especially noticeable with satin stitch or dense fill areas. Proper hoop tension should feel firm like a drum but not overstretched. The goal is support, not strain.
Testing the fabric response before beginning a large project saves enormous frustration later. Small practice samples reveal whether the material stretches excessively, reacts poorly to certain pens, or puckers under dense stitching. Professional embroiderers rarely skip this stage because even expensive fabrics can behave unpredictably under needle tension. Embroidery is part art and part engineering, and understanding fabric movement is what keeps both working together smoothly.
Testing the Pattern Placement Before Stitching
Pattern placement can completely change the visual impact of embroidery. A beautifully stitched design may still look awkward if it sits too high, too low, or slightly crooked on the fabric. Testing placement before stitching allows embroiderers to catch alignment problems while adjustments remain easy. Once the needle starts moving, repositioning becomes far more difficult.
Symmetry matters especially in wearable embroidery such as shirts, jackets, or tote bags. Even a half-inch shift can become surprisingly noticeable. Many embroiderers recommend folding the fabric lightly to locate center lines before transferring the final design. Temporary tape placement or loose basting stitches also help preview positioning without committing permanently. This simple step often prevents the dreaded realization that the design sits off-center after hours of stitching.
Viewing the project from different angles helps identify spacing issues. What looks centered up close may appear tilted from farther away. Some embroiderers even photograph the placement with their phone because cameras reveal alignment flaws the eye sometimes misses. It is a surprisingly effective trick borrowed from artists and graphic designers.
Testing also helps confirm that the embroidery hoop will not interfere with surrounding seams, pockets, or garment edges. Beginners frequently overlook this practical issue until the hoop physically cannot fit around the intended area. Recent embroidery discussions emphasize checking hoop clearance before tracing intricate designs onto clothing.
The final transfer stage should feel calm rather than rushed. Embroidery rewards preparation more than speed. By double-checking placement, visibility, and fabric stability before stitching begins, embroiderers create a smoother and far more enjoyable creative process from start to finish.
Conclusion
Learning how to transfer embroidery patterns to fabric is one of the most valuable skills an embroiderer can develop. The transfer stage quietly determines the accuracy, balance, and professionalism of the finished piece long before the needle enters the fabric. Choosing the right method for the material, stabilizing the fabric correctly, and selecting reliable marking tools all contribute to cleaner stitching and fewer frustrations later.
Modern embroidery offers more transfer options than ever before. From lightbox tracing and water-soluble stabilizers to heat-erasable pens and printable transfer sheets, every method has strengths that fit specific fabric types and project goals. The best embroiderers are not necessarily the fastest stitchers. They are usually the people who prepare carefully, test their materials, and understand how fabric behaves under tension.
Embroidery is a craft where tiny details create dramatic differences. A straight line, a stable hoop, or a properly tested pen may seem insignificant in isolation, but together they shape the entire quality of the work. Once pattern transfer becomes second nature, stitching itself becomes more relaxing, more accurate, and far more enjoyable.
Read More: How to Make Fishing Lures With Household Items
FAQs
1. What is the easiest embroidery transfer method for beginners?
Window tracing is often the easiest method for beginners because it requires minimal equipment and works well on light fabrics like cotton or linen. A bright window and a washable fabric pen are usually enough to get started.
2. Are heat-erasable pens safe for embroidery?
Heat-erasable pens are convenient, but some inks may reappear in cold temperatures. Many embroiderers use them successfully, but testing on scrap fabric first is strongly recommended.
3. Which transfer method works best on dark fabric?
Water-soluble stabilizers, white transfer paper, or chalk-based marking tools usually work best on dark fabrics because standard tracing methods become difficult to see.
4. Why does my embroidery pattern become distorted after hooping?
Distortion often happens because the fabric stretched unevenly during tracing or hooping. Keeping the fabric taut but not overstretched helps maintain the correct shape.
5. Should I wash embroidery after removing water-soluble marks?
Yes, rinsing the fabric gently helps remove leftover residue from water-soluble pens or stabilizers and leaves the finished embroidery looking cleaner.

Kareem Sallam is an Egyptian special writer based in Australia, with a strong interest in practical ideas and creative content that focuses on everyday solutions. He writes clear, engaging articles designed to be easy to follow and useful for a wide range of readers.
His work centers on DIY projects, handmade ideas, simple crafts, and home based creativity. Kareem aims to deliver content that is practical, inspiring, and accessible, helping readers turn simple materials into smart and enjoyable projects.